Yes, you can make cinnamon rolls the night before. Shape the filled rolls in the evening, cover the pan tightly, and refrigerate it for 8 to 12 hours, then let the dough finish its second rise at room temperature for 90 minutes to 2 hours before baking. Night-before work runs about two hours; the morning needs roughly two and a half.
That schedule works because a refrigerator at or below 40°F slows yeast into a pause rather than killing it. You do the messy work — kneading, filling, rolling, cutting — while you are still awake and not rushing. In the morning the dough warms up, finishes rising, and bakes.
Most home bakers get better results refrigerating the shaped rolls rather than the raw bulk dough, and most of the trouble comes from wrapping too loosely or waiting past the 12-hour mark. Both are easy to fix once you know what to look for.
Table of Contents
- What You Need
- Dough for a standard 8-inch square pan
- Filling
- Cream cheese frosting
- Tools that matter
- Can You Make Cinnamon Rolls the Night Before?
- Choose Your Overnight Method
- Step-by-Step: Make the Dough and Filling
- Knead, Roll, and Shape the Rolls
- Let the Rolls Rise Overnight
- Chill or Refrigerate the Shaped Rolls
- Bake the Rolls in the Morning
- Common Mistakes
- The rolls deflate and go flat overnight
- The rolls barely rose at all in the morning
- Cinnamon-sugar filling leaks into the pan
- The cuts come out uneven
- The bottoms are soggy
- The tops brown before the middles are done
- Adjusting for your kitchen
- Longer make-ahead variations
- Frequently Asked Questions
- Should cinnamon rolls rise in the refrigerator overnight?
- How do you know cinnamon-roll dough has risen enough?
- Can you make cinnamon rolls ahead and freeze them unbaked?
- How long can assembled cinnamon rolls stay in the refrigerator?
- Why don’t overnight cinnamon rolls smell as yeasty as same-day rolls?
- Conclusion
What You Need
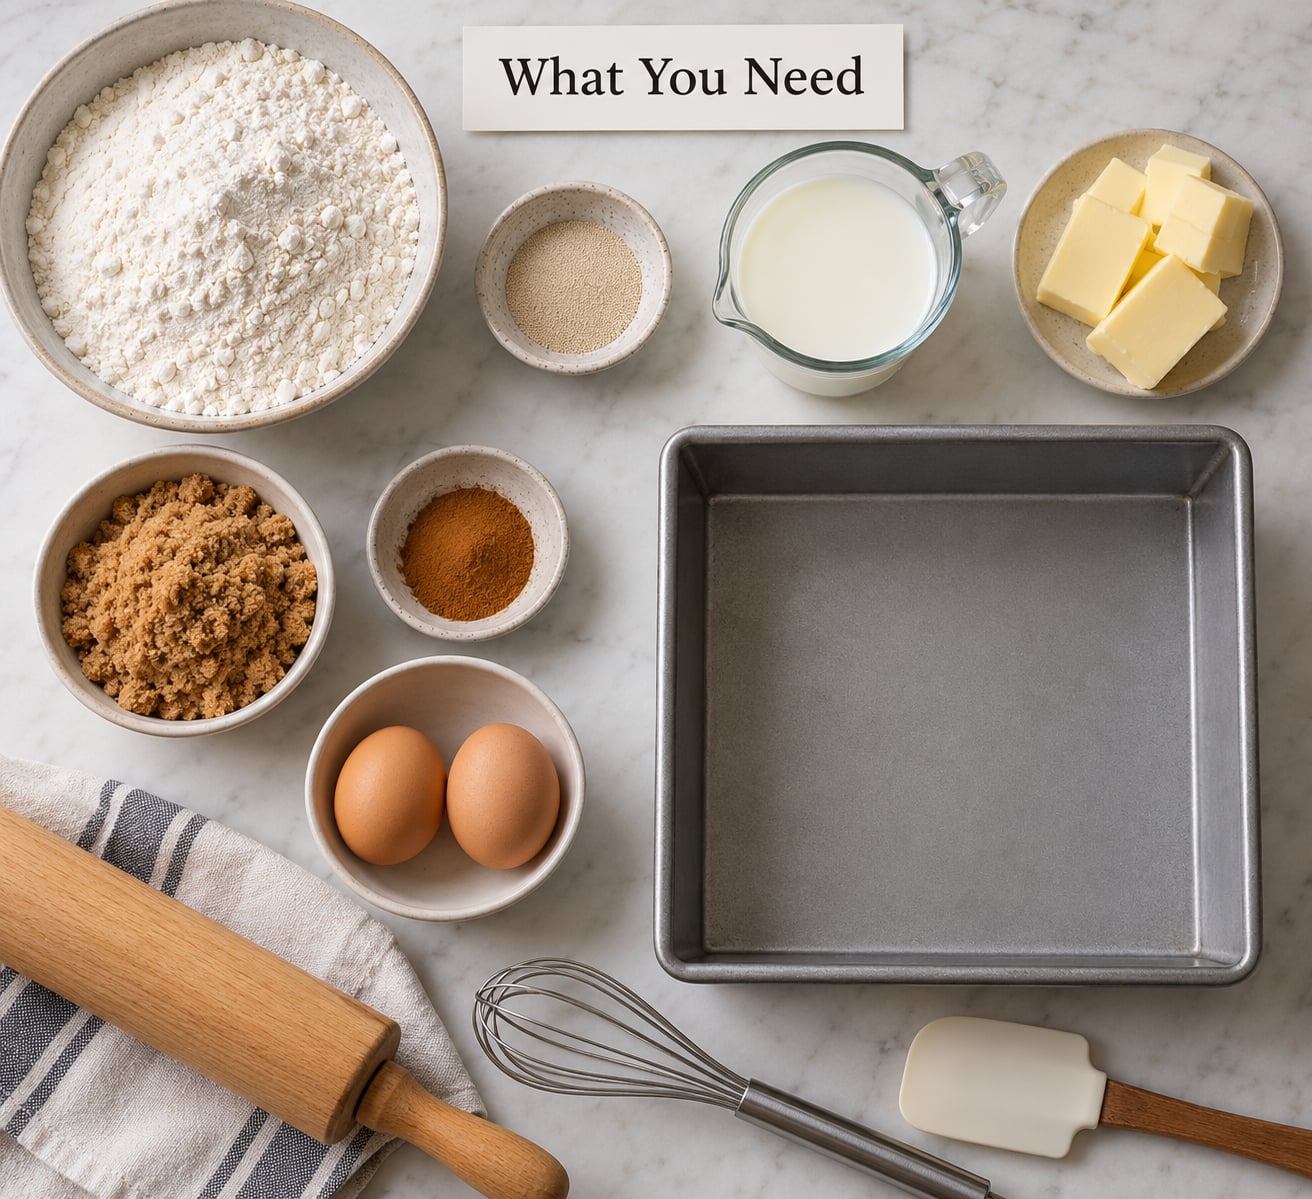
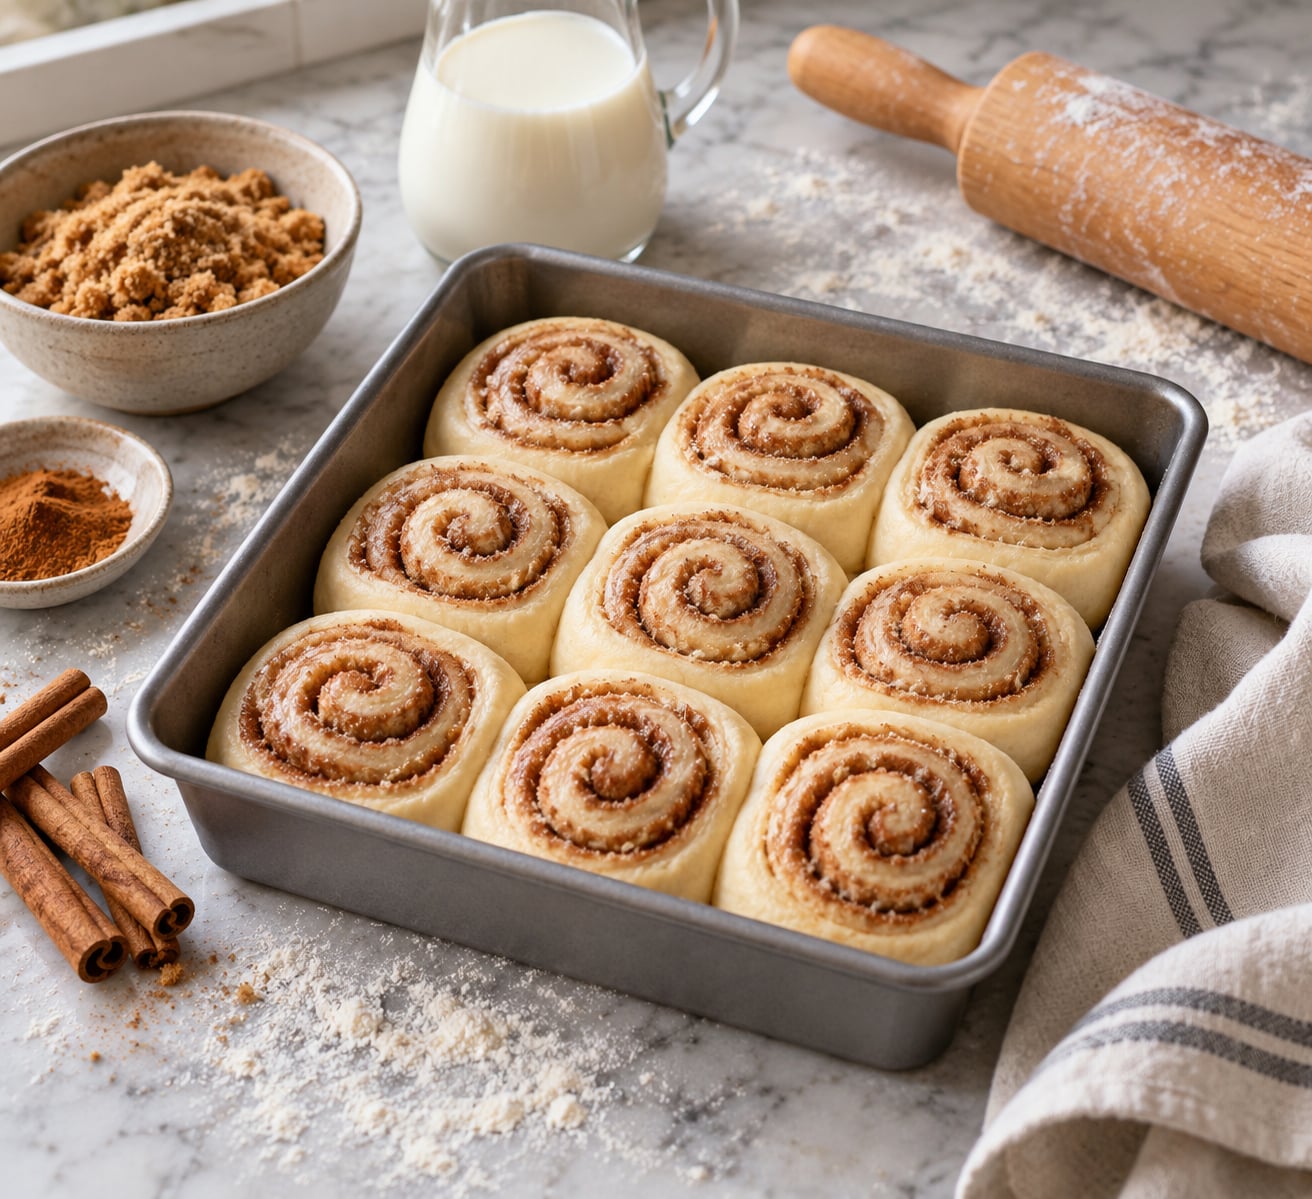
An 8-inch square metal pan holds nine rolls with a little space between them, which is what you want. The dough should look underproofed coming out of that pan, not crowded.
Dough for a standard 8-inch square pan
- 3 cups bread flour (about 360 g)
- 1/4 cup (60 ml) whole milk, warmed to about 100°F
- 2 tablespoons granulated sugar
- 1 packet instant yeast (2¼ teaspoons)
- 1 teaspoon salt
- 1 large egg, room temperature
- 3 tablespoons unsalted butter, softened, plus more for the pan
- 1 teaspoon vanilla extract
Filling
- 3/4 cup packed light brown sugar
- 2 tablespoons ground cinnamon
- 4 tablespoons unsalted butter, very soft
- Pinch of salt
Cream cheese frosting
- 4 ounces cream cheese, softened
- 2 tablespoons unsalted butter, softened
- 1 cup powdered sugar
- 1 teaspoon vanilla and a splash of milk to loosen
Tools that matter
- A stand mixer with a dough hook, or a sturdy bowl and a wooden spoon
- Rolling pin and pastry brush
- Bench scraper or sharp knife for cutting
- Unflavored dental floss for clean cuts (slide the floss under the log, cross the ends over the log, then pull in opposite directions)
- Instant-read thermometer for dough and bake checks
- Plastic wrap plus a lid, a rubber band, or foil for a tight seal
Two things on that list can be done ahead: soften the butter and mix the frosting. Make the frosting before bed, cover it, and refrigerate it beside the rolls. Take it out about 30 minutes before you glaze so it spreads instead of tearing the tops off the rolls. Parchment or a silicone mat cut to fit the pan also helps you lift finished rolls without scraping the pan.
Can You Make Cinnamon Rolls the Night Before?
Yes. Yeasted cinnamon-roll dough can be mixed, kneaded, filled, shaped, and chilled overnight. Every recipe that says refrigerate 8 to 12 hours is describing the same thing, and the reason the morning rise still works is that cold slows fermentation without stopping it for good.
There are two reliable ways to do it, and confusing the two is the most common mistake.
The first is a full cold rise after shaping. You finish the rolls, cover the pan, and put it straight in the refrigerator for 10 to 12 hours. Almost all of the rising happens cold and slowly, so the morning rise takes the full 90 minutes to 2 hours. This is the more forgiving option because the dough cannot overproof while it is cold.
The second is a shorter room-temperature rise followed by chilling. You let the shaped rolls sit at room temperature for 45 to 60 minutes, then refrigerate them. This gives you a shorter morning, but it puts the dough closer to overproofed before it even gets cold, and it leaves more of the yeasty flavor in the dough instead of in the finished roll.
What you should not do is leave active yeast dough at room temperature all night. A warm kitchen turns 8 hours into a full fermentation and then some, and you will bake deflated, flat, collapsed rolls with a yeasty raw taste. Keep the pan at or below 40°F from the moment it goes in until it comes out.
Choose Your Overnight Method
| Method | Evening timeline | Morning timeline | Texture you get | Best for |
|---|---|---|---|---|
| Full cold rise after shaping | Shape, cover, refrigerate 10 to 12 hours | 90 min to 2 hours at room temperature, then bake | Open crumb, deeper caramelized edges, less yeasty bite | Beginners and holiday mornings, because the schedule is nearly impossible to ruin |
| Partial rise then chill | Rise 45 to 60 minutes on the counter, then refrigerate 8 to 10 hours | 60 to 90 minutes at room temperature, then bake | Softer, tighter crumb, slightly more yeasty flavor | Bakers with a hot kitchen, or anyone who wants out of the kitchen faster in the morning |
If you are making these for the first time, use the full cold rise. The two extra morning minutes are cheap insurance, and the flavor difference is real because cold fermentation builds more acid and more complex yeast byproducts than a warm counter ever will.
Step-by-Step: Make the Dough and Filling
Warm the milk to about 100°F — warm like a bath, not hot enough to feel like a shower. Sprinkling instant yeast into the flour and adding the warm liquid gives you an even hydration without a separate blooming step. If you use active dry yeast instead, wake it up in the warm liquid with the sugar for 10 minutes until foamy, then add it to the flour. If nothing foams, the yeast is dead and the rolls will not rise no matter how long they sit.
Mix the flour, yeast, sugar, and salt first. Add the milk, egg, vanilla, and most of the butter, then knead for 8 to 10 minutes by hand or 5 to 6 minutes on low in a stand mixer. The dough is ready when it feels smooth and slightly tacky and pulls cleanly off the side of the bowl — not when it is sticky, which just means you need thirty more seconds of kneading rather than extra flour.
For the filling, soften 4 tablespoons of butter until it dents under a fingertip but does not smear. Mix it with the brown sugar, cinnamon, and salt into a paste that holds its shape. If you dump dry cinnamon and sugar onto cold butter dough, the sugar crystals stay loose and the rolls leak filling into the pan. Creaming them into the butter first is what keeps the layer even and the bottom of the pan clean.
Knead, Roll, and Shape the Rolls
Let the dough rise until puffy and about doubled — 60 to 90 minutes at room temperature for most kitchens. Then punch it down and roll it into a 12 by 18-inch rectangle, roughly a quarter inch thick. Check thickness at the corners; a thin corner spreads the filling unevenly and produces a tight, dense outer roll.
Spread the filling to the very edges, leaving a half-inch border on the long sides so the dough does not leak while rolling. Roll the long edge away from you, pressing gently as you go to push air out. Tuck the seam underneath and pinch the end closed.
For even slices, mark nine positions along the log with a bench scraper, then cut with unflavored dental floss. The floss compresses instead of pushing, so the layers stay put and you do not end up smearing the cinnamon into the cut face. Place each roll seam-side down in the buttered pan.
Let the Rolls Rise Overnight
Cover the pan and decide which schedule you are running before you start the clock at night. A full cold rise means the shaped rolls go in the refrigerator immediately after a 60 to 90 minute counter rise. A partial rise means 45 to 60 minutes on the counter, then straight to the refrigerator. Both work. Neither needs more time than that on the counter, because the counter is where overproofing starts.
The dough should look slightly puffy and relaxed when it goes in, not doubled. If you push a fingertip into a roll and the dent springs back slowly, that is the right stage. If the dough is bouncy and stretched tight, let it sit a few more minutes before you cover it.
Chill or Refrigerate the Shaped Rolls
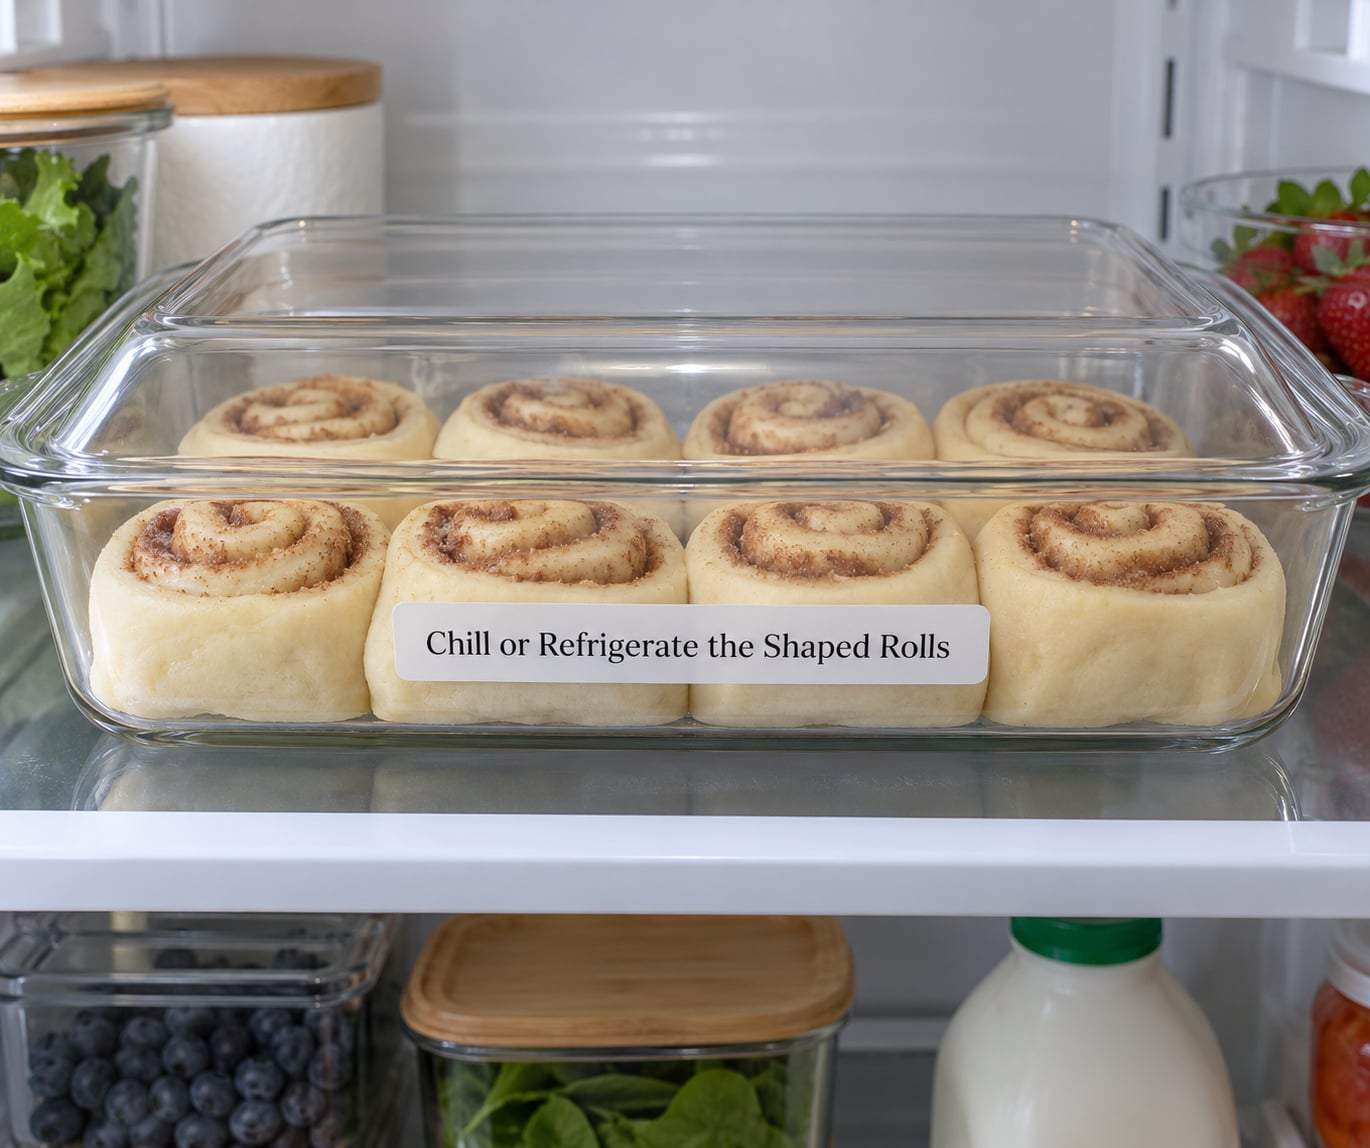
Seal the pan properly. Press plastic wrap directly onto the surface of the rolls so it clings, then put the lid on, the foil over the top, or a rubber band around both. The wrap needs to touch the dough — a loose tent traps less moisture and lets the surface dry into a skin, which reads as a hard shell once the rolls bake.
Keep the pan at or below 40°F. A typical refrigerator runs 34 to 38°F, which is exactly the range you want; a garage fridge or an outdoor cooler in summer is often too warm to slow the dough properly, and in winter it can freeze it.
Plan on 8 to 12 hours, and treat 12 as a ceiling rather than a target. Ten to 12 hours with a 90-minute morning rise is the sweet spot most bakers land on. Past 12 hours the yeast keeps slowly fermenting in the cold, the dough loses its structure, and the rolls come out of the pan looking deflated before you even turn the oven on. If you need a longer gap, freeze instead of refrigerating.
In the morning, take the pan out and look before you touch anything. The rolls should look fuller than they went in, with visible bubbles around the edges. Scrape off any condensation on the underside of the lid so it does not drip onto the rolls.
Bake the Rolls in the Morning
Give the pan time to lose its severe chill. Straight from a 36°F refrigerator into a 350°F oven shocks the dough, and you get a dense outer ring with a pale center. Leave the covered pan on the counter for 20 to 30 minutes, then take the poke test: press a finger gently into the side of one roll. A slow spring-back that leaves a slight dent means the final proof is close. A fast snap-back means it needs more time. A dent that stays means it is ready to bake.
While the dough finishes, heat the oven to 350°F for a light bake, or 375°F for a darker, crisper top. Nine rolls in an 8-inch square pan need 20 to 25 minutes. Uncover the pan, brush the tops with a beaten egg or a little melted butter if you want shine, and bake until the edges are golden.
The signal is temperature, not color. The center of a fully baked roll reads about 190°F on an instant-read thermometer. That is hotter than you might expect, and it is the number to trust when the tops are bronzed but the middles still feel heavy and wet.
Frost while the rolls are warm, not hot. Ten minutes out of the oven is right. If you made the frosting last night, take it out of the refrigerator at the same time you take the rolls out, and stir it again just before spreading. Warm frosting melts into the layers; cold frosting sits on top in thick ridges.
Common Mistakes
The rolls deflate and go flat overnight
This is the single most reported overnight-roll problem. The dough was usually overproofed before the refrigerator, or it sat there too long. Look at the pan before baking: if the rolls have slumped sideways and lost their round shoulders, they went too far. There is no way to bring structure back at that point. Next time, cut the counter rise short and refrigerate at 10 hours rather than 14.
One thing you can do is bake them anyway. Flat rolls will spread in the oven and lose height, but the flavor and the caramelized edges are still good, and a thinner roll means a shorter bake — check for doneness around the 18-minute mark.
The rolls barely rose at all in the morning
That one is a yeast or temperature problem, not a timing problem. A pan straight from the refrigerator into the oven does not warm quickly enough for a visible final rise, and cold dough bakes before it can expand. Also check your oven temperature with a separate thermometer; a dial set to 350 that is actually running 325 will bake pale, dense rolls.
Give the rolls 20 to 30 minutes uncovered on the counter after they leave the refrigerator, and press again. If they are still tight, give them another 30 minutes before baking rather than baking on schedule.
Cinnamon-sugar filling leaks into the pan
Three causes, all fixable. You rolled the filling too thick or too wet, you left filling on the border so it squeezed out the sides, or the seam came unglued as the log cooled. Spread a thinner even layer, keep a clean half-inch border, and pinch the seam firmly before you cut. A very light egg-wash brushed onto the exposed top of the log also helps the seam stick.
The cuts come out uneven
Measure before you cut. Mark nine positions along the log with a sharp knife and cut at the marks, using the dental floss method if you want the layers to stay put. Uneven slices bake unevenly, and the small ones dry out while the big ones are still raw in the middle.
The bottoms are soggy
Two likely causes. You greased the pan with loose butter and the filling pooled underneath, or you baked on the lowest rack. Use just enough butter to slick the pan and wipe off the excess. Bake on the center rack so hot air circulates, and if you are using a glass pan, set it on a metal baking sheet so the bottom gets heat from below.
The tops brown before the middles are done
Your oven runs hot, or the pan is crowded. Cover loosely with foil for the last 5 to 7 minutes if the top is darkening early. Nine rolls in an 8-inch pan should have a little air between them; if they are touching, use a 9×13 and bake only eight rolls.
Adjusting for your kitchen
In a cold house, the counter rise will crawl. Give it a nudge: turn the oven on low for five minutes to warm the room, or set the pan over a barely warm burner with a towel underneath for ten minutes. In a hot kitchen, skip the partial-rise method entirely and refrigerate the shaped rolls immediately after a short 45-minute rest.
Longer make-ahead variations
To freeze unbaked rolls, assemble them, bake for 10 to 12 minutes, then cool in the pan, cover, and freeze. Thaw in the refrigerator overnight, let them finish rising at room temperature in the morning, and add 5 minutes to the bake. Frozen dough does not rise properly the first time, so freeze after that short partial bake rather than raw.
Cream cheese frosting keeps about 4 days covered in the refrigerator. Stir it hard before use; it will have separated. For a quicker version of the whole thing, refrigerated grocery dough tubes work the same way — let the tubes sit on the counter for 45 minutes before assembling so the dough is pliable, then treat them exactly like the shaped rolls above.
Frequently Asked Questions
Should cinnamon rolls rise in the refrigerator overnight?
Yes, and that is the standard overnight method. Shape the filled rolls, cover the pan tightly so the wrap touches the dough, and refrigerate at or below 40 degrees F for 8 to 12 hours. The cold slows the yeast instead of stopping it, so the rolls still finish rising the next morning at room temperature in 90 minutes to 2 hours. Put them in the pan before the fridge, not after the final proof.
How do you know cinnamon-roll dough has risen enough?
Use the poke test. Press a finger gently into the side of a roll, about half an inch in. If the dent springs back quickly and leaves no mark, the dough needs more time. If it springs back slowly and leaves a slight dent, it is close to ready. If the dent stays, it is ready to bake. Volume is the secondary check: the rolls should look noticeably fuller than they did when they went into the refrigerator.
Can you make cinnamon rolls ahead and freeze them unbaked?
You can, with one important step. Assemble the rolls, then bake them for 10 to 12 minutes so the dough is set, let them cool in the pan, and cover before freezing. Freeze the whole pan or lift the rolls out and wrap them. Thaw overnight in the refrigerator, let them finish rising at room temperature in the morning, and add about 5 minutes to the bake time. Raw frozen dough tends to rise unevenly and bake dense.
How long can assembled cinnamon rolls stay in the refrigerator?
Treat 12 hours as a hard ceiling and 8 to 12 hours as the working window. The yeast keeps fermenting slowly at refrigerator temperature, so past 12 hours the dough overproofs and the rolls come out deflated with collapsed sides. If you need more than a day of lead time, bake the rolls partway, freeze them, and thaw in the refrigerator instead of leaving them assembled in the fridge.
Why don’t overnight cinnamon rolls smell as yeasty as same-day rolls?
That is not a mistake — it is the fermentation working for you. Cold, slow rising over 8 to 12 hours gives yeast more time to produce the alcohols and acids that turn into caramel, spice, and browned-sugar flavors during the bake. Same-day rolls get a short warm rise, so more of the raw yeast character survives into the finished crumb. If you prefer the sharper scent, let the rolls warm up at room temperature before baking.
Conclusion
Start with a straight refrigerated overnight rise: mix, fill, shape, and pan the rolls in the evening, press the wrap directly onto the dough, cover the pan, and refrigerate for 10 to 12 hours. In the morning, take the pan out, let it lose its chill for 20 to 30 minutes, confirm the rise with the poke test, and bake at 350 to 375°F until the centers read about 190°F. Frost while warm.
Your first action tonight is simple: make the dough. Everything after that is a matter of timing you already know.