To shape a loaf of sandwich bread, you press out the big gas pockets, flatten the dough into a rectangle, fold the sides to the centre and roll it into a log with a taut skin. The log goes into the pan seam-side down so it rises straight instead of curling. The whole thing takes about 10 minutes once the dough is ready.
That last part matters more than it sounds. Most lopsided sandwich loaves, most seams that rip open down one side and most dense, gummy slices trace back to shaping rather than to the recipe. If you learn to read the dough instead of the clock, this is one of the most forgiving things in bread baking.
I shaped a lot of bread badly before I understood where the tension comes from. The fix turned out to be less about hand strength and more about what you do to the dough in the first thirty seconds after it comes out of the bowl.
Table of Contents
- What You Need
- Step-by-Step: How to Shape a Loaf of Sandwich Bread
- Check That the Dough Is Ready to Shape
- Prepare the Pan and Work Surface
- How to Shape a Loaf of Sandwich Bread Into a Log
- Check the Loaf’s Tension and Diameter
- Place the Shaped Loaf Seam-Side Down
- Proof and Bake With the Right Orientation
- Common Mistakes and How to Fix Them
- Common Mistakes
- Frequently Asked Questions
- Should I remove the large bubbles before shaping sandwich bread?
- How do I stop a shaped loaf from spreading in the pan?
- Where should the seam of a sandwich loaf be placed?
- Can I reshape bread dough after it feels sticky?
- How do I know the shaped loaf is ready for the oven?
- How long should homemade sandwich bread cool before slicing?
- Conclusion
What You Need
The dough itself does most of the work. Sandwich bread dough should be developed enough to hold a shape without tearing, which is why a stretch-and-fold or two during bulk fermentation pays you back at the bench.
A standard sandwich loaf pan measures 9 by 5 inches inside, about 2.75 inches deep, and holds roughly 700 to 800 grams of dough. A Pullman pan is longer and deeper and gives you a square loaf with a flat top when you bake it with the lid on.
| Pan | Inside size | Dough weight | Proof until it sits |
|---|---|---|---|
| Standard loaf pan | 9 x 5 x 2.75 inch | 700-800 g | 1 inch above the rim |
| Pullman pan with lid | 9 x 4 x 3 inch | 700-800 g | Level with the rim |
| Small loaf pan | 8 x 4 x 2.5 inch | 450-550 g | Just below the rim |
| Two small loaf pans | 8 x 4 x 2.5 inch each | 340-400 g each | Just below the rim |
On the bench you need very little: a floured surface or a couche, a bench scraper or bench knife, a plastic bowl or bag to cover the loaf, and optional semolina or rice flour if your dough runs sticky. A scale matters more than any of the tools on that list, because dough weight is the one number that keeps the loaf inside the pan.
Step-by-Step: How to Shape a Loaf of Sandwich Bread
Check That the Dough Is Ready to Shape
Judge the dough, not the clock. A dough at shaping temperature should look domed and puffy, roughly 1.5 to 2 times its original volume, with bubbles visible along the sides and a slightly domed top that holds its shape when you tip the bowl.
Flick the side of the bowl with your fingers. If the dough slumps slowly and leaves a soft dent that fills back in only partway, it is ready. A dent that springs back instantly means it needs more time, and a dent that stays and tears means the gluten is slack and overproofed.
Underproofed dough tears when you try to stretch it because the gluten has not relaxed yet, and it bakes dense no matter how well you shape it. Overproofed dough spreads in the pan, and no amount of tension will fix it because there is no structure left to hold on to.
If the dough is cold from the fridge, let it sit until it is cool to the touch rather than straight from cold. Cold dough is stiff and fights you, and a cold pan does the same thing to the loaf during oven spring.
Prepare the Pan and Work Surface
Grease the pan with butter or oil, or line it with parchment if you want a clean release. A Pullman pan gets the same treatment plus a lid within reach.
Dust the bench with flour, or with a 50-50 mix of all-purpose and rice flour if the dough is wet. Cornmeal works too and adds a little crunch to the bottom, though it does not stop a sticky dough from bonding to the pan quite as well as rice flour.
Tip the dough out and leave it in a mound. Do not pull it away from the bowl edge yet, because a dough that has dried slightly on the bowl tears hardest right there.
How to Shape a Loaf of Sandwich Bread Into a Log
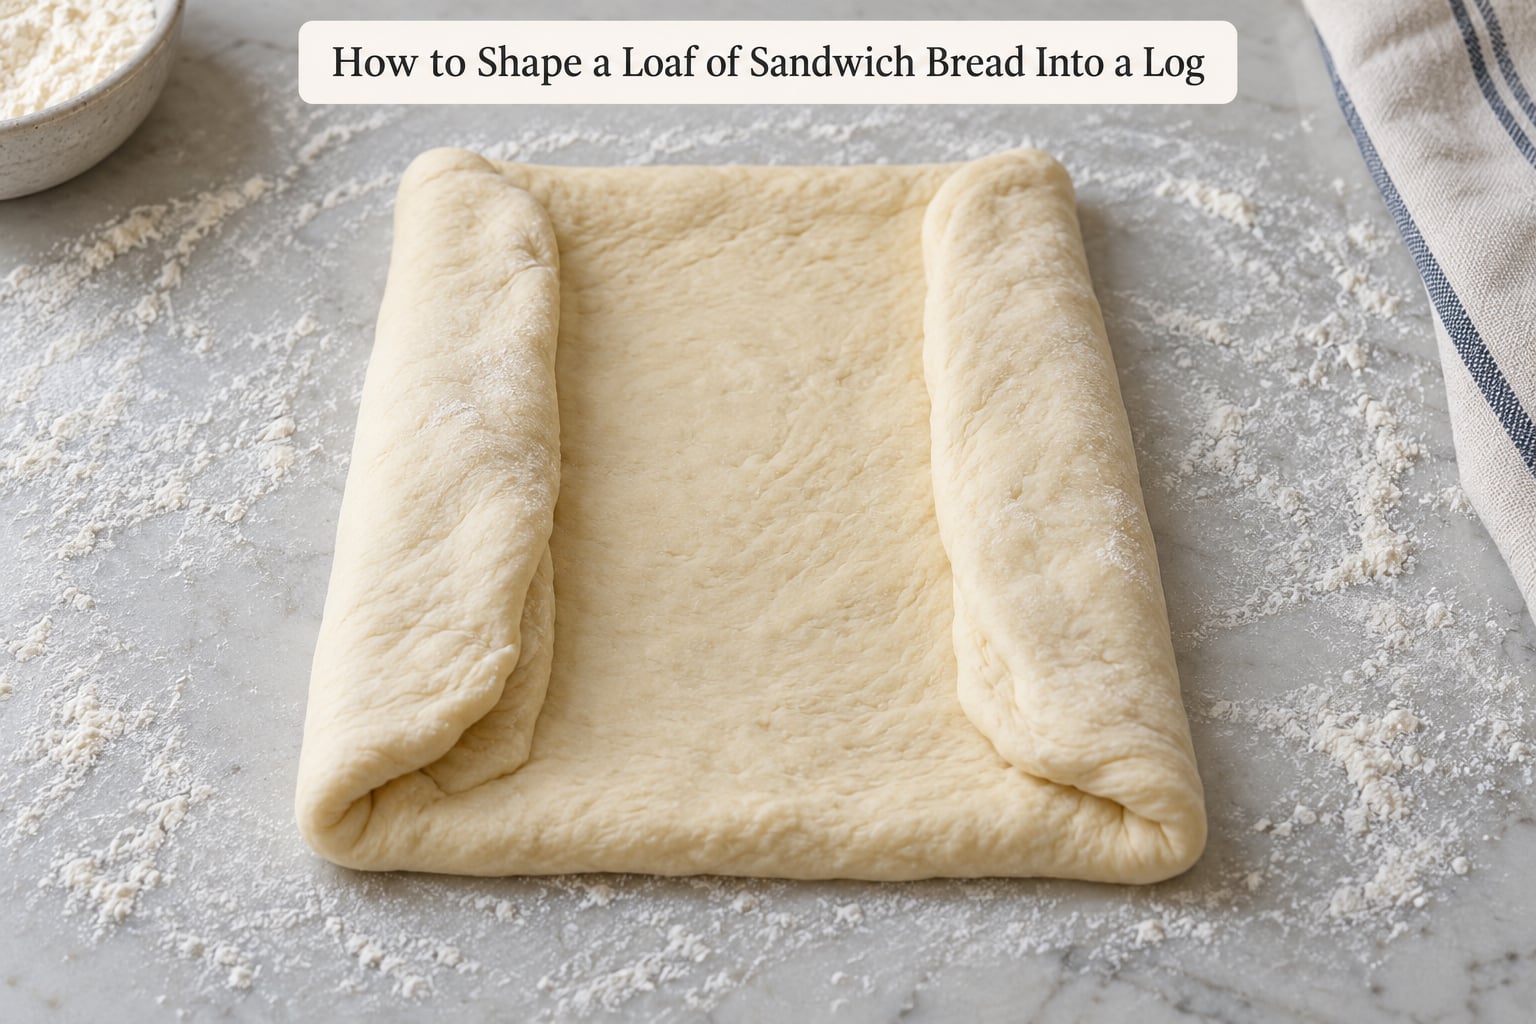
Here is the sequence that produces an even rise. Work through it in order, without rushing the first step.
1. Turn the dough out and let it relax. Turn it onto the floured surface seam-side down, with the smooth side of the dough facing up. Let it sit untouched for a minute or two if the gluten feels tight.
2. Press out the gas. Use the pads of your fingers to press down from the top edge toward you and then from the bottom edge toward you. You are pushing the big bubbles out to the edges without tearing the surface.
Every large bubble you leave in the middle of the dough becomes a hole in the finished crumb. Push them out, then fold the outer edges back over them.
3. Pat it into a rectangle. Flatten the dough with the heels of your hands into a rough rectangle, roughly 8 by 6 inches for a 9 by 5 pan. Edges do not need to be neat at this point.
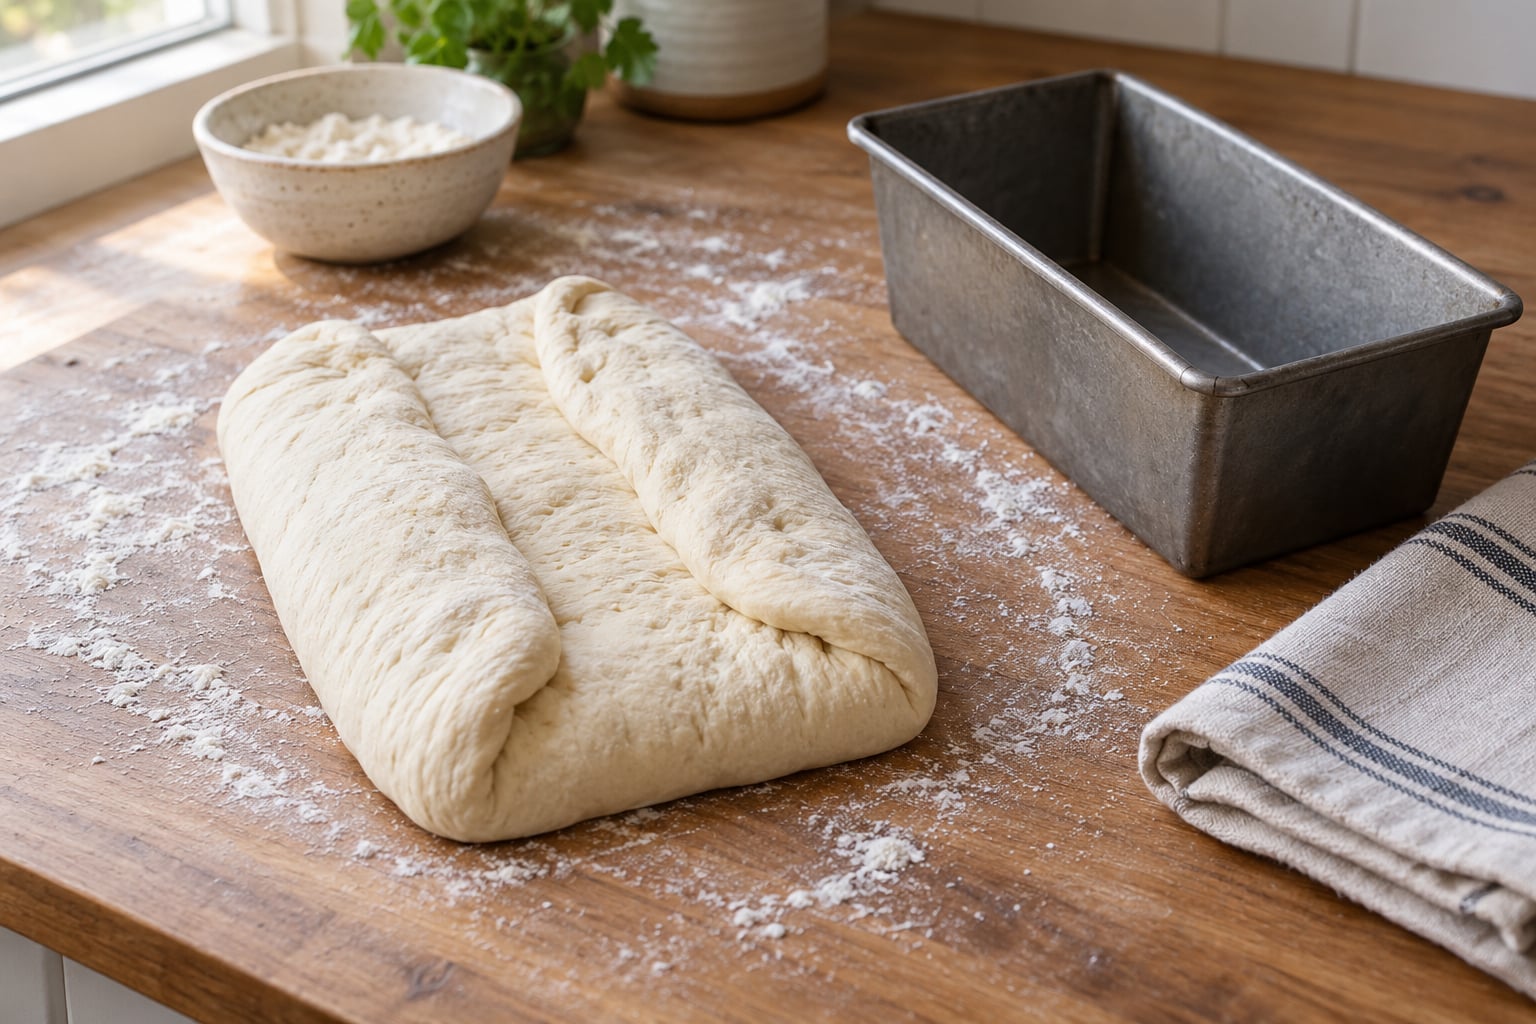
4. Fold the sides to the centre. Fold the left third over onto the middle, then the right third over that, so the long edges meet along the centre line and the seam runs down the length of the dough.
5. Roll it up. Starting from the front edge, roll the dough toward yourself, one full turn, pulling the surface taut as you go so no big bubbles ride along inside the log.
6. Pinch or seal the seam. Pinch the long seam closed along the bottom of the log, then run the seam back and forth between your thumb and forefinger a few times to flatten it.
7. Rest and repeat if needed. If the log is fatter in one spot than another, let it rest under a towel for five minutes. The gluten relaxes and the log reshapes itself closer to even on its own.
Another common method is the book fold: stretch the dough into a long strip, fold it into thirds like closing a book, then roll from the crosswise side. It builds excellent tension and is the one most bakers reach for when a dough is very slack.
A triangle fold is the fastest of the three. Pull the corners of a pre-shaped round together to make a triangle, roll it up, and the pointed ends tuck into the middle. King Arthur Baking promotes the triangle fold for a tight skin and even rise, and it works well when you are working quickly with a firm dough.
Check the Loaf’s Tension and Diameter
Tension means the surface is pulled tight enough to hold air, not so tight that you stretch the gluten thin. The dough should feel like a firm, filled pillow rather than a slack tube.
Test it by picking the log up with both hands. A well-tensioned loaf holds its cylinder shape and feels heavy for its size. A slack one flattens in your hands and sags at the ends, and that is your signal to redo the final shape.
Check the diameter against your pan before it goes in. A log for a 9 by 5 pan should be roughly 3.5 to 4 inches across. If it is much fatter, roll it longer and thinner; if it is narrower than the pan, the loaf will spread and bake with a domed, cracked top.
For the diameter to stay even, the log needs an even amount of dough along its whole length. Thick patches rise faster and brown before the thin sections, and that is what gives you a loaf with one good slice end and one dense one.
Place the Shaped Loaf Seam-Side Down
Lay the log in the pan seam-side down, so the pinch runs along the bottom. This is the single most agreed-upon step among home bakers, and the reason is mechanical: the seam is the weakest line in the loaf, and putting it against the pan lets the pan wall and the rising dough press it closed.
Centre the log across the width of the pan with equal space at both ends. An off-centre loaf leans as it rises and bakes with one side taller than the other.
Press the top of the loaf gently with a flat hand so it sits flat on the pan bottom. A log that rocks or sits on a curl of dough will rise crooked, so if you feel a gap, fill it with a pinch of dough from the ends rather than pressing harder.
Proof and Bake With the Right Orientation
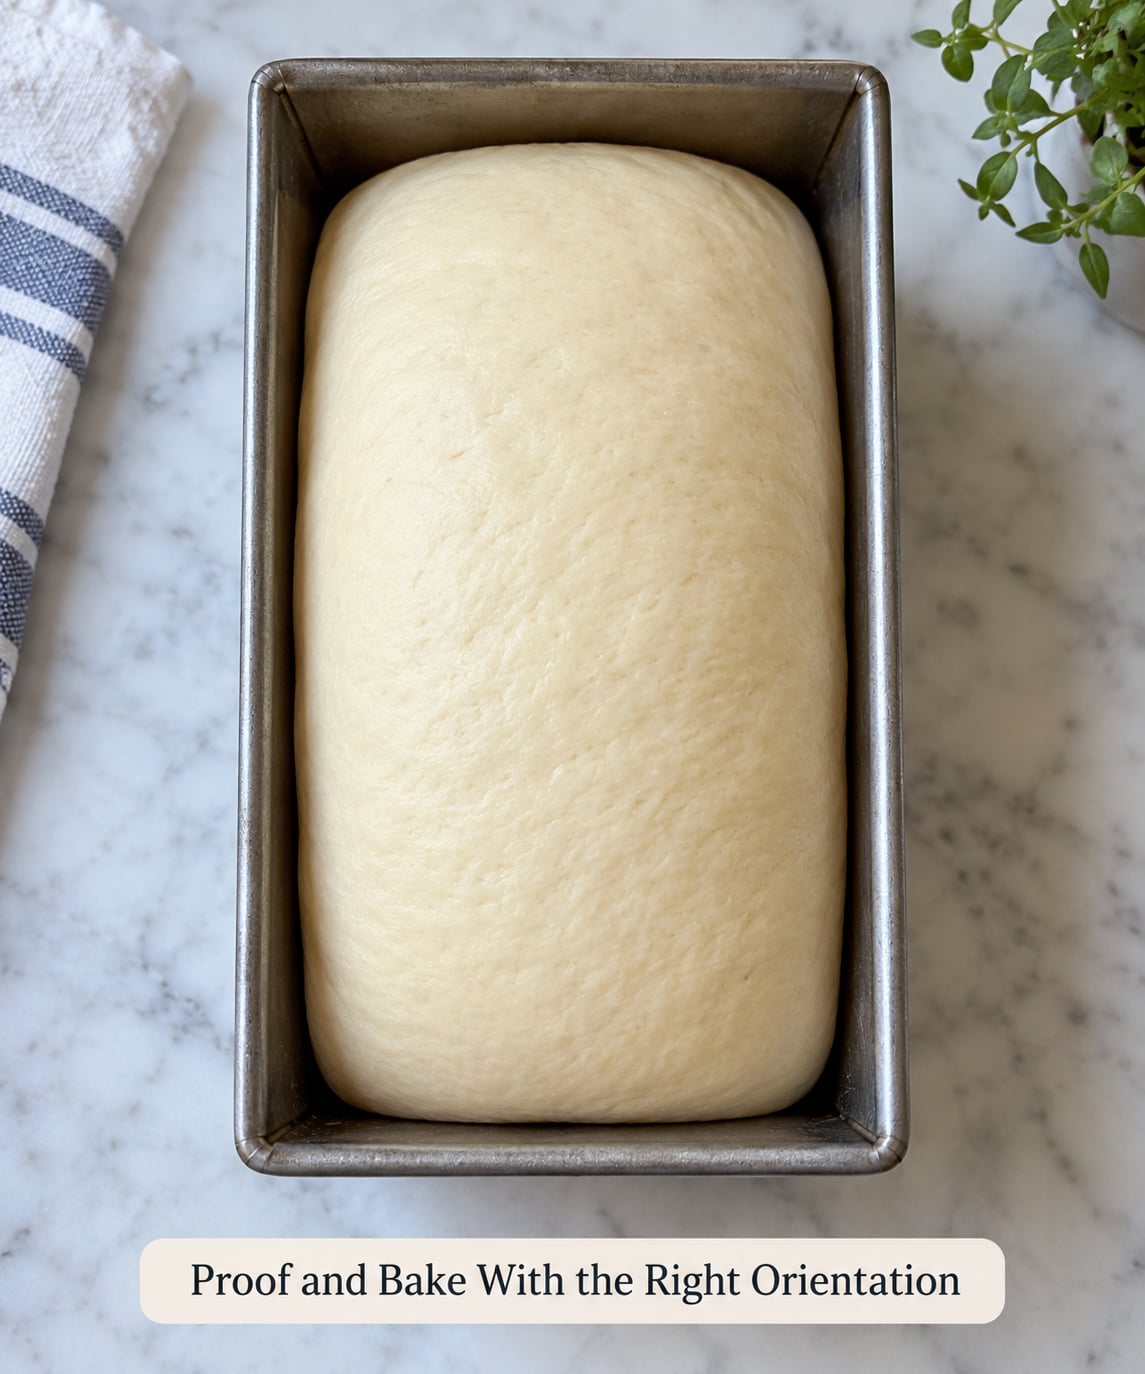
Cover the loaf and let it do its final proof before the oven. Ignore the clock again and watch the dough instead.
For a standard pan, the loaf is ready when it domes about 1 inch above the rim and looks pillowy, with a visible crease along the top where the dough has started to pull away from the pan walls at the corners. A poke that springs back slowly, leaving a soft dent, is the same test as before, at a larger scale.
Preheat the oven to 425°F for 20 minutes with the loaf pan inside. That gives the pan a hot head start, and a hot pan is what produces oven spring and a straight rise. If you bake from a cold pan you will get a flatter loaf with weaker sides.
Put the loaf in and bake at 425°F for 10 minutes, then turn the heat down to 350°F for 22 to 30 minutes. Baking hot-and-heavy first sets the crust, then gentler heat lets the crumb finish without burning the outside.
For a crisp crust, add steam: cover the pan with an empty metal pan for the first 10 minutes, or put a covered cast-iron skillet or a tray of boiling water on the oven floor. Sandwich bread does not need steam, but it does not mind it.
Most sandwich loaves are done at an internal temperature of 195 to 200°F, checked at the very bottom of the loaf where it is coolest. The crust should be evenly golden, and the loaf should sound hollow when you tap the bottom.
Common Mistakes and How to Fix Them
These are the problems you can still fix with the loaf in front of you, before it goes in the oven.
- The dough tears as you stretch it. It is underproofed or too cold. Give it another 20 minutes and let it lose its chill, then try again with the pads of your fingers rather than your palms.
- The log spreads flat in the pan. It is slack or has been shaped with no tension. Do a second roll: flatten it gently, re-roll with firmer tension and put it back in the pan seam-side down.
- The seam will not stay closed. Pinch harder and roll the seam between your fingers to flatten it into the dough. If it still opens, put the loaf seam-side down and let the pan do the work.
- There is a bubble of trapped gas near the top. Press it out along the length of the log and re-seal before it goes in.
- One end of the log is fat and the other thin. Redistribute the dough with an extra fold at the thick end before the final roll.
- Dough is sticking to everything. Use rice flour or a 50-50 flour blend on the bench and your hands, and let sticky dough rest covered for five minutes before you touch it.
Common Mistakes
Once the loaf is out of the oven, the symptoms tell you which step went wrong. Match what you see to what caused it and change one thing next time.
| What you see | What caused it | What to change |
|---|---|---|
| Vertical split along one side | Seam placed seam-side up, or a weak spot with no dough behind it | Always lay the log seam-side down; pre-shape to even thickness so no section is thinner than the rest |
| Lopsided or leaning loaf | Log sat off-centre or on a curl of dough | Centre it and press the top flat before the final proof |
| Dome cracked open down the middle | Not enough tension, or the loaf was underproofed and spread | Roll with firmer tension, and proof to 1 inch above the rim rather than doubling in the pan |
| Large holes under the top crust | Big bubbles left in during shaping | Press gas out toward the edges before folding |
| Dense, gummy slices | Usually proofing, not shaping: underproofed, or dough too weak to hold | Add a stretch-and-fold or two during bulk, and extend the final proof until the dome is well above the rim |
| Flat sides, poor rise | Cold pan, cold dough, or overproofed dough with no structure left | Preheat the pan with the oven and shape while the dough is cool to the touch, not cold |
| Loaf domed over the rim and spread | Too much dough or too long a final proof | Scale the dough to the pan and pull it out of the oven at the internal temperature check |
| Torn bottom crust | Dough bonded to the pan during proofing | Grease generously, or use parchment or a rice-floured pan |
A few habits that prevent most of these. Weigh your dough instead of eyeballing it, and keep the pan size and dough weight matched. Flour the surface lightly, because a heavily floured bench leaves you with dusty bare patches that grip the dough and tear during the roll.
Treat the pan as part of the shaping. Its straight sides do the containing for you, which is exactly why a pan loaf can be a little wetter and less fussy than a free-form loaf, and why the shaping only has to solve one problem: even thickness.
If your dough is high-hydration sourdough, shape it as slack as you can stand and expect to do a second shape. A ten minute bench rest under a towel between the pre-shape and the final shape does more for a wet dough than extra flour ever will.
Frequently Asked Questions
Should I remove the large bubbles before shaping sandwich bread?
Yes. Tip the dough out, turn it smooth-side up, and press from the top and bottom edges toward the centre with your fingertips so trapped gas moves outward and you can fold it away. Leave big pockets in and they bake as tunnels near the top of the loaf. You do not need to chase every bubble, just the fist-sized ones, and you never want to pummel the dough hard enough to tear the surface.
How do I stop a shaped loaf from spreading in the pan?
Two things help most: build real tension when you roll, and do not overproof. A slack log spreads in the pan because nothing holds its shape. Roll it again with firmer pull and pin the seam, then place it seam-side down. On the proofing side, take the loaf out when it domes about 1 inch above the rim rather than waiting for a full doubling, and check that your dough weight matches the pan size.
Where should the seam of a sandwich loaf be placed?
Seam-side down, always, with the log centred in the pan and the ends evenly spaced. The seam is the weakest line in the loaf, and putting it against the bottom lets the pan walls and the rising dough press it shut as the loaf bakes. A seam placed on top or on the side is the usual reason for the long vertical split that ruins an otherwise good sandwich loaf.
Can I reshape bread dough after it feels sticky?
Yes, and you usually should. Cover the dough and leave it five minutes so the surface dries off and the gluten relaxes, then dust your hands and the bench with rice flour or a 50-50 flour blend. Stickiness is usually a surface moisture problem rather than a dough-strength problem. If it is still unworkable, make a gentle pre-shape, rest it covered again, and do the final shape after the second rest.
How do I know the shaped loaf is ready for the oven?
Watch the dough rather than the clock. In a standard 9 by 5 pan it is ready when it domes about 1 inch above the rim and looks pillowy, with the corners pulling slightly away from the pan walls. A gentle poke leaves a soft dent that fills back in only partway. If the dough still feels tight and springy, it needs more time, and an underproofed loaf will bake dense.
How long should homemade sandwich bread cool before slicing?
Let it cool in the pan for 10 minutes, then turn it onto a rack and wait until it is completely cool before slicing, usually one to two hours. Cutting hot bread traps steam inside the crumb and gummy slices are the result, and the crumb is still setting as it cools. Soft sandwich bread is often fine to slice a little earlier since its moisture is high, but a dense or enriched loaf really needs the full wait.
Conclusion
The whole technique comes down to five things: confirm the fermentation by feel, press the gas out toward the edges, build enough tension to hold a cylinder, keep the diameter even, and set the log in the pan seam-side down. Everything after that, proof and bake and cool, is easier once those five are right.
If you run one check on your next loaf, make it this: pick the shaped log up before it goes in the pan. If it slumps in your hands, roll it a second time. That single habit fixes more lopsided sandwich loaves than any oven temperature adjustment ever will.