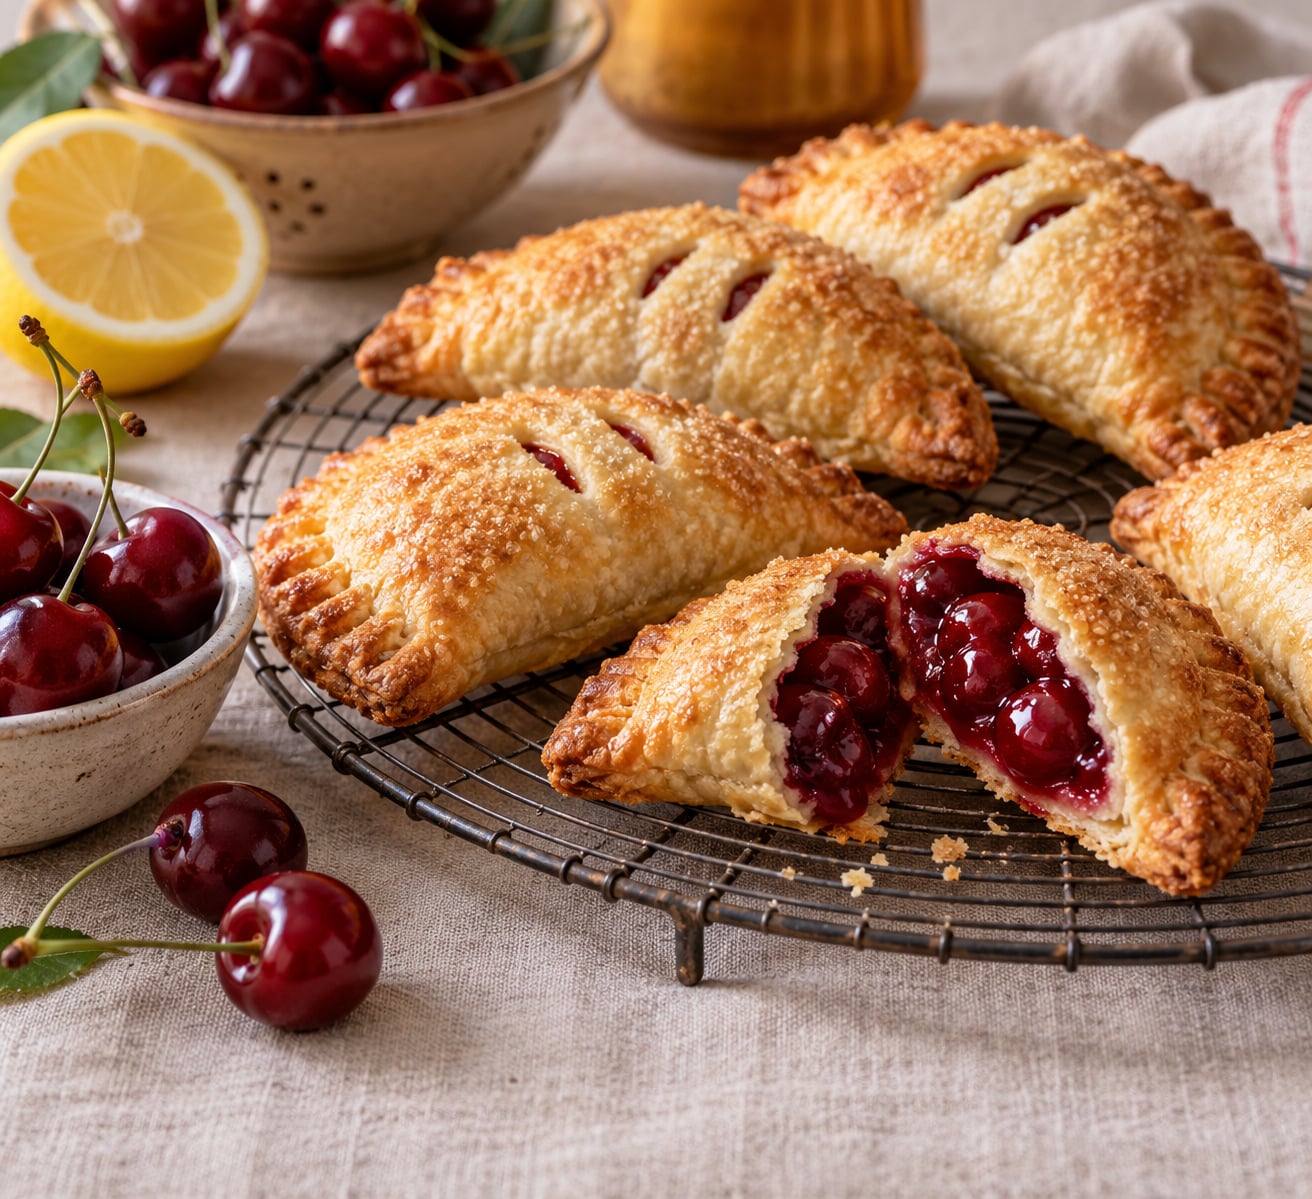
Hand pies are small fruit pies: a spoonful of thick cooked fruit on a round or square of pie dough, folded over, crimped shut, vented, and baked until golden. If you know how to make hand pies with fruit filling, the whole thing comes down to two things nobody can rush — a filling thick enough not to leak, and a seal that holds.
This method uses store-bought pie dough and fresh seasonal fruit, and takes about an hour from counter to oven with 25 minutes of that being baking. It is beginner-friendly, and the same steps work for a market stall batch of forty pies or a Sunday afternoon bake of six.
Table of Contents
- What You Need
- Step-by-Step
- How to Make Hand Pies With Fruit Filling: Prepare the Fruit
- Chill the Filling
- Roll and Cut the Dough
- Fill and Seal the Hand Pies
- Vent, Egg Wash, and Bake
- Cool and Store the Baked Hand Pies
- Common Mistakes
- Tips for Better Fruit Hand Pies
- Frequently Asked Questions
- What is the best fruit for hand pies?
- Can I use fresh or frozen fruit for hand pies?
- Why does the fruit filling leak out of hand pies?
- What temperature and time should I bake fruit hand pies?
- How should I store baked fruit hand pies, and can I freeze them?
- Can I make hand pie dough ahead of time?
- Get Baking: Your First Fruit Hand Pies
What You Need
Tools are short and mostly already in your kitchen: a rolling pin, a 4-inch round cutter or a bench scraper and ruler for squares, a small saucepan for the filling, a pastry brush, a fork for crimping, a sheet pan lined with parchment paper, and a cooling rack.
For ingredients you need one 9- to 10-inch pie dough round (store-bought or homemade), 2 cups of fruit, 1/4 cup granulated sugar, 2 tablespoons cornstarch, 1 tablespoon cold water, 1 teaspoon lemon juice, a beaten egg for wash, and coarse sugar for the top. Fresh fruit works best, and a little lemon juice keeps the color bright.
Dough temperature matters more than anything else in this recipe. Pie dough should be cold but not rock-hard — straight from the fridge feels firm, and after ten minutes on the counter it bends without cracking. Warm dough sticks to the rolling pin and the butter melts into the flour, which is exactly how you lose flaky layers.
| Dough option | Flakiness | Effort | Best for |
|---|---|---|---|
| Store-bought pie dough in the tin | Good | None | Weeknight bakes, beginners, consistent results |
| Refrigerated biscuit dough | Medium | Very low | Fast batches; check it has no dairy if that matters to you |
| Homemade pie dough | Best | 30 minutes plus chill | When the crust is the point |
| All-butter puff pastry sheets | Highest | Very low | Sweet, shatteringly crisp pies; needs an egg wash or the layers slip |
Homemade pie dough is a mix of flour, cold butter, salt, and ice water pulsed in a food processor until it looks like coarse meal, then pressed into a disc and chilled at least an hour. Store-bought crust skips all of that and is genuinely the better starting point for your first batch.
Step-by-Step
How to Make Hand Pies With Fruit Filling: Prepare the Fruit
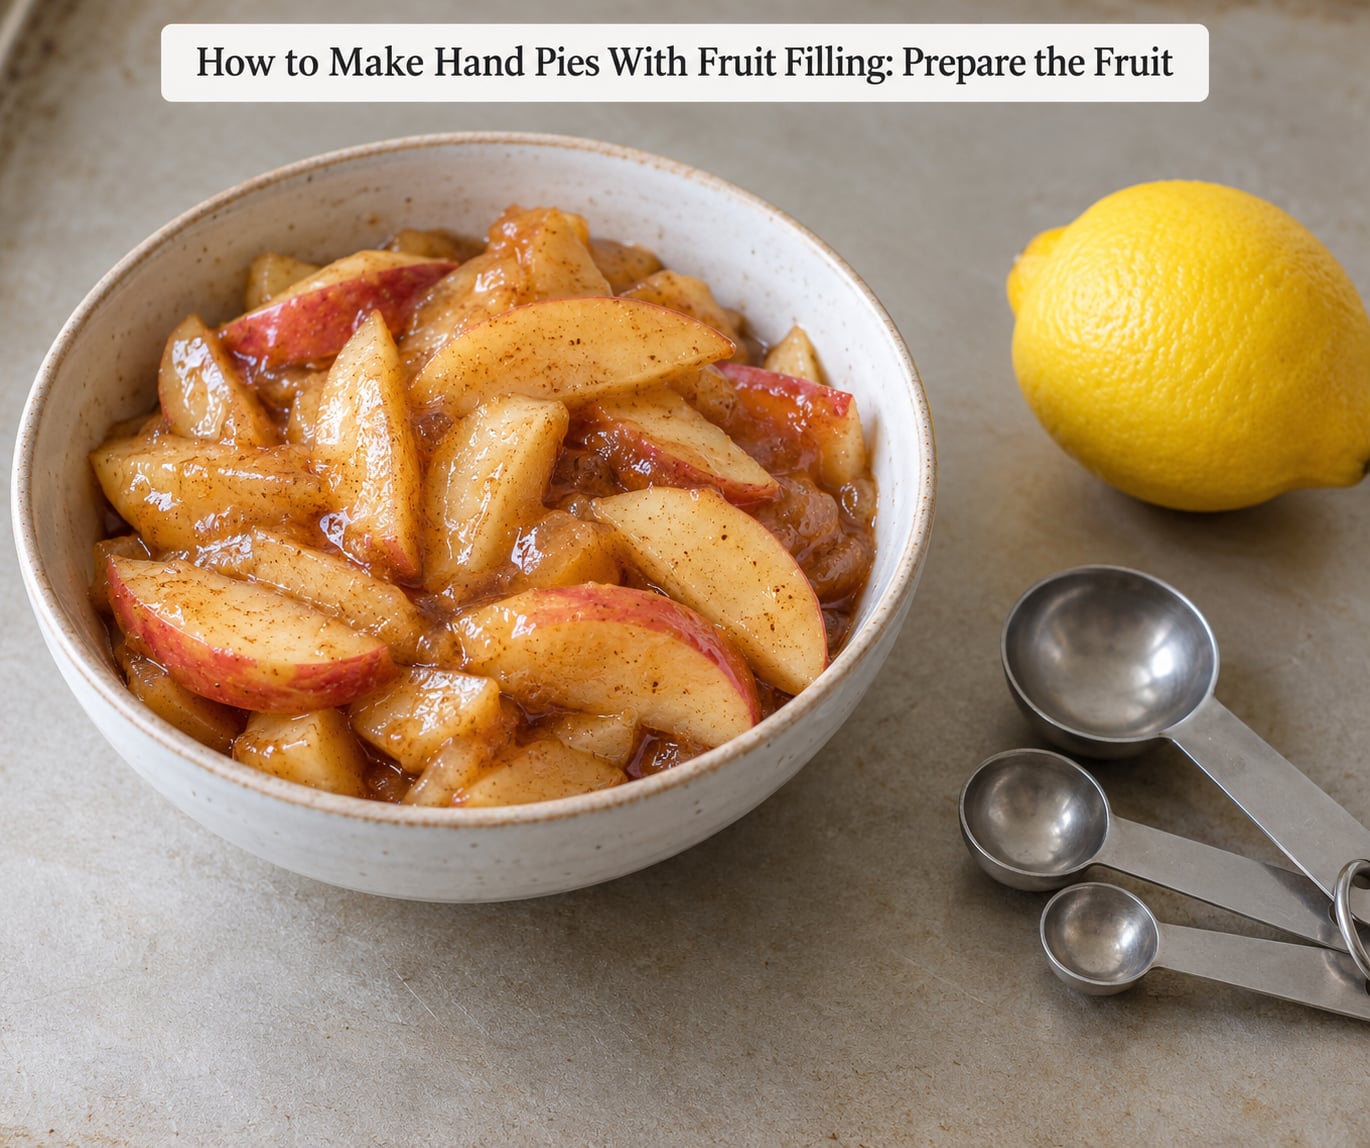
Peel and core the fruit if you need to, then slice it thin — about a quarter-inch thick. Thick slices stay crunchy and release less juice at once, which is easier on the pastry.
Toss the fruit with the sugar and let it sit 10 to 15 minutes. You will see syrup pool at the bottom of the bowl, and that syrup is concentrated sweetness you would otherwise be adding later.
Pour that fruit and its juice into a saucepan over medium heat. Stir in the cornstarch and water slurry and cook, stirring constantly, until the mixture coats the back of a spoon and a clean finger drawn through it leaves a trail. That is jam consistency, and it takes about 5 minutes.
Stir in the lemon juice and any spice at the very end. Cinnamon, nutmeg, or a teaspoon of vanilla work well with apple and peach; skip them for berry fillings, which already taste sweet.
Chill the Filling
Cooling the filling is the step people skip, and it is the one that saves your batch. Warm filling melts the butter in the dough and softens it before the seal sets, so pies puff apart in the oven.
Scrape the filling onto a plate or into a shallow bowl so it cools fast, then refrigerate for 20 to 30 minutes. It is ready when a spoonful dropped on a cold plate holds its shape instead of running flat.
Roll and Cut the Dough
Roll the dough on a lightly floured surface to an even 1/8 inch. You can see the shadow of your hand through it when it is right — thicker bakes pale and raw in the middle.
Cut 4-inch rounds for circles or 4-inch squares for half-moons and triangles. Reroll the scraps, but stop once the dough gets warm or the scraps turn tough; that is where cracks start.
If the dough fights you, put the rounds back on the tray and chill them for 15 minutes. Cold rounds crimp cleanly and hold their shape in the oven.
Fill and Seal the Hand Pies
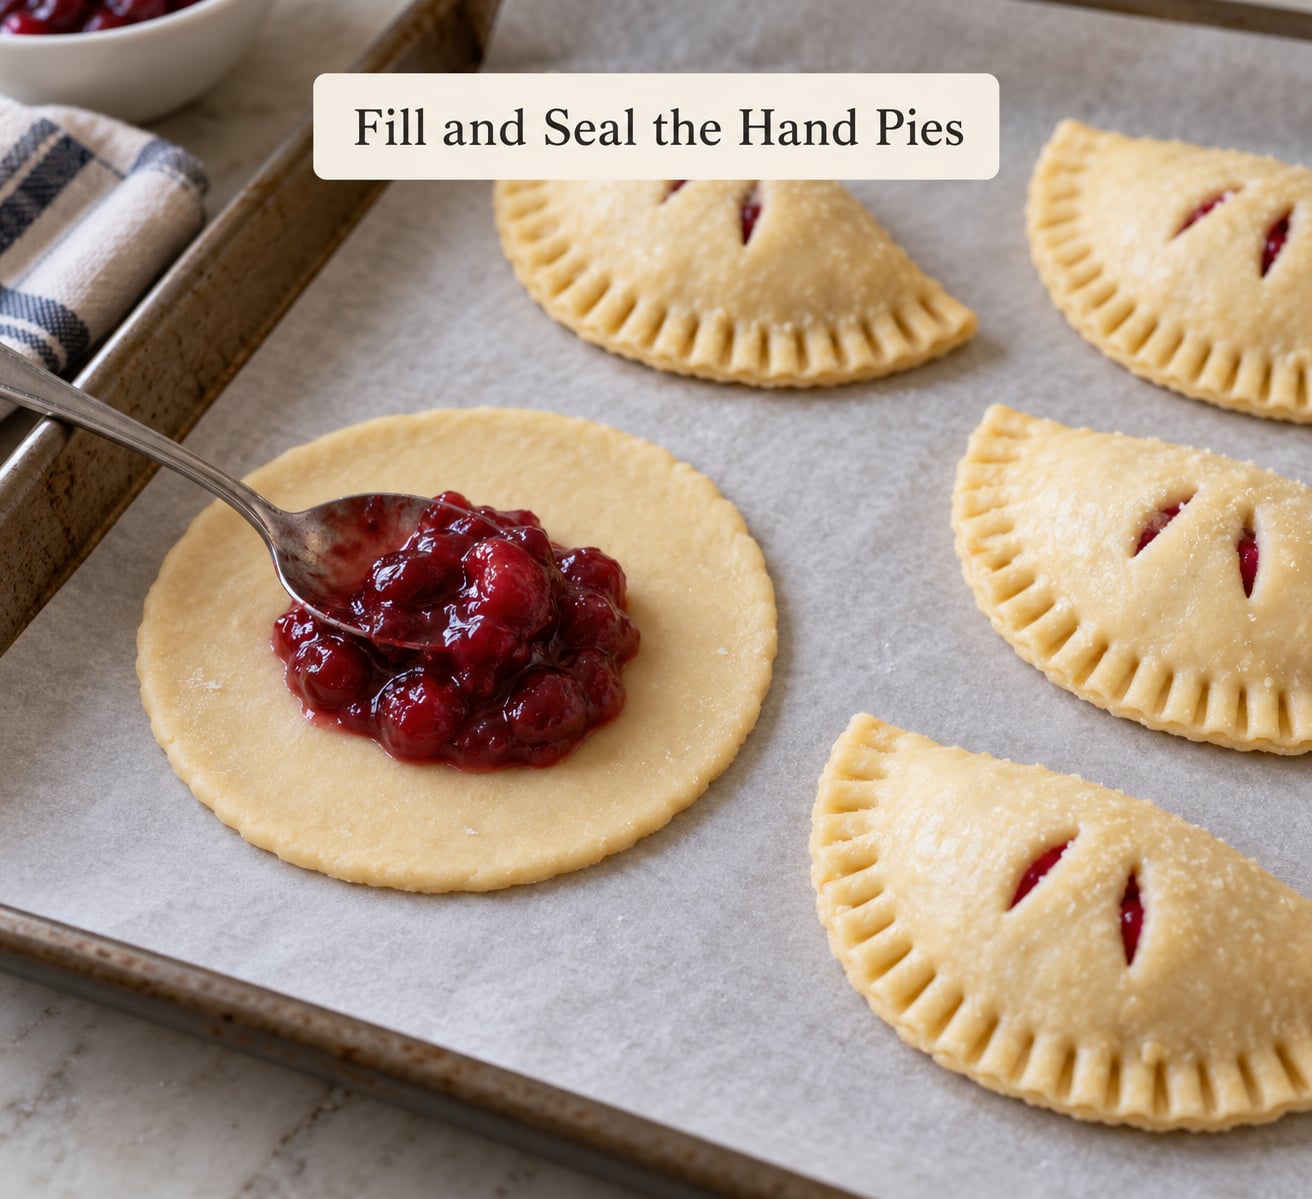
Put 1 to 1.5 tablespoons of chilled filling in the center of each round, leaving a full inch of dough clear around the edge. That clearance is your seal margin — filling spread to the rim pushes the two halves apart and guarantees a leak.
For circles, fold the round in half, press out the air with your fingertips, and crimp along the curved edge with the tines of a fork. For squares, fold on the diagonal into a triangle and crimp the slanted edge. Turn a square-folding half-moon by putting the filling slightly off-center on one half, then folding over.
Crimp hard. A fork pressed firmly leaves visible ridges that lock the layers together; a gentle press looks tidier and springs open under steam.
One more trick from home bakers who swear by it: dip the crimped edge in a little cold water or egg white before pressing. The seam sticks to itself, which is cheap insurance against a burst.
Vent, Egg Wash, and Bake
Cut two small slits in the top of every pie, or one hole in the center of a round. Skipping this is the number one reason hand pies explode — trapped steam has nowhere to go and blows the seam apart.
Brush with beaten egg and scatter a few pinches of coarse or turbinado sugar. The egg wash is not optional if you bought puff pastry, because the glaze is what glues the flaky layers together.
Set the pies on a parchment-lined sheet an inch apart so the hot air can move around them. Bake until the crust is golden brown and the filling bubbles through the vents.
| Method | Temperature | Time | Notes |
|---|---|---|---|
| Bake | 375F | 18 to 22 minutes | Even, reliable browning. 400F for 15 to 18 minutes works too, with a darker crust |
| Air fry | 350F | 6 to 8 minutes | Fastest route. Do not crowd the basket; check at 6 minutes |
| Deep fry | 350F oil | 5 to 6 minutes | Crispest shell; let drain on a rack, not paper |
Fruit has a lot of water in it, so pies brown from the sugar before the crust can overbake. Pull them when the underside sounds hollow and the pastry is pale gold to deep gold depending on your sugar.
Cool and Store the Baked Hand Pies
Cool on a rack for 10 to 15 minutes before eating. The filling is molten and the pastry is still soft, so a pie straight from the oven will squish out the vent if you bite it immediately.
At room temperature hand pies keep about two days in an airtight container. In the refrigerator they last three to four days, though the bottom crust softens on day three.
For freezing, let the pies cool completely, lay them in a single layer on a sheet to freeze solid, then move them to a bag or container. They freeze well for two to three months. Reheat from frozen at 350F for 10 minutes, or from fresh at 325F for 8 minutes so the filling reheats all the way through.
Common Mistakes
Burst seams come from three things: no vent, a loose crimp, or too much filling. Fix all three and bursting stops. If your pies reliably split, cut the filling back by half a tablespoon before changing anything else.
Runny filling means it was under-thickened or too warm at assembly. Cook fruit until it holds a finger trail, then chill it. Cornstarch is the reliable thickener here — flour leaves a raw taste and tapioca turns gummy if you overcook it.
Soggy bottoms happen because juice, sugar, and steam soften the pastry from the inside. Thickening the filling fixes most of it. Beyond that, let the sealed pies sit 10 minutes before baking so the dough firms up, and give them a full 18 minutes rather than pulling them early.
Pale pastry usually means the oven was cool or the sugar top was missing. Beat the egg with a teaspoon of water for a shinier wash, and give the pan ten minutes longer if your oven runs slow.
Uneven shapes come from filling that is off-center or dough that stretched while transferring to the tray. Drop each round from about an inch above the pan instead of dragging it.
Sticking dough is almost always a warm-workbench problem. Chill between rolling passes and dust sparingly with flour — too much flour makes the crust taste dusty once baked.
Tips for Better Fruit Hand Pies
Choose fruit by water content. Apples, peaches, pears, and rhubarb cook down and need the full cornstarch amount. Blueberries, blackberries, raspberries, and cherries release a lot of juice and need a little extra thickener. Strawberries are the exception that spoils pies fastest, so use them the same day you bake.
Balance sweetness before you thicken. Jarred preserves mixed with fresh berries is a real shortcut — half a cup of jam replaces a quarter cup of sugar and gives you a filling that is already the right texture.
Canned pie filling works too. Drain one can of cherry or apple filling, stir in a tablespoon of cornstarch, a teaspoon of lemon juice, and a pinch of cinnamon or almond extract, warm it for two minutes, and chill it before assembly. That is the whole upgrade.
Vary the shapes for the occasion. Triangles and half-moons from squares, rounds from circles, hearts from a metal cutter for Valentine’s, and rectangles for a dessert table — the method is identical, only the cut changes.
To avoid scorching on a dark pan, use a light-colored sheet or line it twice. Dark metal cooks the bottom roughly two minutes faster than the top.
For a make-ahead batch, roll and cut the dough the night before and keep it wrapped in the fridge for up to three days. Bake the day of, cool fully, and freeze. Market morning is then just a tray from the freezer to a warm oven.
Frequently Asked Questions
What is the best fruit for hand pies?
Apples, peaches, and pears are the most forgiving because they hold their shape and are not overly juicy. Blueberries and blackberries are close behind and need only a little extra thickener. Rhubarb and strawberry are the wettest, so bump the cornstarch by one teaspoon and bake them the same day. Frozen fruit works, but thaw it in the pan first or you will chase extra juice.
Can I use fresh or frozen fruit for hand pies?
Yes to both, with one adjustment. Fresh fruit is brighter and needs nothing special. Thaw frozen fruit in a sieve over a bowl so the juice you discard is measurable, then add sugar to taste rather than following the fresh-fruit amount, because the fruit is already sweetened in most cases. Canned fruit packed in syrup works too if you drain it well.
Why does the fruit filling leak out of hand pies?
Three causes account for nearly every leak: no vent slit, a weak crimp, and overfilling. Cut two small vents in each top, press firmly with a fork so the ridges are deep, and hold filling to 1 to 1.5 tablespoons per pie with a full inch of bare dough around the edge. Warm filling is a fourth cause, so chill it before assembly.
What temperature and time should I bake fruit hand pies?
375F for 18 to 22 minutes gives the most even browning and a fully cooked bottom. If you want a darker, flakier crust, 400F for 15 to 18 minutes works well. In an air fryer at 350F they take 6 to 8 minutes, checked at the 6-minute mark. Pies are done when the crust is golden brown and the filling bubbles through the vents.
How should I store baked fruit hand pies, and can I freeze them?
Airtight at room temperature they last about two days, and in the refrigerator three to four days, though the bottom softens by the third day. Freeze them fully cooled, single layer on a tray first, then in a bag or container for two to three months. Reheat from frozen at 350F for 10 minutes, or from fresh at 325F for 8 minutes.
Can I make hand pie dough ahead of time?
Yes, and it is the best way to make this a calm morning job. Homemade pie dough keeps wrapped in the refrigerator for up to three days, and store-bought crust can simply sit in its tin. You can also cut all the rounds a day ahead and chill them on a covered tray. Do not roll the dough warm, since a cold start is what keeps the layers flaky.
Get Baking: Your First Fruit Hand Pies
Start with one tray, not forty. Chill the filling until it holds a finger trail, roll the dough to 1/8 inch, and keep each filling to 1 to 1.5 tablespoons with a full inch of bare edge. Vent every pie, crimp hard, and give them their full 18 minutes at 375F.
Once that first batch comes out, swap the fruit and keep everything else identical. Apple today, peach next week, blackberry when the market stall has a glut — same dough, same method, different filling.