If you have been wondering how to make homemade ice cream without a machine, the short answer is this: whip cold heavy cream to stiff peaks, fold in sweetened condensed milk, and freeze the mixture in a shallow container for four to six hours. That is the whole trick, and it costs about fifteen minutes of hands-on work plus one long, unhurried stretch in the freezer. No ice, no salt bath, no spinning paddles, no counter space eaten up by an appliance.
The reason people think a machine is mandatory is that churned ice cream is smoother. A churn keeps the mixture moving so tiny ice crystals never get the chance to grow, and that is genuinely hard to copy at home. It is not impossible to copy, though. Most of the texture gap comes down to air whipped into the cream, fat in the cream, and how thick a layer you freeze.
If you learn those three things, you can turn out a spoonful of vanilla ice cream, a chocolate one, or a dairy-free coconut version without ever plugging anything in. Plan on roughly half a quart of finished ice cream, ten to fifteen minutes of work, and four to six hours of freezing time you can mostly walk away from.
Table of Contents
- What You Need
- Step-by-Step: How to Make Homemade Ice Cream Without a Machine
- Step 1: Make the Ice Cream Base
- Step 2: Cool and Chill the Base
- Step 3: Fold in Add-Ins and Freeze
- Step 4: Harden and Store the Ice Cream
- Common Mistakes and Tips for Creamier Ice Cream
- The container was too deep
- The cream was never whipped to stiff peaks
- The base went into the freezer warm
- The cream had too little fat
- Hard mix-ins went in too early
- The base was too rich
- It froze for too long, then got refrozen
- The science behind icy texture
- Tips for flavor and serving
- Frequently Asked Questions
- Can I make ice cream without a machine or heavy cream?
- How long does homemade ice cream take to freeze without a machine?
- Why is my no-churn ice cream icy instead of creamy?
- What can I use instead of eggs in an ice cream base?
- How should I store homemade no-churn ice cream?
- Can I add fresh fruit, chocolate chips, or cookies to no-churn ice cream?
- Conclusion: Start With the Four-Ingredient Base
What You Need
The equipment list is short, and the only item that genuinely changes your result is the container. Deep is bad here. A shallow layer freezes fast and freezes evenly, so look for a wide freezer-safe bowl, a loaf pan, a square glass dish, or even a loaf-size tupperware with a lid.
You also want a mixing bowl that fits in your freezer, a whisk or a hand mixer, a rubber spatula for folding, measuring cups, and a couple of spoons. A food thermometer is optional but genuinely useful, mostly for the cooked custard version in Step 1 and for confirming your base is fully chilled in Step 2.
Freezer space matters more than people expect. Reserve a flat patch roughly the size of a baking sheet on the back shelf, where the air stays coldest. The batch needs to sit undisturbed for four to six hours, and shuffling it around a busy freezer is how you end up tasting half-frozen ice cream with a spoon at midnight.
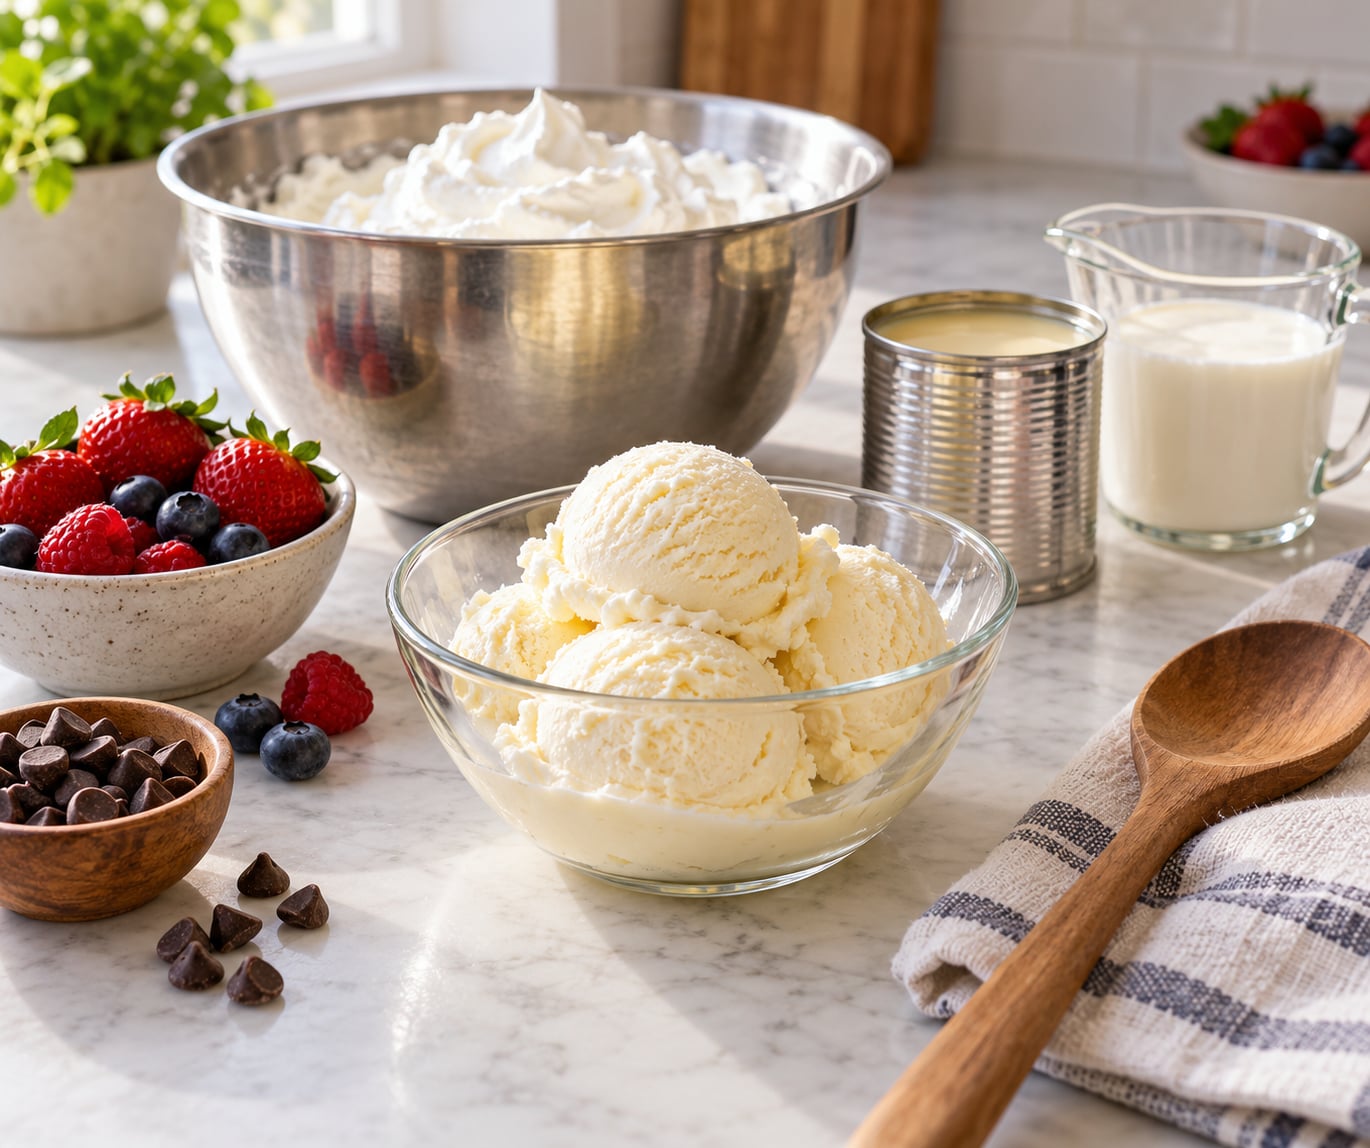
For the ingredients, the base that works almost every time is deliberately boring:
- 2 cups cold heavy whipping cream, chilled well, at 30 percent fat or higher
- 1 can (14 ounces) sweetened condensed milk
- 1 to 2 teaspoons vanilla extract, or vanilla bean paste
- A pinch of fine salt, which sharpens everything without making it taste salty
- Mix-ins as desired: chocolate chips, crushed sandwich cookies, chopped candy, fruit, cocoa powder, or cold coffee
That yields roughly one and a half quarts, which is about eight generous scoops. Cold is not a stylistic preference. Cream that has sat in the fridge for a few hours whips faster, holds more air, and gets you closer to the texture people imagine when they think of ice cream.
The condensed milk is doing two jobs at once. It supplies sugar, which lowers the freezing point so the finished dessert stays scoopable straight out of the freezer, and milk solids, which give the mixture something to hang onto when the cream melts. Do not substitute sweetened milk or evaporated milk for it. They are not the same food and the batch will not set right.
Fat percentage is the number experienced cooks check first, because it decides how creamy the result gets. Here is how the common options actually behave:
- Heavy cream, 36 percent fat: the richest, densest scoop. Whips fast and holds peaks best.
- Heavy whipping cream, 30 percent fat: the all-rounder and the safe pick. A touch lighter and less dense than 36 percent.
- Half-and-half, 10 to 12 percent fat: whips poorly and freezes icier. Lighter body, less forgiving.
- Lactose-free cream, 30 to 36 percent fat: works well, with a slightly thinner body than dairy cream.
- Full-fat coconut cream, about 24 percent solid fat: the dairy-free route. Freezes creamy if the can is cold and unopened.
Two small pieces of prep go a long way. Chill the bowl, the beaters, and the condensed milk in the fridge or freezer for twenty minutes before you start, and set the cream out for no more than five minutes so you are not whipping something the size of a brick. If you want to scale the batch, double everything rather than trying to eyeball halves; the ratio of two cups of cream to one 14 ounce can is the number worth memorizing.
Step-by-Step: How to Make Homemade Ice Cream Without a Machine
There is more than one way to do this without a machine. The no-churn condensed milk base below is the most forgiving and the best place to start. If you want to skip the condensed milk entirely, the bag method and the blender method further down both work with nothing but dairy, sugar, and vanilla, so keep that option in mind before you shop.
Step 1: Make the Ice Cream Base
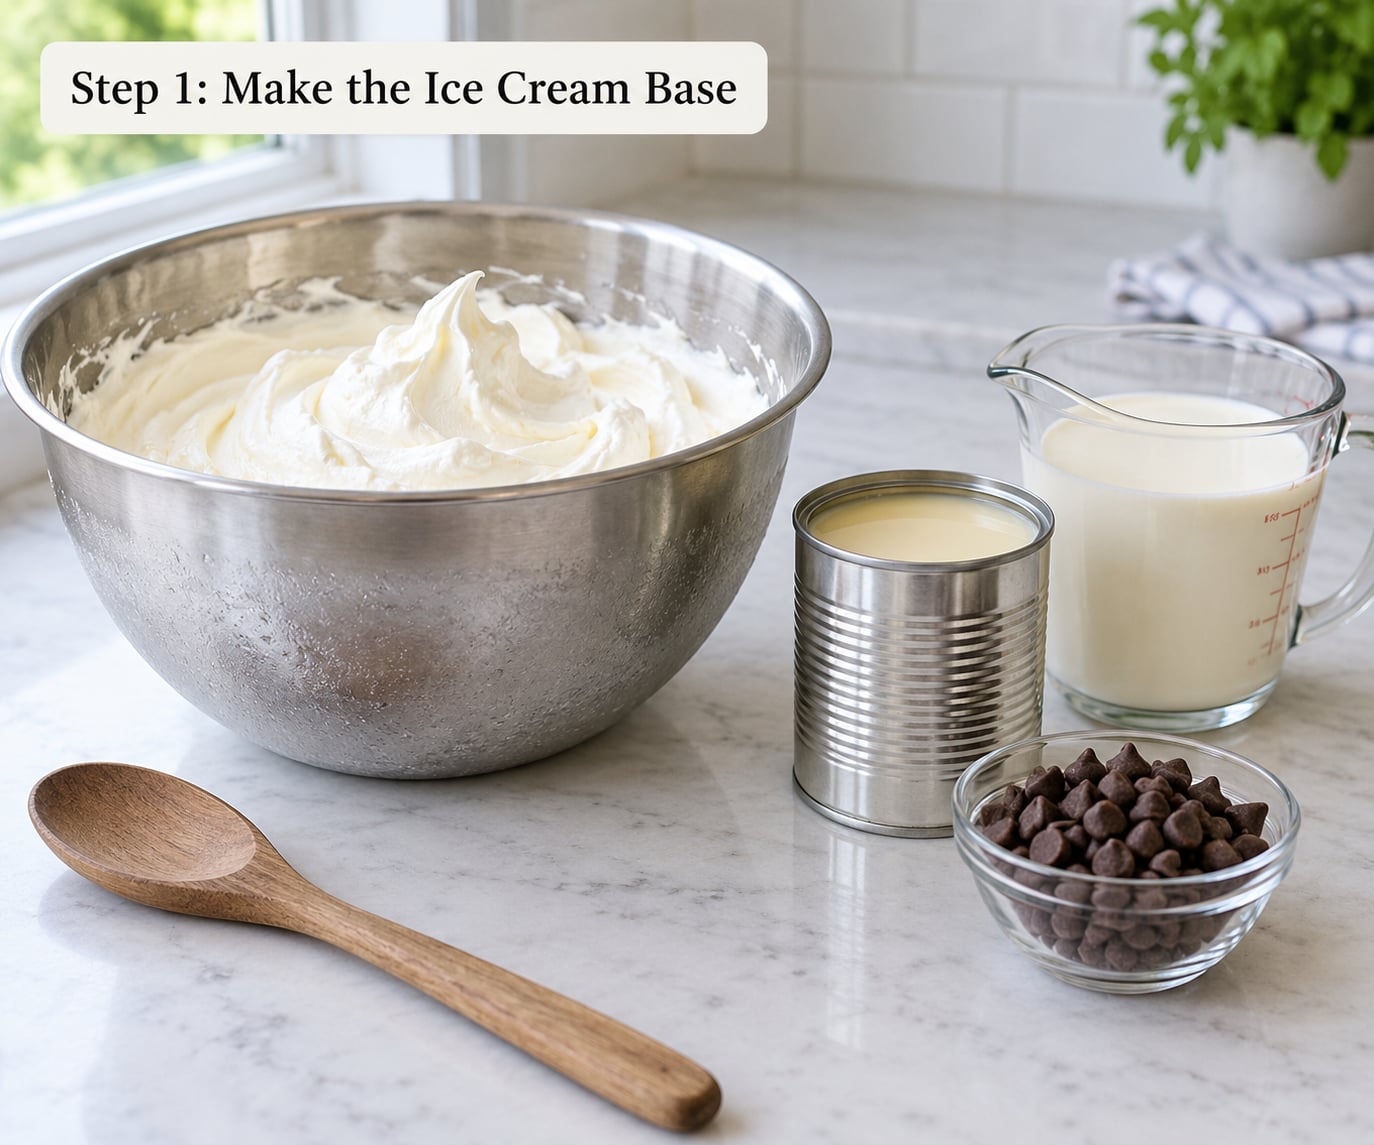
Pour the cold cream into your chilled bowl and whip it on medium-to-high speed. You are watching for one specific state: stiff peaks. Lift the beaters and the cream should hold a ridge that keeps its shape, the way soft paint holds a line. Soft peaks that flop over the second you lift the bowl are not ready, and watery cream that never thickens is too cold or too thin.
Watch the far end of the scale too. If the cream goes past stiff peaks and starts looking grainy, dull, and slightly yellow, you have gone into butter territory. It is not dangerous, and you can still scoop the solid pieces out and fold them in for a slightly denser result, but the smooth whipped look is gone.
Now fold in the condensed milk. Add it in two or three additions and use a spatula to cut through the cream from the bottom, then up and over, turning the bowl a quarter turn each time. Folding keeps the air you just built inside the mixture. Stirring with fast circles knocks it flat, and that flattened mixture is exactly how you get ice crystals later.
Add the vanilla and the pinch of salt with the last addition. Vanilla bean paste, which flecks the mixture with tiny seeds and carries a deeper, rounder flavor, works in the same quantity.
You can stop there, and for a condensed milk base most people should. If you prefer a slightly cooked flavor, warm cream, milk, and sugar together in a saucepan until the mixture just steams and every grain of sugar has dissolved, then cool it fast before folding in the whipped cream. Two rules for that route: never let it boil, and never heat it past steaming, because scalded cream tastes flat and will not emulsify properly once it goes back into the bowl.
How do you know the sugar has dissolved? Run a finger along the back of the wooden spoon. If it feels slick and smooth, you are done. If you still find graininess, keep it just off the heat and stir until it clears. A digital thermometer helps here: cooked custard bases need to reach 160 F before they chill, and pasteurized eggs take the safety question off the table entirely.
Step 2: Cool and Chill the Base
Whether you cooked the base or not, it needs to go cold before it hits the freezer. Warm cream freezes unevenly: the top skin sets first, the center stays loose, and you get a shell around a soupy middle.
Cool it fast by setting the bowl in an ice bath and stirring for a minute or two, or by spinning it in the freezer for ten minutes. Do not leave dairy at room temperature for more than two hours, and less than an hour if your kitchen is warm. Then transfer the base to the widest shallow container you have, a layer no deeper than about one inch.
Cover it and chill until it is thoroughly cold all the way through, roughly two hours in the fridge, and happily overnight. If you have a thermometer and want a number to aim at, the base should read around 40 F when it goes in. A shallow layer chills considerably faster than the bowl you whipped it in, so the wide container is doing real work here too.
Over-chilling is not a risk. Under-chilling is the problem, because the cream that has not fully firmed up will slump during freezing and the finished texture turns dense and grainy instead of smooth.
Step 3: Fold in Add-Ins and Freeze
Fold in your mix-ins now, gently, so you do not deflate the base. Fold chocolate chips, crushed sandwich cookies, chopped candy bars, or cocoa powder straight into the mixture. Fold in diced fresh fruit with a light hand, since fruit releases water as it freezes, and pat it dry first. Blended frozen berries and pureed fruit can go in earlier without the same problem.
Set the container flat in the coldest part of the freezer and set a timer. For the first two hours, come back every 30 to 45 minutes and scrape the frozen edges down into the softer middle with a spoon. This is the step most recipes skip, and it is the step that breaks up forming crystals while the mixture is still half-liquid. Anyone learning how to make homemade ice cream without a machine who skips it usually ends up with a decent dessert, just not a creamy one.
You are looking for a soft-serve texture at the two-hour mark: firm enough to hold a shape on the spoon, soft enough to slump slowly off it. Think somewhere around 10 to 12 F. If the whole tray has turned hard, you overshot and should move the container to the warmest part of the freezer or let it sit on the counter for a few minutes before scraping.
If you want soft serve rather than a scoopable dessert, stop at that point and serve it straight from the container. Just remember that soft serve will not survive the drive to a picnic, so freeze it firm if it is traveling.
Step 4: Harden and Store the Ice Cream
Scoop the finished ice cream into a lidded container that closes tightly, or leave it in the shallow dish with plastic wrap pressed directly against the surface. That direct contact is the single best defense against freezer burn and stale odors, which are the main reasons homemade ice cream gets tossed.
Give it two more hours in the freezer to harden up from soft serve to scoopable. Then, before you serve it, set the container on the counter for five to ten minutes. Warming it in the refrigerator instead dulls the flavor and takes forever, since the container has to warm all the way through before the inside does.
For food safety, keep dairy ice cream at 0 F or below and treat the two-hour room-temperature rule as a ceiling rather than a target. If a batch has melted completely and you are not certain how long it sat out, throw it out. Partially melted ice cream can usually be refrozen, but the texture turns hard and grainy, so plan to serve that batch as a milkshake instead of fighting it.
Common Mistakes and Tips for Creamier Ice Cream
Nearly every disappointing batch traces back to one of a handful of things. Here they are in rough order of how often they happen.
The container was too deep
The most common mistake, and the easiest to fix. A three-inch layer takes six hours to freeze through and freezes unevenly on top while staying loose underneath. Keep the layer at one inch and split anything bigger into two dishes. This one change fixes more bad batches than any ingredient swap.
The cream was never whipped to stiff peaks
Air is what keeps water molecules from locking into large crystals, and whipping is where you put it in. Soft peaks that droop, or cream whisked lazily with a spoon, mean the finished dessert freezes hard and icy no matter how long you leave it. Whip until the beaters leave a ridge that holds its shape for several seconds.
The base went into the freezer warm
Cold base, cold container, faster freeze, smaller crystals. Two hours in the fridge, spread thin, fixes this. Overnight in the coldest part of the freezer finishes the job better than four hours next to the frozen peas.
The cream had too little fat
Half-and-half and low-fat cream do not hold air the way 30 percent cream does. You can use them, but expect an icier, lighter result and add an extra tablespoon of condensed milk to help the body along. Coconut cream is the better dairy-free answer because its solids stay stable when cold.
Hard mix-ins went in too early
Chocolate chips and cookie pieces stirred into the base at the start come out as hard little bricks. Fold them in during Step 3, or wait until the last hour of freezing for the crunchiest result. Fruit with a lot of water belongs late in the game for the same reason.
The base was too rich
There is such a thing. A cream-to-condensed-milk ratio far above two cups to one can turns into something dense and greasy, and it refuses to soften properly on the counter. If your mixture is stiff enough to scoop before freezing, loosen it with a splash of milk before it goes in.
It froze for too long, then got refrozen
Once ice cream is rock hard, letting it soften on the counter and refreezing it produces a second generation of large crystals. That is the ice brick people end up with. Soften in small increments and eat it at the consistency you like rather than putting it back.
The science behind icy texture
Three levers control nearly everything about how creamy this turns out, and it is worth knowing them because they transfer to every recipe on this page. First, air: whipped cream traps air in a stable foam, and those pockets are what give ice cream its scooping room. Second, fat: cream at 30 percent fat or more stays smooth below freezing instead of turning grainy, because the fat network interrupts crystal formation. Third, sugar: sugar lowers the freezing point, so a properly sweetened base stays soft at freezer temperature while an unsweetened one goes solid.
Pull any one of those three levers down and you get ice. Under-whipped cream, low-fat dairy, and a thin freezer layer all weaken them at once, which is why those three mistakes travel together.
Tips for flavor and serving
A pinch of salt, more than you think, is the cheapest improvement available. It makes vanilla taste more like vanilla and chocolate taste darker without adding anything sweet.
For market-season fruit, chop fresh peaches, berries, or figs small, toss them with a teaspoon of sugar, and fold them in during the last hour of freezing. The sugar draws out juice and keeps the pieces from freezing solid.
Coffee and cocoa are simple wins: replace a quarter cup of the cream with cold strong coffee, or add two tablespoons of cocoa powder during the last fold for an instant fudge flavor.
Serving temperature is worth one more note. Ice cream tastes duller straight from the freezer because cold suppresses sweetness and aroma. Ten minutes on the counter costs nothing and makes the batch taste like a different dessert.
Frequently Asked Questions
Can I make ice cream without a machine or heavy cream?
Yes, with one tradeoff. Without a machine, whip and fold still works using a hand mixer or a whisk, roughly ten minutes of arm work. Without heavy cream, the body changes: half-and-half gives a lighter and icier scoop, coconut cream gives a rich dairy-free version that freezes well, and sour cream makes a tangy lower-fat base. Any of them still need four to six hours in a shallow container to set.
How long does homemade ice cream take to freeze without a machine?
Four to six hours in a shallow container is the sweet spot for a condensed milk base, and freezing overnight is perfectly fine. Speed comes from three levers: chill the bowl and ingredients first, keep the layer about one inch deep, and put the container at the back of the freezer where the air is coldest. Recipes quoting three hours used very shallow dishes, while the slow eight-hour versions came from deep loaf tins.
Why is my no-churn ice cream icy instead of creamy?
Three things cause ice crystals: under-whipped cream, a deep container, and not enough fat or sugar in the base. Air from whipping is what keeps water from freezing into hard crystals, so whip to stiff peaks where the beaters leave a ridge that holds its shape. Freeze in a one-inch layer and use cream at 30 percent fat or higher. Half-and-half on its own will always be icier.
What can I use instead of eggs in an ice cream base?
Nothing needs replacing, because the standard condensed milk base has no eggs in it at all. Eggs only appear in cooked custard bases, where they thicken the mixture and give a denser, French-style result. If you want that texture without eggs, add a tablespoon of cornstarch slurry to the cream and warm it, or blend in a tablespoon of softened cream cheese after folding.
How should I store homemade no-churn ice cream?
Keep it in an airtight container in the coldest part of the freezer and eat it within one to two weeks. Press plastic wrap directly onto the surface so air, odors, and freezer burn stay out. Set the container on the counter for five to ten minutes before scooping instead of warming it in the fridge, which dulls the flavor and warms the whole container before the center softens.
Can I add fresh fruit, chocolate chips, or cookies to no-churn ice cream?
Yes, and how you add them decides the texture. Fold chocolate chips, cookie pieces, and chopped candy into the base right before freezing. Add fresh fruit during the last hour and pat it dry first, because it releases water as it freezes. Blended or frozen fruit works from the start. Anything hard and chunky added at the beginning stays frozen solid in the middle.
Conclusion: Start With the Four-Ingredient Base
Start with the four-ingredient base tonight: two cups of cold heavy cream whipped to stiff peaks, one can of sweetened condensed milk, a teaspoon of vanilla, and a pinch of salt. Pour it into the shallowest container you own and walk away for four to six hours.
Once that first batch works, the same base becomes cookies, chocolate, mint, coffee, or whatever the market had fresh that morning. Getting how to make homemade ice cream without a machine right comes down to the fat in your cream and the depth of the layer, not to any piece of special equipment.