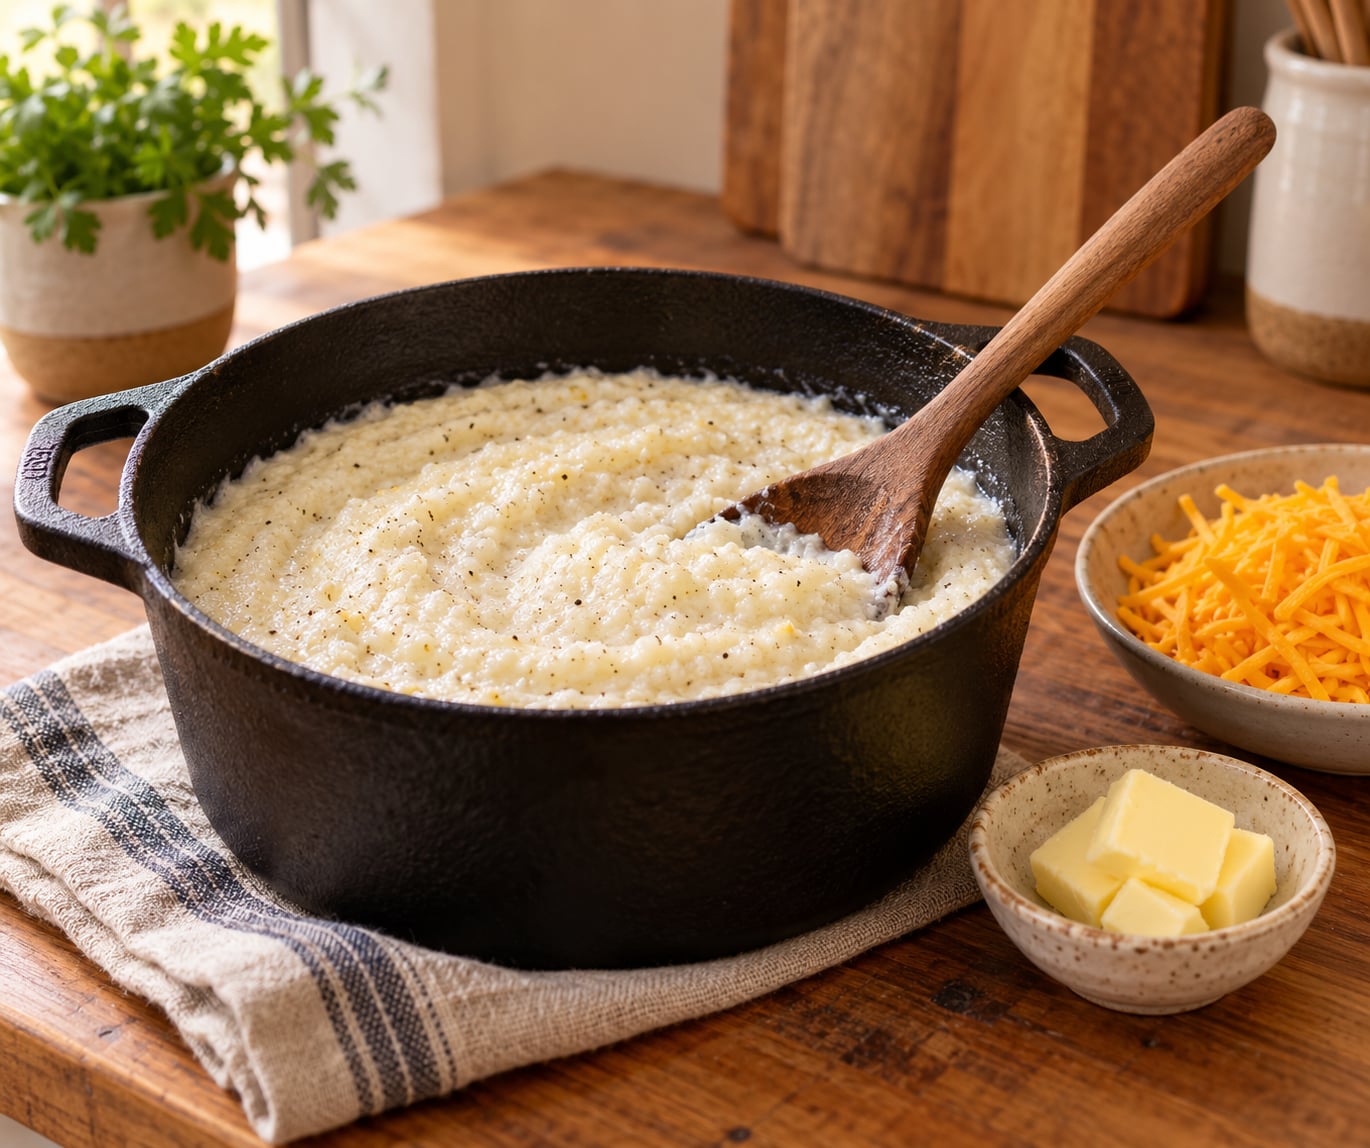
To cook grits so they are creamy, use about 4 cups of liquid for every cup of stone ground grits, bring it to a boil once, then drop the heat to the lowest simmer and stir often until the grains slump off the spoon. Most of the work is in the ratio and the heat, not in any secret ingredient. Allow 20 to 50 minutes depending on which grits you bought.
Plenty of home cooks have ended up with gluey, pasty grits, and it is nearly always the same cause: not enough liquid, or too much of it at the wrong heat. Once you control those two things, creaminess follows on its own.
This is the method we teach at the market table, and it is the one that scales cleanly from a two-serving skillet up to a brunch buffet pan.
Table of Contents
- What You Need
- Step-by-Step: How to Cook Grits So They Are Creamy
- The liquid-to-grits ratio by type
- Step 1: Toast the grits and add the liquid a little at a time
- Step 2: Bring it to a boil once, then turn it down
- Step 3: Stir until the grains slump
- Step 4: Finish with butter and seasoning off the heat
- Step 5: Serve right away or store the rest safely
- Common Mistakes
- Swaps and variations that work
- Frequently Asked Questions
- What is the difference between quick grits and stone ground grits for a creamy texture?
- How do I fix grits that are too thick after cooking?
- Can I make creamy grits without butter?
- How long should grits simmer before they are tender?
- Can cooked grits be frozen and reheated later?
- Are grits supposed to be grainy?
- Conclusion
What You Need
You need very little. The ingredient list for one cup of grits is short enough to memorize, which is one reason this dish has survived so long in Southern kitchens.
- Grits: stone ground, quick-cooking, or instant. Stone ground tastes the best and cooks the creamiest. Quick-cooking is a decent shortcut. Instant grits are pre-cooked and will not give you the same texture.
- Liquid: 3 to 4 cups per cup of grits. Water works, but a mix of water and chicken broth or water and milk tastes better and feels richer in the mouth.
- Fat: 2 tablespoons butter or unsalted oil, plus more butter at the end if you like.
- Salt: about 1 teaspoon per cup of liquid. You cannot really salt grits effectively after cooking, so season the liquid early.
- A heavy pot: a heavy-bottomed saucepan, a cast iron skillet with a lid, or a Dutch oven. Something thick gives you steadier heat and less chance of scorching the bottom.
- A whisk or a sturdy spoon: a whisk breaks up lumps before they set. A wooden spoon is fine once the mixture thickens.
On the question of milk versus water: neither is wrong. Water gives you the cleanest corn flavor, which is what you want if you are serving shrimp and grits or a plain buttered bowl. Milk or a half water, half milk mix gives you a rounder, softer texture and reads as more luxurious, at the cost of a slightly heavier pot and a bigger risk of scorching if the heat is too high.
One of our regulars cooks in two cups water, two thirds cup milk, and one third cup chicken broth per cup of grits. It is a good middle ground, and it is the ratio most home cooks land on after a few tries.
Skip the fine-mesh strainer idea. If you sieve grits before cooking, you get cornmeal, and cornmeal makes a different dish entirely.
Step-by-Step: How to Cook Grits So They Are Creamy
The liquid-to-grits ratio by type
Most grits recipes say “add enough liquid to cover” and leave it there, which is why so many home cooks get it wrong. Measure instead. Here is the ratio that works for each type.
| Grits type | Liquid per 1 cup grits | Cook time | Best for |
|---|---|---|---|
| Instant | 2 to 2.5 cups | 4 to 5 minutes | Weeknight speed, not texture |
| Quick-cooking | 3 cups | 5 to 10 minutes | A decent middle ground |
| Stone ground | 4 cups | 40 to 50 minutes | The creamiest result by far |
| Hominy (whole kernel) | 4 to 5 cups | 45 to 60 minutes | Nutty, chewy Southern style |
The general rule holds across all of them: more time needs more liquid. A pot of instant grits left on the heat for 40 minutes will be a gluey brick, and no amount of butter will save it.
Step 1: Toast the grits and add the liquid a little at a time
Melt the butter in your pot over medium heat. Add the grits and stir until they smell nutty, about 60 to 90 seconds. Toasting is optional, but it does something you cannot get any other way, which is a deeper corn flavor in a pot of plain grits.
Now pour in about half the liquid while whisking. Keep whisking until the mixture is smooth with no dry pockets, then add the rest in two more additions, stirring between each. This is the single step that prevents lumps, and it takes ten seconds more than dumping it all in at once.
As a cook’s shortcut, you can add all the liquid first and whisk hard for a full 30 seconds before turning on the heat. It works about as well and saves a dish.
Step 2: Bring it to a boil once, then turn it down
Turn the heat to high and bring the mixture to a boil, stirring constantly so nothing catches on the bottom. Once it bubbles, drop the heat to the lowest setting your stove has.
You want a bare simmer, where you see a bubble every second or two, not a rolling boil. Aggressive heat drives water off faster than the corn can absorb it, and the starch sets past creamy into gluey. This is the mistake behind most gummy grits I have been handed at the market.
Cover the pot with a lid. Leave it slightly ajar if your pot spits. Stir every 30 to 60 seconds for the first 10 minutes, then every few minutes after that.
Step 3: Stir until the grains slump
There is a test for doneness that works better than any timer: drag the back of a spoon across the bottom of the pot. If the mixture closes the trail slowly and holds a soft line for a second before filling in, it is done. That is the spoon drag, sometimes called the slump test.
The finished grits should slump off the spoon in a slow ribbon. If it holds its shape and stands up in a mound, it needs more liquid and more time. A spoonful tipped back into the pot should spread out, not sit there as a dome.
Stone ground grits genuinely do get smoother the longer they cook. Long-time cooks in one forum thread on Southern grits report pushing stone ground all the way to 45 minutes before it turned velvety, with the texture still improving after that. Trust the texture over the clock.
If the mixture thickens faster than you expect, that is normal. Add a half cup of hot broth or water and keep going. Hot liquid mixes in cleanly, cold liquid shocks the starch and can make the pot seize.
Step 4: Finish with butter and seasoning off the heat
Take the pot off the heat and let it sit for a minute. Stir in 2 to 4 tablespoons of cold butter, a handful of grated cheese, or both. Adding dairy off the heat keeps it from breaking and gives you that glossy, melty finish.
Season now, but gently. If you salted the liquid at the start, you mostly need black pepper and maybe a pinch more salt. Taste it with a clean spoon before serving.
Let it rest two to three minutes before serving. The starch finishes setting as it sits, and grits served the instant they leave the pot can be looser than you want. That short rest is what turns a loose mixture into something that holds its shape on a plate but still flows.
Step 5: Serve right away or store the rest safely
Grits are a morning dish and they do not wait. Serve them within a few minutes, under fried eggs, bacon, cheese, black pepper, or a spoonful of jam if you are the sweet kind of grits person. Shrimp and grits is the best-known savory version, and a bowl of grits works as the base for a breakfast hash or a brunch buffet dish.
For leftovers, cool them in a shallow dish and refrigerate no more than three to four days. When reheating, warm a splash of broth or milk in the pan first, add the grits, and stir over low heat until loose. Straight from the fridge into a hot pan is how reheated grits turn to paste.
Grits freeze poorly as a creamy finished dish, but plain cooked grits freeze fine in a sealed container for two to three months. Thaw in the fridge overnight and loosen with hot liquid on the stove. Freeze them before the butter and cream go in.
Common Mistakes
Every problem with grits comes back to liquid, heat, or timing. Here is what went wrong and what to do about it.
Not enough liquid. This is the number one cause of grits that taste pasty. The grain absorbs water as it cooks, and if you measure by eye instead of by cup you will run short. Keep hot broth or water on the back of the stove and add a splash whenever the spoon leaves a clean trail.
A hard boil. A rolling boil is fine for the first minute or two to bring everything up to temperature. After that it should be a whisper of a simmer. High heat boils off water faster than the corn can take it in, and the result is gluey, tight, and hard to loosen.
Dumping the grits into the liquid. Dry grits hitting hot liquid clump on contact, and clumps that form early never fully break apart. Whisk the grits into the first half of the liquid, then add the rest.
Stirring nonstop through the whole cook. Once the grits thicken, constant stirring tears the starch structure and gives you that gluey, rubbery feel people describe. Stir often enough to stop the bottom from catching, then slow down. A spoon every few minutes does more than a spoon every second.
Scorching the bottom. That brown, bitter layer is the flavor people mean when they say their grits taste bitter. It comes from letting the pot sit untouched on too high a heat. Stir every 30 to 60 seconds early on and use a heavier pot, and you will not get it.
Overcooking after the texture is right. Grits do not get better forever. Hold them at the slump test, finish them, and stop.
Skipping fat entirely. Water plus grits gives you a correct but plain dish. Butter at the start and butter at the end is what people mean when they call grits rich.
Swaps and variations that work
- Heavy cream: replace one cup of the water with one cup of heavy cream for a dessert-level texture.
- Cream cheese: half a block stirred in at the end adds tang and body without thinning the pot. It is the trick behind most restaurant grits.
- Shredded cheese: sharp cheddar melts aggressively and adds salt, so hold back on the salt. Smoked Gouda is the move for shrimp and grits.
- Chicken broth: swap the water for broth one to one for a savory, more layered bowl.
- An egg: a beaten egg stirred in with the butter at the end coats each grain and makes the texture silkier and more custard-like. It also makes reheated grits more forgiving.
- An overnight soak: cover one cup of stone ground grits with two cups of water and let them sit in the fridge overnight. They will not absorb it all. Bring them to a boil the next day with the remaining liquid and an hour of simmering. The soak does part of the work for you and shortens the cook.
- A rice cooker or slow cooker: the same ratio works on low, and there is no scorching to worry about. Add all the liquid and the butter at the start, stir once at the halfway point.
Frequently Asked Questions
What is the difference between quick grits and stone ground grits for a creamy texture?
Stone ground grits are milled only to a coarse grind, so the kernels still have to break down over 40 to 50 minutes of cooking. That slow breakdown is what gives them a creamy, almost pudding-like texture. Quick-cooking grits are partially pre-cooked, finish in 5 to 10 minutes, and stay noticeably grainier. Use quick-cooking when you are in a hurry. Use stone ground when creaminess is the whole point.
How do I fix grits that are too thick after cooking?
Add hot liquid a quarter cup at a time and stir over low heat until it loosens. Use broth or milk for savory grits and milk or water for a sweet bowl. Warm liquid mixes in without cooling the pot down. Cold liquid drops the temperature suddenly and can make the starch seize into pasty clumps, which is the opposite of what you want.
Can I make creamy grits without butter?
Yes, and they will still be creamy if the ratio and heat are right. Butter adds richness and a glossy finish rather than thickness. If you want to leave it out, use olive oil at the start for a slight fruitiness and finish with a few ounces of heavy cream or a handful of grated cheese off the heat. Any added fat rounds out the texture; none of them are required for smoothness.
How long should grits simmer before they are tender?
Instant grits need 4 to 5 minutes, quick-cooking grits 5 to 10 minutes, and stone ground grits 40 to 50 minutes. Hominy takes 45 to 60 minutes. Time is only a rough guide, because brands and grind sizes vary. Use the spoon drag test instead: when the trail you leave in the pot closes slowly, the grits are tender enough to finish.
Can cooked grits be frozen and reheated later?
Plain cooked grits freeze well in a sealed container for two to three months. Freeze them before adding butter or cream, since dairy-rich grits separate and turn grainy when thawed. Thaw overnight in the fridge rather than on the counter, then reheat in a pan with a splash of broth or milk over low heat. Refrigerated leftovers keep three to four days.
Are grits supposed to be grainy?
A little graininess is normal in quick-cooking grits and part of their character. Finely ground grits that stay noticeably sandy past the simmer stage were probably cooked in too little liquid or stirred too hard once they thickened. Stone ground grits cooked at a bare simmer with the full 4-to-1 ratio should come out smooth and creamy with no sandy bite at all.
Conclusion
Start with the ratio, because that is where most pots of grits go wrong. Measure 4 cups of liquid for every cup of stone ground grits, whisk them in gradually, bring it to a boil once, then turn the heat down to the quietest simmer your stove has.
Stir often early on, slow down once it thickens, and stop at the slump test rather than at a timer. Then take it off the heat, add butter and seasoning, let it sit two minutes, and serve it right away.
On your first pot, keep the toppings simple. Butter, salt, black pepper, and a fried egg is the version most people decide they like. You can add cheese and cream once you know what the base is supposed to taste like. This method has not changed much, and it is still the one we hand out at the market in 2026.