To shuck oysters safely, you protect the hand that holds the shell, stabilize the oyster in a folded towel, and work a short blunt-tipped oyster knife into the hinge. Twist the handle like a doorknob until the top shell pops, then slide the blade along the inside to cut the muscle holding the oyster to the bottom shell. Never force a kitchen knife into a shell. The whole job takes five minutes once your hands know the sequence.
That warning is not theoretical. Shuckers on seafood cooking forums talk about watching a shucking knife pass straight through a friend’s palm, and the infection that followed. Almost every oyster injury is the same accident: the blade slips off a wet, rounded shell and drives into the hand underneath it.
Good news is the technique is learnable in one sitting. The steps below are ordered so the safety moves happen before the knife enters the picture, not after. If you have never shucked before, read the whole sequence once, then work slowly through a single oyster.
Table of Contents
- What You Need
- Step-by-Step: How to Shuck Oysters Safely
- 1. Chill and inspect the oysters
- 2. Wrap the oyster in a towel so you can shuck oysters safely
- 3. Find the hinge and loosen the shell
- 4. Slide the blade around the shell
- 5. Lift the top shell and remove loose shell fragments
- 6. Serve immediately or chill promptly
- Common Mistakes
- Forcing a kitchen knife into the shell
- Cutting toward the hand holding the oyster
- Pushing too hard when the shell will not pop
- Leaving the towel loose
- Forgetting to check for shell fragments
- Letting oysters warm up
- What to do if you get cut
- Frequently Asked Questions
- Can you shuck an oyster with a butter knife?
- What tool do you need to shuck oysters?
- Should I wash oysters before shucking them?
- What if an oyster is already open before I shuck it?
- Are oysters killed when they are shucked?
- How long can shucked oysters sit out?
- Conclusion
What You Need
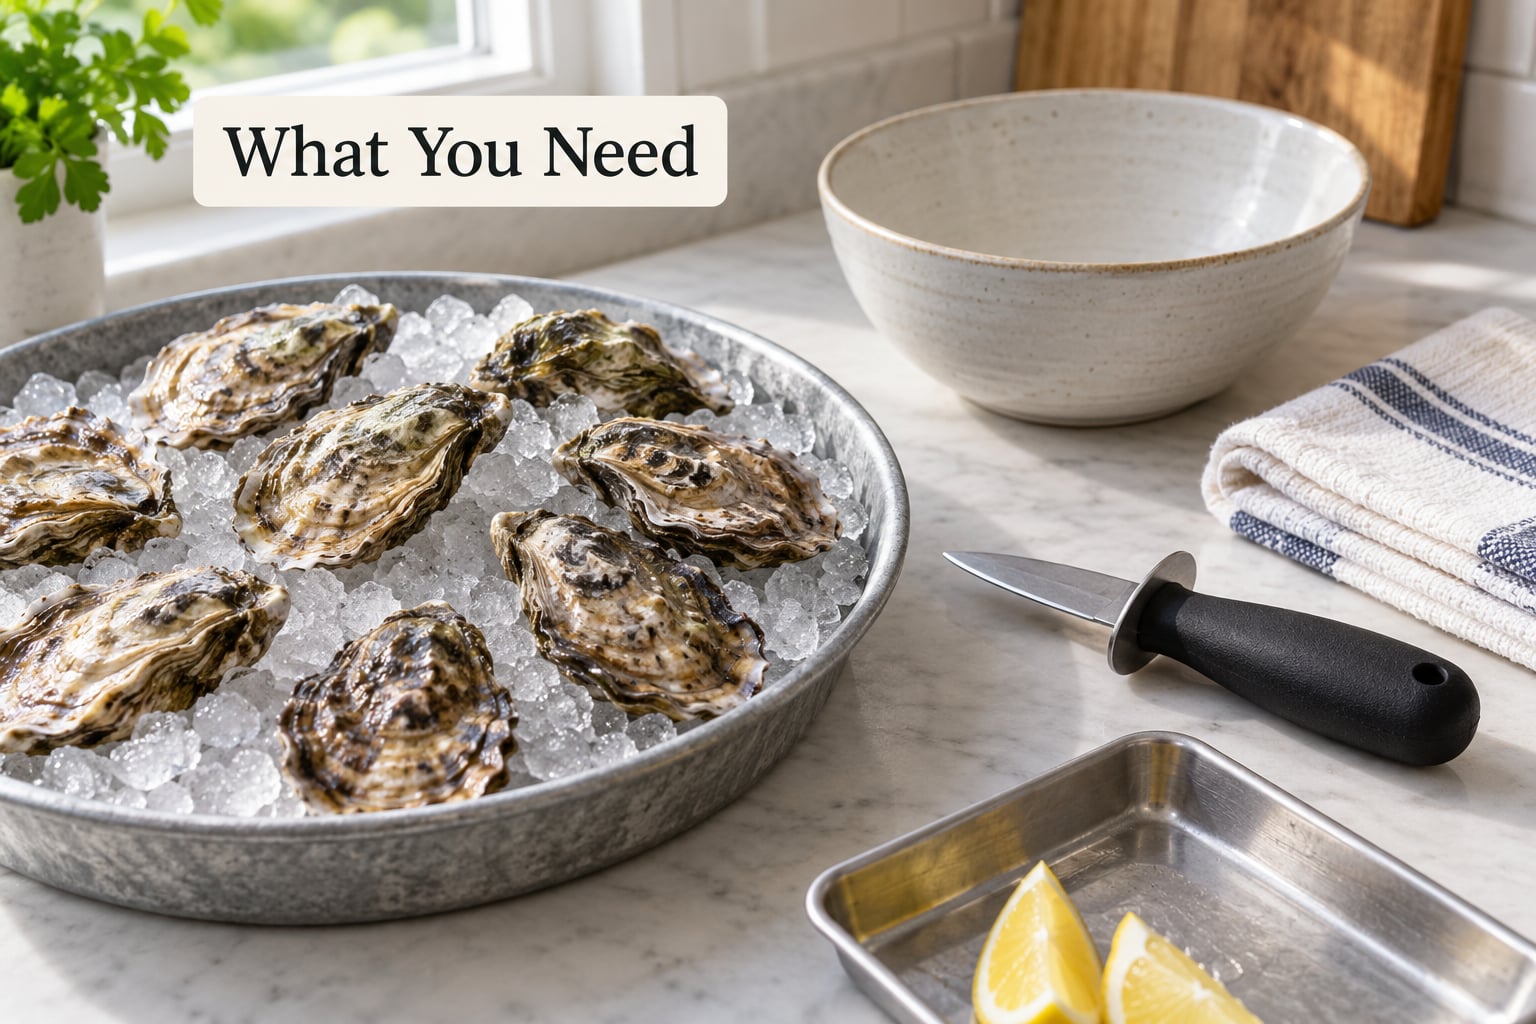
Four things, and only one of them is specialized.
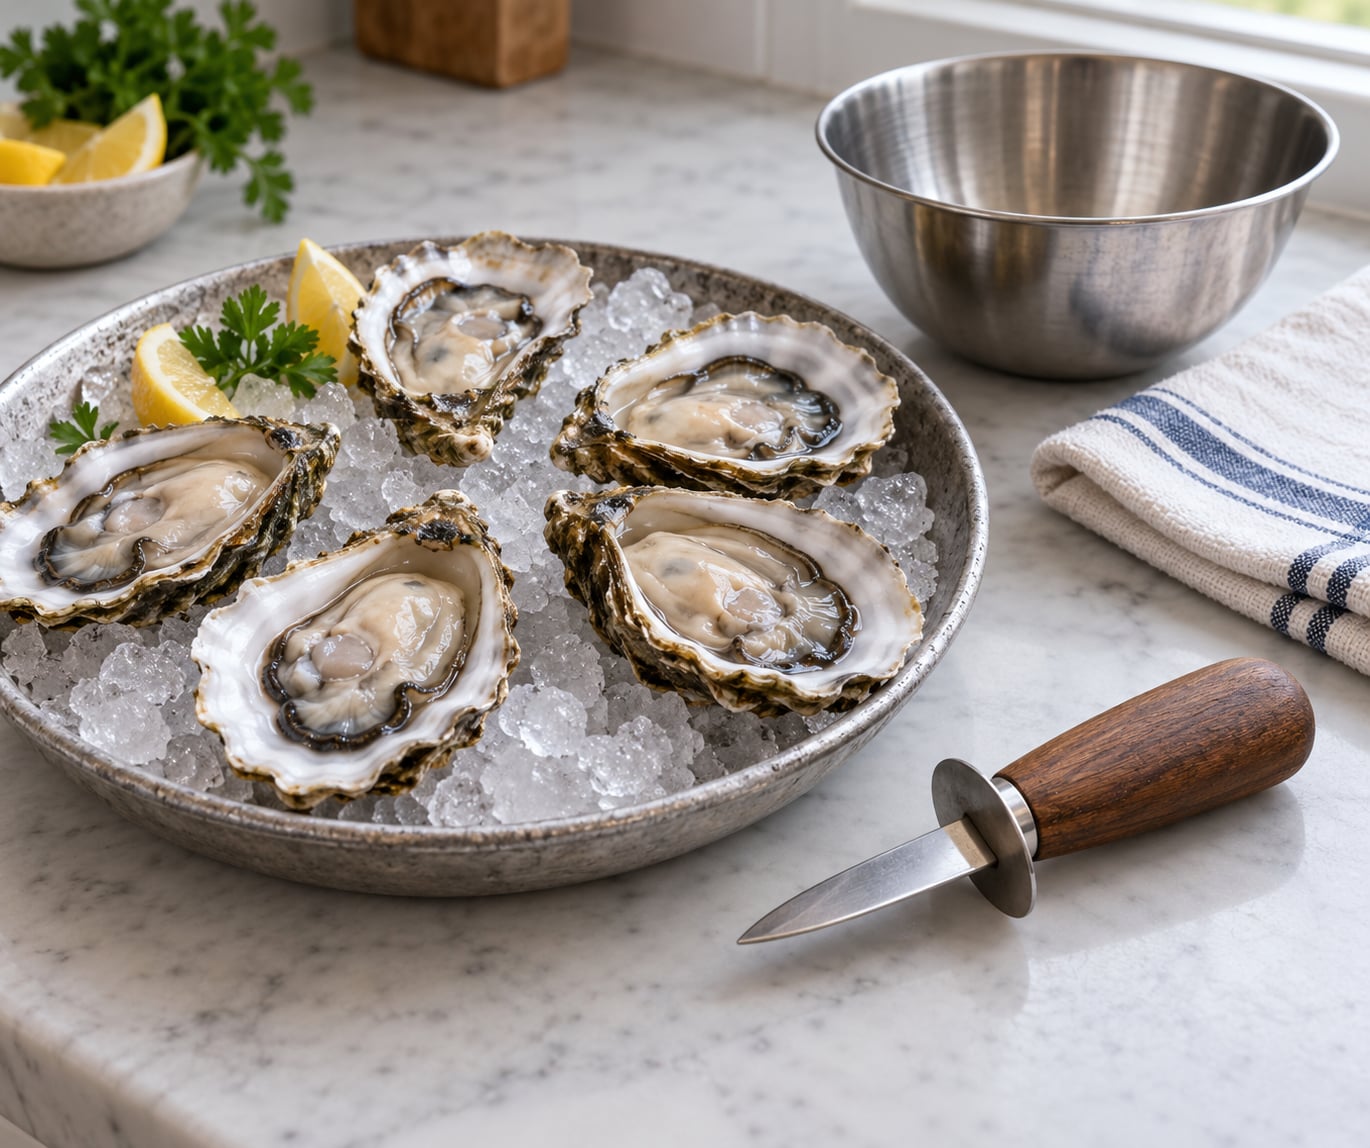
- An oyster knife. Stubby, thick, blunt along the edge with a sharp point. That shape is the safety mechanism: it pries without slicing.
- A heavy kitchen towel or bar rag. Folded into layers and wrapped over the oyster so the holding hand stays completely covered.
- A shallow tray or bowl. Big enough to catch the liquor if an oyster tips.
- A bucket of crushed ice. Both for keeping oysters cold before and after shucking.
A cut-resistant or chainmail glove on your non-dominant hand is a good upgrade if you already own one. If you do not, the folded towel is the whole protection, and shuckers on cooking forums consistently say folding it over the oyster, rather than just cupping it, is the thing that actually keeps fingers out of the way.
Set up on a cutting board or non-slip rubber mat so the board cannot slide while you are pushing. Scrub hands and the work surface before you start.
Step-by-Step: How to Shuck Oysters Safely
1. Chill and inspect the oysters
Oysters are alive when you buy them, and they stay cold right up to the moment you open them. Keep them on ice in a closed container, out of a warm car and away from the stove, and shell them as soon as you get home if you can.
Pick each one up before it goes near a towel. A live oyster in the shell is closed, or it clamps shut when you tap it. If a shell sits open, toss it. Same for cracked, chipped, or badly damaged shells with sharp edges poking through, and for anything sitting in a puddle of broken shell in the bag.
Rinse the closed oysters under cold running water and scrub the shells with a stiff brush to knock off grit and loose debris. Do not soak them in a sink or bowl of fresh water. Oysters filter what passes through their tissue, and fresh water can kill them and make them unsafe to eat.
2. Wrap the oyster in a towel so you can shuck oysters safely
Lay the towel flat on the board and place one oyster in the middle, deep cupped side down, hinge at the far end. Fold the towel up and over the shell, then wrap it around until your hand is fully enclosed and only the oyster itself is showing.
Hold the oyster in your non-dominant hand with the towel as a barrier between your palm and the shell. Wetting the towel slightly makes it grip the slick shell better, which is the difference between a confident hold and an oyster that squirts out mid-shuck.
Leave the hinge exposed and pointed away from your body. Position your knife hand so the blade travels away from your chest and away from the wrapped hand. That one habit prevents most cuts.
3. Find the hinge and loosen the shell
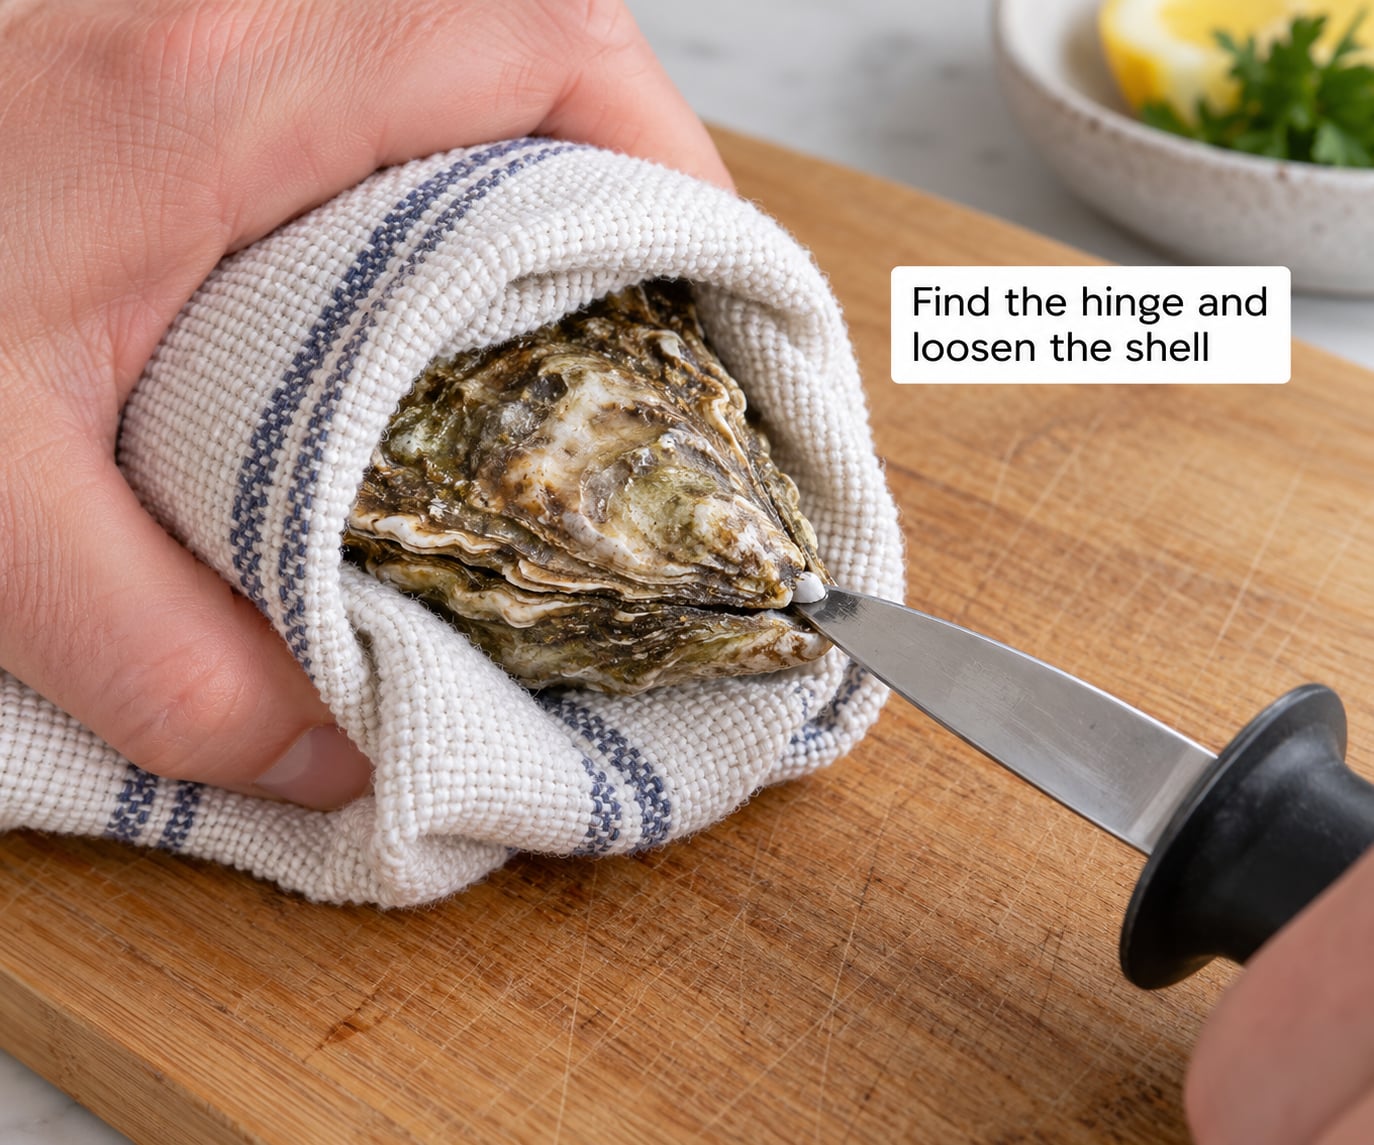
Hold the oyster in your palm with the hinge on the thick, sealed end where the two shells meet. That seam is slightly wider than the rest of the shell edge, and it feels like a small notch. On a round Pacific oyster the hinge is harder to spot than on a long Eastern oyster, so feel for the spot where the shells stop separating.
Set the knife point into that notch. Push down and shimmy the blade back and forth just enough to wedge the tip into the shell. The tip should feel seated, not slipping. If the blade skates off, pull it out and start at a slightly different angle rather than pressing harder.
Now twist the handle like you are turning a doorknob. Not a chop, not a pry, just torque, and slow enough that you can feel the shells starting to give. The adductor muscle, the strong tissue holding the two halves shut, snaps as the hinge separates and the top shell lifts.
If the shell will not pop, do not increase the force. More pressure on a blade that is not seated sends the point through a brittle shell, sometimes the bottom shell, sometimes your hand.
4. Slide the blade around the shell
With the top shell lifted but still resting on the oyster, slide the knife flat along the inside of the top shell to sever what remains of the muscle underneath. Keep the blade low, between the two shells, and angled away from your wrapped hand.
Work around the whole inner rim of the top shell rather than cutting on one side only. Leftover muscle attached to a single edge is what makes oysters cling to the top shell and tear when you try to release them.
Keep the knife tip pointed at the shell and never at the oyster flesh. Tipping the blade downward for control puts it in the exact spot you want it, but it also puts it an inch from your fingers if your grip shifts. If your wrist is bending to reach, reset instead of stretching.
5. Lift the top shell and remove loose shell fragments
Lift the top shell straight up and away, and set it on the board shell-side up so any grit falls out rather than onto the oyster. Do not flick it off with a flick of the wrist, which is how small chips end up in the meat.
Look at the oyster before you serve it. Check for shell fragments caught in the folds of the meat and around the edges, and check the oyster itself for grit. If the oyster looks damaged or has an off smell, leave it out.
Then slide the blade under the oyster and lift it off the bottom shell, cupping your palm underneath so the oyster liquor runs into your hand rather than onto the counter. That brine is the best part of the oyster. A shucked oyster sitting dry on a plate is a shucked oyster that lost its seasoning.
6. Serve immediately or chill promptly
Shucked oysters go on a bed of crushed ice right away. Ten to fifteen minutes is roughly how long they can sit out before you want them cold again, and raw shellfish is one food I would not leave sitting on a counter at a party.
Keep them in a covered container over ice in the refrigerator if you are not serving within an hour. Shucked oysters keep a day or two that way; longer than that and the texture suffers and the risk goes up.
For anyone shucking oysters for beginners reading this far: nobody eats raw shellfish without some risk, because bacteria that live harmlessly in warm coastal water can live in oysters from any water, cold included. Cooking kills them, so if you are serving a guest who is pregnant, over 65, immunocompromised, or has liver disease, cook them until the flesh is firm and reaches 145°F (63°C). Serve cooked oysters to anyone who is not sure.
Common Mistakes
Forcing a kitchen knife into the shell
This is the mistake that sends people to urgent care. Household blades are long and thin, so they bend, skate, and then punch through. An oyster knife is thick and stubby so it can be pushed and twisted instead of stabbed. If all you own is a butter knife or a paring knife, the honest answer is to buy a proper shucker before your first oyster.
Cutting toward the hand holding the oyster
Point the hinge away from your body and keep the blade traveling in the same direction the knife faces, not across your body toward the towel. If you have to reach or twist awkwardly to get at the hinge, your grip is wrong. Rewrap it.
Pushing too hard when the shell will not pop
A shell that will not open usually means the blade is not seated in the hinge, not that you need more muscle. Re-seat the tip, apply torque instead of downward force, and if it still fails, move to a fresh oyster. There is no prize for the one that costs you a fingertip.
Leaving the towel loose
A towel cupped in the palm leaves fingertips exposed below the shell. Fold it over the oyster so the shell is wrapped and your hand disappears inside. Wet hands, wet shells, and dry towels are a slip waiting to happen.
Forgetting to check for shell fragments
Chipped shell in a raw oyster is common and unpleasant. Set the top shell down shell-side up, check the meat and the edges, and feel with your fingertip before the oyster goes on the platter.
Letting oysters warm up
Warm oysters are also oysters that are harder to grip and less safe to eat. If the ice melts under your tray while you are working, top it up. Work in batches of a dozen or so rather than a whole bag at once.
What to do if you get cut
Wash the cut under clean running water, apply firm pressure with a clean cloth for ten minutes without peeking, and then clean it and cover it. Nicks from an oyster shell are shallow and usually stop easily.
Get medical advice if the bleeding will not stop with ten minutes of pressure, if the cut gapes or is deep, if you see a piece of shell you cannot remove, or if the finger is numb or the cut is on the pad of the thumb. Watch for spreading redness, swelling, warmth, pus, red streaks running up the hand, or a fever, and see a doctor if any of those appear. Do not wait out an infection from a marine shell cut, and never ignore a puncture if you cannot see what caused it.
Frequently Asked Questions
Can you shuck an oyster with a butter knife?
No. A butter knife is thin, flexible, and long, which means it bends, skates off a wet shell, and then stabs when you correct it. An oyster knife is short, thick, and blunt-edged with a sharp point, so it can be wedged into the hinge and twisted. A fork also fails, for the same reason.
What tool do you need to shuck oysters?
A short, thick oyster knife, a folded kitchen towel or bar rag, a cutting board or non-slip mat, and a tray of crushed ice. A cut-resistant or chainmail glove on your holding hand is a useful upgrade. Clamps and shucking sleds hold the shell for you, which helps on large oysters, but they do not replace the towel grip.
Should I wash oysters before shucking them?
Yes, rinse the shells under cold running water and scrub off grit with a stiff brush. Do not soak them in fresh water, and do not shuck oysters from a bowl of melted ice water, because fresh water can kill them. Keep them on ice and out of a warm car until you shell them.
What if an oyster is already open before I shuck it?
Discard it. A live oyster in the shell is closed, or it clamps shut when you tap the shell. An oyster that stays open was likely not alive, and perishable seafood that has been warm or dead should not be shucked and served raw.
Are oysters killed when they are shucked?
Yes. Oysters are alive when you buy them, and shucking is what kills them. That is why they must arrive closed and cold, why you never soak them in fresh water, and why they go on ice immediately once opened.
How long can shucked oysters sit out?
Keep them on crushed ice and serve within about ten to fifteen minutes of being shucked. If they sit longer, put them back on ice or in the refrigerator. Covered and chilled, shucked oysters keep a day or two before the quality drops and the risk climbs.
Conclusion
Start with cold, closed oysters on a board that will not move. Fold the towel right over the shell so your hand is nowhere near the blade, wedge the tip of an oyster knife into the hinge at the pointed end, and turn the handle like a doorknob instead of pushing down. Let the top shell come to you, cut around the inside rim, and move the oyster onto crushed ice right away.
Every injury on that list comes from one of two things: a thin household knife, or force where torque was needed. Drop either one and you can shuck oysters safely on your first attempt.