To brine a pork chop, soak it in a cold solution of about 1/4 cup kosher salt and 1/4 cup brown sugar per 4 cups of water, keep it fully submerged in the refrigerator for 1 to 4 hours, then pat it dry and cook. That is the whole method. The salt seasons the chop deep into the muscle and holds moisture inside it, which is exactly what lean pork needs to stay juicy over high heat.
The active part takes about ten minutes. Most of the clock is the refrigerator, so brining fits neatly into the afternoon before dinner or the night before a cookout. I do it every time now, and the chops come out seasoned all the way through instead of only on the outside.
Table of Contents
- What You Need
- Step-by-Step: How to Brine a Pork Chop
- Step 1: Choose the Right Pork Chops
- Step 2: Make a Balanced Brine
- Step 3: Brine the Chops in the Refrigerator
- Step 4: Rinse and Dry Before Cooking
- Step 5: Cook and Check for Doneness
- Common Mistakes to Avoid
- Frequently Asked Questions
- Do I need to brine pork chops?
- Should pork chops be rinsed after brining?
- How long should pork chops brine in the refrigerator?
- Can I use a brine with vinegar, wine, or juice?
- Can I reuse the brine after raw pork has been in it?
- Does brining make pork chops better for grilling?
- Start With the Salt Ratio and Let the Clock Work
What You Need

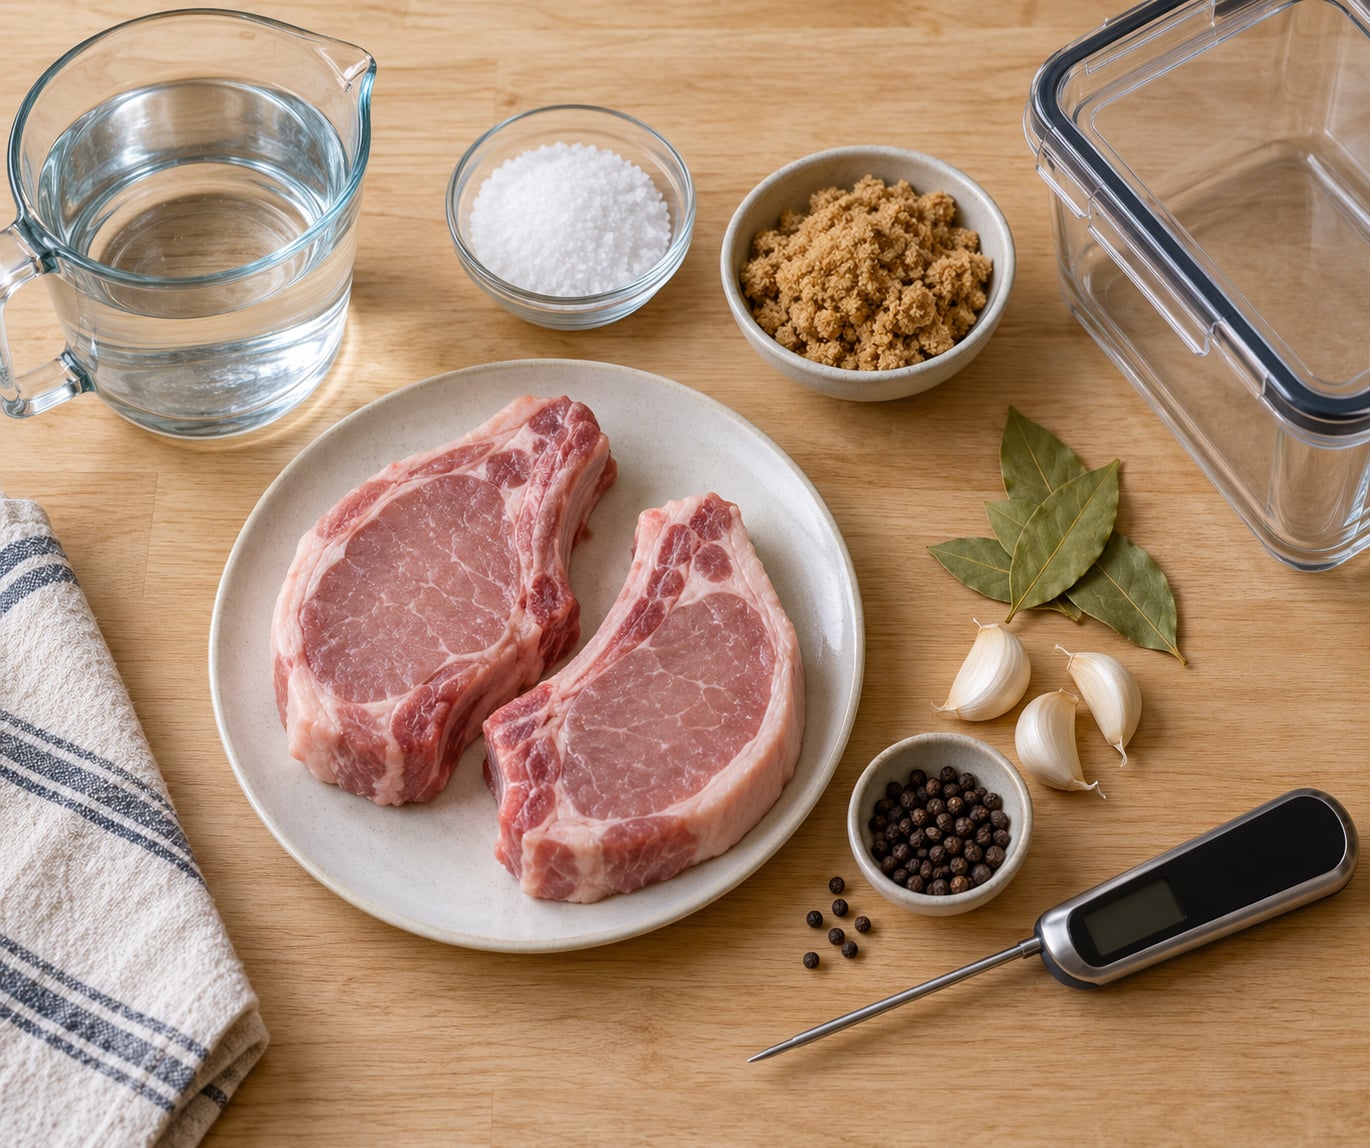
A good brining setup is small. For four pork chops you need:
- Pork chops — bone-in or boneless, roughly 3/4 to 1 1/2 inches thick.
- Kosher salt — 1/4 cup for 4 cups of liquid. If you only have table salt, use about 3 1/2 tablespoons, since table salt packs far denser by volume.
- Brown sugar — 1/4 cup. It balances the salt and gives the crust something to caramelize against.
- Cool water — 4 cups, or a mix of water and apple juice, cider, or broth.
- A nonreactive container — glass, plastic, or a brining bag. Skip reactive metal like plain aluminum or bare iron, which can give the brine a metallic taste.
- A small plate or lid to hold the chops under the surface.
- Paper towels and tongs for lifting them out.
- An instant-read thermometer for the cooking stage.
Optional aromatics: a bay leaf, a few black peppercorns, two or three garlic cloves, thyme or rosemary sprigs, or a few orange slices. Add a handful, not a fist. A brine seasoned heavily with aromatics can taste like a soup by the time you bite into a single chop.
Step-by-Step: How to Brine a Pork Chop

Step 1: Choose the Right Pork Chops
Thickness decides your brine time, so measure before you start. Chops between 3/4 and 1 1/2 inches thick are the sweet spot: enough mass for the salt to penetrate partway without turning the whole chop salty.
Bone-in chops take brine a bit more slowly than boneless ones because the bone and the section right next to it shield the meat. Boneless chops are exposed on more sides, so they pick up salt faster. Thin chops cut for quick grilling need far less time than thick butcher-shop chops, which is why a market counter where every chop is a slightly different size is worth measuring rather than guessing.
Skip chops that are grey or already stiff from sitting on the display case. Brine cannot fix meat that has started to go off.
Step 2: Make a Balanced Brine
Dissolving salt takes heat, but the chops should never meet a hot liquid. Stir the salt and sugar into 1 cup of hot water until nothing is left in the bottom of the pot, then pour in 3 cups of cold water, or drop in a couple of handfuls of ice to cool it faster. The finished brine should taste noticeably salty but still pleasant on a spoon.
The basic ratio is 1/4 cup kosher salt and 1/4 cup brown sugar per 4 cups of liquid. That works out to roughly 34 grams of salt per liter of water, or about 6 percent salinity by weight, which is the figure most serious charcuterie cooks use and the one that gives you room to scale any batch.
For a smaller batch with just two chops, use 2 cups liquid, 2 tablespoons kosher salt, and 2 tablespoons brown sugar. For eight cups of liquid, double up to 1/2 cup salt and 1/2 cup sugar. Anything in between scales the same way.
Step 3: Brine the Chops in the Refrigerator
Put the chops in the container, pour the cold brine over them, and set the small plate on top so every piece stays under the liquid. Chops that poke above the surface season unevenly, and the part above the line is where the saltiness disappoints you later. Seal the container and put it in the refrigerator at or below 40°F.
Leave it in there between 1 and 4 hours for most chops. Two to four hours is the range most home grillers land on, and thin chops are fine with as little as 30 minutes. Thick chops want the full window, and an overnight soak of 8 to 12 hours works for pork that is about an inch thick. Past that, lean pork starts to pick up a cured, ham-like flavor and a softer, spongier texture.
Keep the container covered the whole time. A brine made ahead of time is fine and keeps for about three days refrigerated, covered, and you can make it the night before without touching the pork yet.
Step 4: Rinse and Dry Before Cooking
Lift the chops out, drain off the liquid, and blot the surface dry with paper towels. Rinsing is optional, and recipe writers disagree about it for a reason: a light rinse under cold water tones down a salty surface, while skipping it keeps more of the brine flavor and a slightly tacky glaze that browns beautifully.
My rule is to taste a tiny corner of one chop first. If it tastes properly seasoned rather than aggressively salty, skip the rinse and just pat dry. The drying matters more than the rinsing, because a wet surface steams instead of searing and you lose the crust.
Do not add more salt. The chop is already seasoned through the muscle, and a second layer of salt on the outside is how brined chops turn into salt blocks. Pepper, paprika, and a dry rub are fine, since none of them add significant saltiness.
Step 5: Cook and Check for Doneness
Brined meat cooks faster than unbrined meat, so start with a lower heat than you would use for a plain chop and let the thermometer, not the clock, call it done. For grilling, set up two zones, sear hard for 2 to 3 minutes a side, then move the chops to indirect heat and cook until the thermometer says so. For pan cooking, use a medium-hot skillet and finish in the oven at 375°F. Roasting at 400°F works well too. An air fryer at 400°F takes roughly 10 to 14 minutes for a 3/4-inch chop.
USDA guidance puts whole cuts of pork at a safe minimum internal temperature of 145°F, measured at the thickest part and away from the bone. Many home cooks pull at 150°F for a pink, moist center, and brined chops can go a couple of degrees further without drying out. Rest the meat 5 to 10 minutes before slicing so the juices stay in the chop instead of running across the board.
One rule worth repeating: the viral claim that you should never brine pork longer than 20 minutes does not hold up. Twenty minutes barely seasons the surface. The real limit is about 24 hours, and within a normal window of 1 to 12 hours you are working with a forgiving technique.
Common Mistakes to Avoid
- Brining far too long. Past 24 hours, lean pork turns noticeably salty and takes on a cured, ham-like texture. Stick to the thickness table, not to an all-day soak.
- Using too much salt. Half a cup of kosher salt in 4 cups of liquid is well past a brine and into curing territory. Measure it, and switch to table salt by weight rather than guessing by volume.
- Not dissolving the brine. Undissolved salt settles at the bottom of the container and hits the bottom chop with a heavy dose while the top one gets none. Use hot water for at least part of the liquid.
- Crowding the container. Chops packed tight and stacked on each other season unevenly. Use a wide container and lay them in a single layer, or brine in two batches.
- Skipping the refrigerator. A warm brine is a warm environment for meat, and a hot brine poured straight onto chops starts cooking the outside. Cool it down and keep it cold.
- Cooking by appearance. Color is a poor guide on brined pork because the sugar in the brine browns the surface early. Use an instant-read thermometer in the thickest part.
Two practical tips that help more than any extra spice: brine enough liquid to cover the chops with room to spare, since a shallow pool forces you to turn them mid-soak, and keep a marked time on the container so the hours count, not your memory.
Frequently Asked Questions
Do I need to brine pork chops?
Not strictly, but it is the cheapest way to fix the dryness most people complain about. Modern pork chops are very lean, so they lose moisture fast over high heat. A brine seasons the interior and holds water in the muscle. If your chops come out juicy with a simple salt and pepper seasoning, brining is optional for you. If they turn dry and chewy, it is the fix.
Should pork chops be rinsed after brining?
It depends on taste. Blotting the chops dry without rinsing keeps more brine flavor and gives you a tacky surface that browns well. A quick rinse under cold water helps when the chop tastes too salty on the surface. Either way, dry the chops thoroughly with paper towels before they hit the pan, since moisture blocks searing.
How long should pork chops brine in the refrigerator?
One to four hours covers most chops. Thin chops under three-quarters of an inch need only 30 to 60 minutes, chops around one inch want two to four hours, and chops thicker than one and a half inches need closer to eight. Overnight soaking works for pork up to about 24 hours, after which saltiness and a cured texture take over.
Can I use a brine with vinegar, wine, or juice?
Yes. Replace some or all of the water with apple juice, apple cider, white wine, or broth. Acidic liquids add tang and are common in pickling-style brines, so go easy on them and cut the sugar slightly to balance. Keep the salt ratio the same, dissolve the salt in hot liquid first, then cool the whole mixture before the pork goes in.
Can I reuse the brine after raw pork has been in it?
Discard it once raw pork has soaked in it. The liquid carries whatever was on the surface of the meat, and a cooked chop dipped into it reintroduces that contamination. Brine that has not touched raw meat can be covered and refrigerated for about three days before you add the pork. Making a fresh batch for every cook is the safest habit.
Does brining make pork chops better for grilling?
It is one of the biggest upgrades you can make for the grill. Brined chops are seasoned all the way through, tolerate the high heat of an open grate, and finish before you expect them, so pull them off the heat early and let the thermometer decide. Because the sugar in the brine caramelizes quickly, watch the sauce and the crust more closely than you would with plain chops.
Start With the Salt Ratio and Let the Clock Work
If you do one thing, mix 1/4 cup kosher salt and 1/4 cup brown sugar into 4 cups of water, cool it fully, and submerge four chops for two to four hours in the refrigerator. That single ratio scales to any batch, and the two-to-four-hour window covers nearly every chop you will buy at a market counter.
Pat them dry, skip the extra salt, and cook to 145°F with a thermometer rather than to a guess. Everything else on this page is a variation on those three moves.