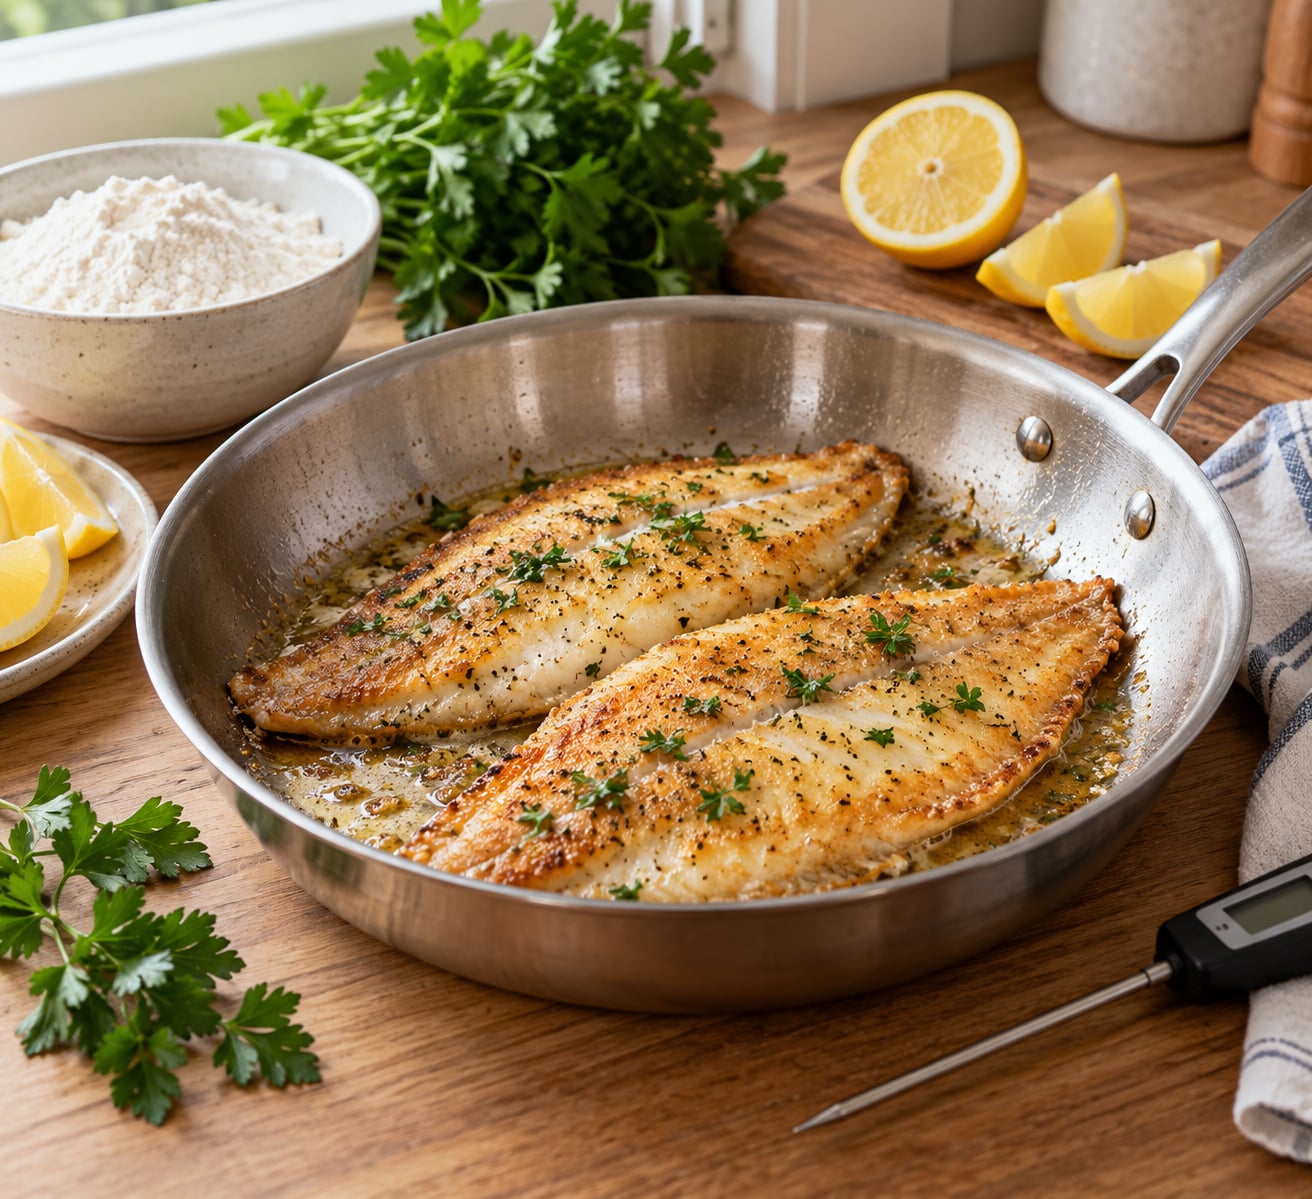
Thin flounder fillets take about 2 minutes a side, so learning how to cook flounder in a skillet is mostly about heat control and timing. Get a heavy skillet properly hot, dry the fillets twice, then leave them alone until they release on their own.
A full dinner lands on the table in 10 to 15 minutes, which makes flounder one of the fastest proteins on a weeknight. The whole recipe below works for beginners, and every doneness cue comes with a backup method in case you do not own a thermometer.
Table of Contents
- What You Need
- Step-by-Step: How to Cook Flounder in a Skillet
- Step 1: Prepare and Pat the Flounder Dry
- Step 2: Heat the Skillet and Oil
- Step 3: Cook the Flounder Without Moving It
- Step 4: Flip and Finish Cooking
- Step 5: Rest, Plate, and Serve
- Common Mistakes
- Tips
- Frequently Asked Questions
- How long does it take to cook flounder in a skillet?
- What temperature should flounder reach when cooked?
- Should I flour flounder before cooking it in a skillet?
- How do I know when flounder is done without a thermometer?
- Can I cook frozen flounder fillets in a skillet?
- How long can cooked flounder be stored in the refrigerator?
- Conclusion
What You Need
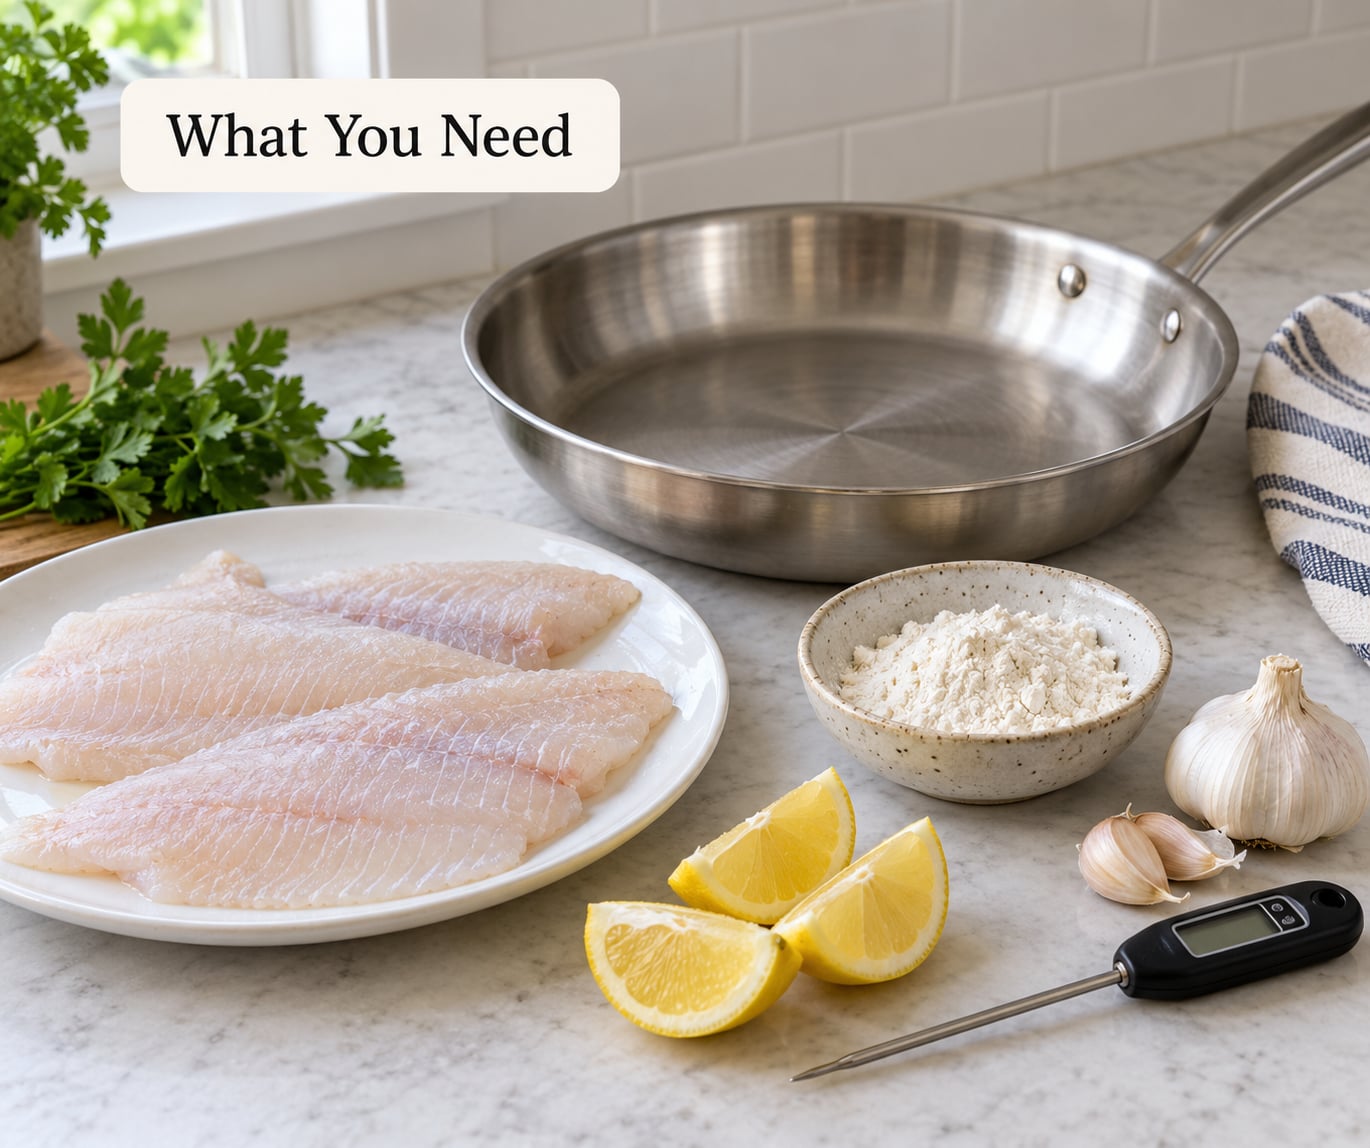
The ingredient list is short because flounder does nearly all its work in a hot pan. Everything else is seasoning, fat, or a finishing acid.
Flounder fillets: 4 fillets, each about 1/2 inch thick and 5 to 6 ounces (140 to 170 g) apiece. You can cook fewer and double the batches, but do not crowd the pan.
Salt and pepper: 1/2 teaspoon kosher salt and several grinds of coarse black pepper. Diamond Crystal or another fine-grain kosher salt seasons evenly; table salt is roughly twice as salty per pinch.
Flour for dredging: 1/2 cup (65 g) all-purpose flour in a shallow dish. This is optional. Cooks who skip it get a softer, cleaner-tasting fish, and rice flour works identically for a gluten-free version.
Neutral oil: 1 tablespoon (15 ml) canola, grapeseed, or avocado oil. Oil carries the heat to the fish and browns the flour without burning.
Unsalted butter: 2 tablespoons (28 g), added after the flip for basting and sauce.
Lemon: one, half squeezed for juice, half cut into wedges. Zest from the squeezed half is a good addition to the butter.
Fresh herbs: 2 tablespoons chopped parsley, chives, or dill. Capers, about 1 tablespoon, are an optional addition to the pan sauce.
As for equipment, a 10- to 12-inch heavy skillet is the one upgrade that matters. Stainless steel or cast iron heats more evenly than thin nonstick and gives you an even crust across the whole fillet. Nonstick is forgiving but tends to cook unevenly at the temperatures this method needs.
You will also want a fish spatula or the widest metal spatula you own, a plate lined with paper towels, an instant-read thermometer, and a shallow dish or a zip-top bag for dredging.
Decide on your coating before the pan goes on the stove. No coating suits a weeknight and a delicate texture, a light flour dusting gives the classic golden crust, panko adds a heavier crunch and takes a few extra minutes, and skin-on fillets render their own fat into a dark caramel crust. The method below covers all four.
Step-by-Step: How to Cook Flounder in a Skillet
Step 1: Prepare and Pat the Flounder Dry
Lay the fillets on a paper towel or a rack set over a plate and blot them dry on both sides. Then blot again. Cooks who do this twice get noticeably crisper fish than those who do it once, because surface moisture has to boil off before browning can start.
Run a fingertip along the center of each fillet and feel for the tiny bones some butchery leaves behind. Pat the fish dry while the skillet heats.
Season both sides with the salt and pepper right before the fish goes in. Seasoning early pulls more water out of the flesh, which works against you.
If you are dredging, tip the seasoned fillets into the flour and turn them so every face gets a thin coat. Shake off the excess. You want a matte, dusty surface, not a thick shell.
Step 2: Heat the Skillet and Oil
Set the skillet over medium-high heat and add the oil. Stainless and cast iron take a minute or two to get going, so start before you think you need to.
Wait until the oil shimmers and flows easily when you tilt the pan. If it is smoking, turn the heat down. Olive oil smokes too easily for this and turns bitter, so it is not a good choice here.
This is also the moment to think about splatter. Oil that is far too hot throws droplets, which is how home cooks end up with a forearm burn. Dry fish laid gently into hot-but-not-smoking oil is quiet.
Step 3: Cook the Flounder Without Moving It
Lower each fillet away from you into the skillet. Do not slide it across the pan, and do not nudge it once it lands. Moving the fish is what tears the crust and the fillet.
Cook time depends almost entirely on thickness, not on the number of fillets or the size of your pan. Use these as starting points, then trust the cues underneath:
- 1/4 inch (6 mm): 60 to 90 seconds per side.
- 1/2 inch (13 mm): about 2 minutes per side.
- 3/4 inch (19 mm): about 3 minutes per side.
- 1 inch (25 mm) and thicker: 3 to 4 minutes per side.
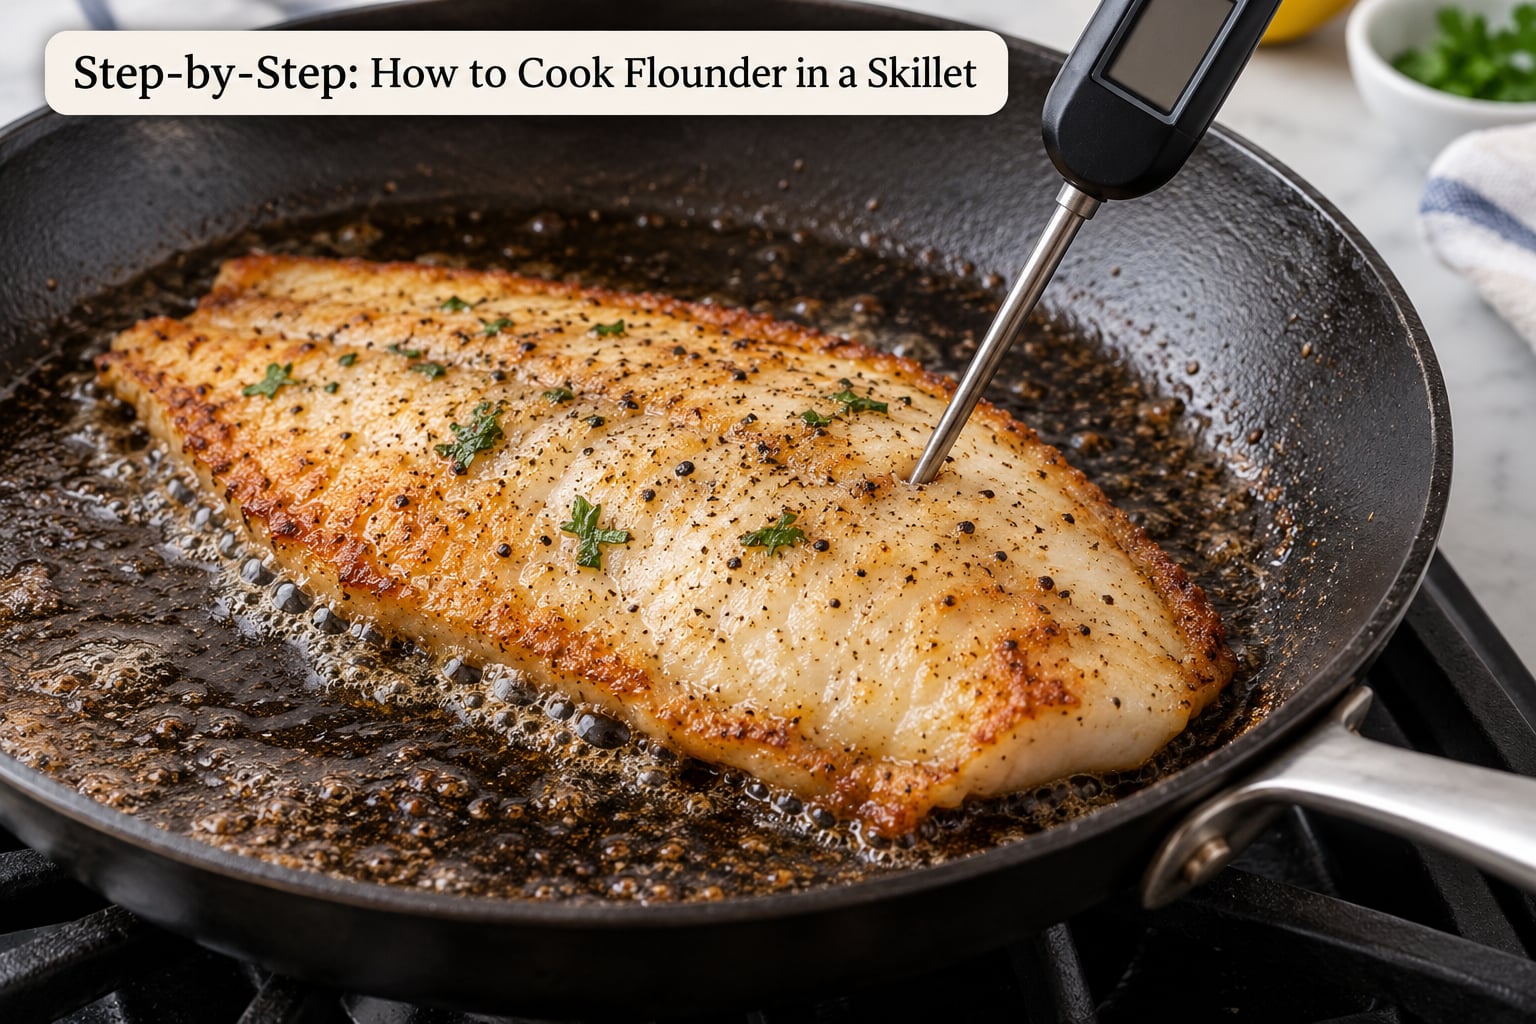
Three signals tell you the first side is nearly there. The edges turn opaque and the flesh firms up, the fillet stops looking translucent at the thin center, and a spatula slides underneath with no resistance at all. That last one is the reliable signal: the fish releases from the metal when the proteins have set.
Two fillets is the comfortable limit in a 12-inch skillet. Four fillets touch each other, the pan temperature drops, and the fish steams instead of searing. Cook in batches and keep the finished fillets on a warm plate.
If you have heard the 10-minute rule for fish, it does not apply here. That USDA visual guideline describes a thick fillet cooked to 145 F and staying on heat for ten minutes. Flounder is far thinner and reaches temperature in a fraction of the time.
Step 4: Flip and Finish Cooking
Slide the fish spatula fully under the fillet, all the way to the far edge, and turn it in one quick confident motion. A thin spatula used as a lever will snap the fillet in half. If the fish resists, it is not ready to flip yet, so give it another 30 seconds.
Drop in the butter with the lemon zest, if using, and tilt the skillet so the butter foams over the fish. Spoon the foaming butter over the fillet two or three times. This basting step cooks the top of the fish gently and builds the sauce in the pan at the same time.
Give the second side a minute or so. It usually cooks faster than the first because the butter is already hot and the fillet is partly set. Watch it more closely than the first side.
Slide the spatula under the fillet again and check for doneness. An instant-read thermometer pushed into the thickest part, entering from the side rather than straight down through the crust, should read 145 F (63 C). Fish continues cooking after it leaves the pan, so pulling it a few degrees below target is reasonable.
Step 5: Rest, Plate, and Serve
Rest the fillets for one to two minutes on the warm plate. That pause lets the juices settle back into the flesh instead of running out across the plate.
Leave the crust uncovered. A foil tent or a lid traps steam, and steamed crust goes soft.
Spoon the pan butter over the fish and add a squeeze of lemon. Capers stirred into the butter off the heat give it a salty, briny edge that flounder handles well.
For sides, keep them simple. Steamed or roasted asparagus, green beans, rice, mashed potatoes, or a salad of bitter greens all work, because the pan sauce already carries the salt and acid.
Common Mistakes
Most disappointing skillet flounder comes down to one of six problems, and each has a fix you can apply on the next attempt.
The fish sticks and tears. Three causes, in order of likelihood: the pan was not hot enough, the fillets were still wet, or the cook flipped too early. Heat the skillet fully before adding oil, dry the fish twice, and wait for the spatula to slide under without resistance. A fish stuck at the start will always rip.
The fillets break into pieces. That is a spatula problem or a crowding problem. Use the widest metal tool you have and support the whole fillet, cook two at a time, and flip once. Flipping twice is how a golden crust gets sanded off.
The crust is soggy. Moisture, steam, and stacking. Pat the fish dry twice, leave space between fillets, and cook one layer. If you are serving the fillets on top of each other, put a rack on the platter instead.
The fish is rubbery. Thin white fish has short muscle fibers and very little connective tissue, so it has no second chance. The window between done and overdone is roughly a minute at 2 minutes per side. Pull it early and let carryover cooking finish the job.
The browning is uneven. Either the pan was crowded or cold when the fish landed. Heat the skillet empty first, then add oil, then the fish. A refrigerated pan needs longer than a room-temperature one.
Frozen fillets steam and never crust. Thaw them overnight in the refrigerator rather than in hot water, blot them dry, and skip the flour or dust it very lightly. Frozen flesh carries surface ice that has to go before browning can happen.
Tips
Coating variations: no coating for the cleanest taste and fastest cleanup, a light flour coat for the classic golden crust, panko for a crunch that holds up to a sauce. Skin-on fillets go into a hot pan with a generous oil film and come out caramelized on both sides.
Seasoning ideas: lemon zest in the butter, a pinch of smoked paprika or Old Bay, garlic powder in the dredge, capers in the pan sauce, or a scatter of dill and chives over the finished plate.
Choosing flounder: at a market, look for fillets that smell of clean ocean air rather than sourness, look translucent and glossy, and sit flat rather than curled. Avoid flesh that is dull, dry at the edges, or has a gap between the layers. Ask the vendor when it was landed if you can, and buy it for the same day or the next.
Substitutions: the method transfers directly to sole, Pacific Dover sole, snapper, swai, rockfish, basa, branzino, catfish, and tilapia of similar thickness. Halibut and cod are thicker, so use the 3/4 inch or 1 inch times.
Storage and reheating: cooked flounder keeps in the refrigerator for 3 to 4 days at or below 40 F (4 C), covered loosely. Reheat in a skillet over low heat for a minute or two rather than in the microwave, which dries the fish out.
Frequently Asked Questions
How long does it take to cook flounder in a skillet?
Thin flounder fillets take about 10 to 15 minutes from pan to plate. That includes about 2 minutes per side for a 1/2 inch fillet, plus a minute of prep and a short rest. Quarter-inch fillets need only 60 to 90 seconds a side, while a 1 inch fillet needs 3 to 4 minutes per side. Pull the fish a few degrees before 145 F and let carryover cooking finish it.
What temperature should flounder reach when cooked?
The USDA safe minimum internal temperature for fish and shellfish is 145 F (63 C). Check the thickest part of the fillet with an instant-read thermometer, inserting the tip from the side so you do not punch through the crust. Because carryover cooking adds a few degrees after the fish leaves the pan, pulling it at about 140 F to 142 F is a good target.
Should I flour flounder before cooking it in a skillet?
It is optional. A light dusting of flour is what creates the classic golden crust and gives a sauced fillet something to hold onto. Skipping the flour gives you a softer, cleaner-tasting fish that cooks even faster, which many cooks prefer. Panko is the third option for a heavier crunch. If you dredge, shake off the excess so the coating stays thin.
How do I know when flounder is done without a thermometer?
Three cues work together. The fillet turns opaque all the way through and firms up at the edges, a fish spatula slides underneath with no resistance, and the flesh separates into flakes when you press gently with your finger. It should spring back slightly from light pressure. If the fish still looks glassy in the center, it needs another 30 seconds.
Can I cook frozen flounder fillets in a skillet?
You can, but thawing is better. Frozen fish releases surface ice, which steams instead of searing and leaves a soggy crust. Thaw the fillets overnight in the refrigerator, then pat them dry twice and cook them fresh. If you must cook from frozen, skip the flour, pat the fillets hard before adding them to the pan, and give them a minute more on each side.
How long can cooked flounder be stored in the refrigerator?
Cooked fish keeps for 3 to 4 days in the refrigerator at 40 F (4 C) or below, covered loosely so the crust can breathe. Refrigerate it within two hours of cooking. Reheat in a low skillet for a minute or two instead of using the microwave, which tends to make thin white fish rubbery. For longer storage, freeze it tightly wrapped for up to three months.
Conclusion
Start with the fillets, not the pan. Blot them dry twice, season both sides just before they go in, and heat the skillet until the oil shimmers without smoking.
Then leave the fish alone for about 2 minutes per side at 1/2 inch thick, flip once with a wide spatula, baste with butter and lemon, and confirm 145 F (63 C) in the thickest part. Golden edges and a spatula that slides underneath with no resistance are the cues that beat any clock.