How to make kimchi with market vegetables comes down to three things: fresh, crisp produce, salt measured at about 2% of the vegetables’ weight, and a chili paste you let ferment on the counter for a few days. The whole process takes about an hour of active work plus a week of waiting, and no cooking at all.
I make a jar most Saturdays from whatever came home from the market. The cabbage is the anchor, but radishes, carrots, scallions and whatever else looks sharp that morning all go in the same jar.
Table of Contents
- What You Need
- Vegetables from the market
- Pantry and paste ingredients
- Equipment
- How to Make Kimchi with Market Vegetables: Step-by-Step
- How to Make Kimchi with Market Vegetables: Salt and Ferment the Vegetables
- How to Make Kimchi with Market Vegetables: Make the Flavor Paste
- How to Make Kimchi with Market Vegetables: Make the Heat Match Your Taste
- How to Make Kimchi with Market Vegetables: Pack and Ferment the Vegetables
- Common Mistakes
- Why my kimchi is watery
- Why my kimchi is too salty
- Why the vegetables are mushy
- Why nothing is bubbling
- Why the jar is leaking or foaming
- Why the fish sauce flavor is overwhelming
- Salt type and botulism: what actually matters
- Ways to Use and Store Kimchi
- Ways to cook with it
- A fresh version for people who are not ready for sour
- Frequently Asked Questions
- Which vegetables work best for kimchi?
- Can I make kimchi without fish sauce?
- How long does homemade kimchi need to ferment?
- Why is my kimchi watery?
- Can I use cabbage, radishes, and carrots together?
- How should I store kimchi after it has fermented?
- Conclusion
What You Need
Build the batch around 2 to 3 pounds of vegetables. That fills one quart jar with enough headroom, and it is the size most beginners should start with.
Vegetables from the market
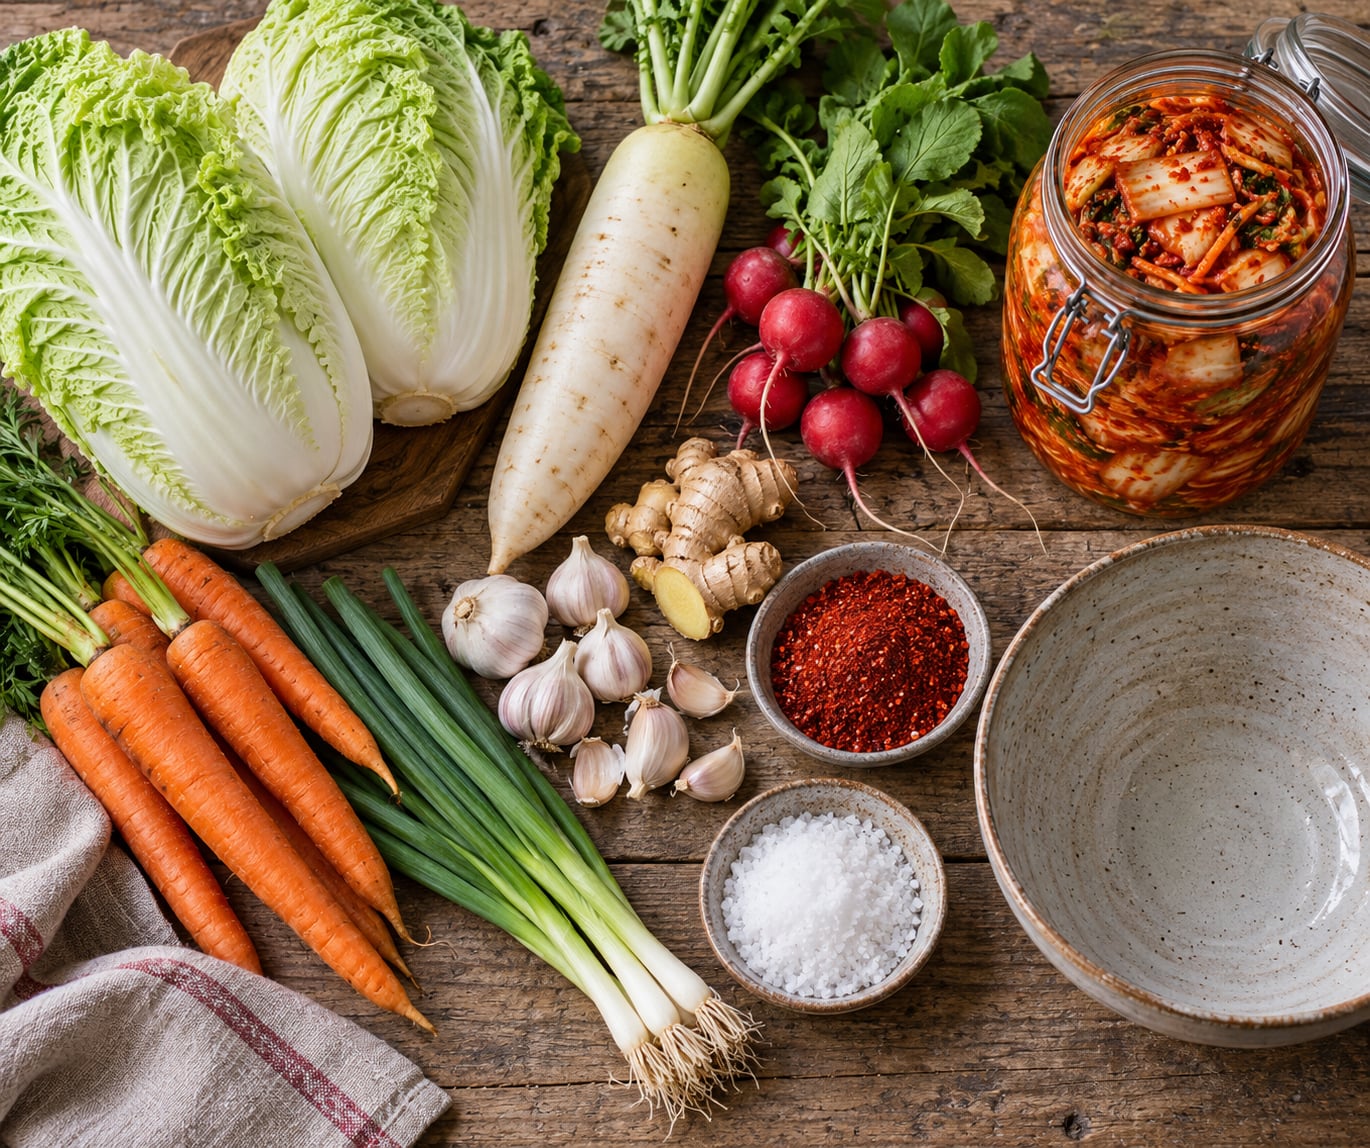
- 1 small napa cabbage (about 1.5 pounds), quartered and cut into 2-inch pieces
- 4 to 6 radishes (daikon or any crisp market radish), sliced into thin matchsticks
- 2 carrots, peeled and cut into thin matchsticks
- 4 to 6 scallions, whites and greens separated, cut into 1-inch lengths
- Optional: 1 green onion bunch, a handful of radish greens, or 2 green garlic stalks
Pantry and paste ingredients
- Non-iodized salt (kosher or sea salt), about 2% of the vegetable weight by weight
- 4 to 6 tablespoons gochugaru (Korean chili flakes)
- 1 tablespoon minced fresh garlic, plus 4 to 6 extra cloves
- 1 tablespoon grated fresh ginger
- 3 tablespoons fish sauce
- 1 tablespoon rice vinegar
- 1 tablespoon sugar, or half a grated Asian pear
- 1 to 2 tablespoons salted shrimp paste (saeujeot), optional
- 1 teaspoon glutinous rice flour and 2 tablespoons water, optional but traditional
Equipment
- Kitchen scale
- Two large bowls and a colander
- A one quart glass jar with a lid (Mason jar or fermentation jar)
- A small weight that fits inside the jar, or a sealed zip bag of brine
- Kitchen gloves for mixing the paste
No need to sterilize the jar. A clean jar rinsed in hot water is fine, since the salt and acidity do the preserving.
How to Make Kimchi with Market Vegetables: Step-by-Step

Salt the cut vegetables for two hours, rinse them three times to pull off the excess salt, then coat them in a paste of gochugaru, garlic, ginger, fish sauce and rice vinegar. Pack everything into a clean quart jar with a weight on top and leave it on the counter for two to seven days, tasting daily, until it smells sour and fizzes.
How to Make Kimchi with Market Vegetables: Salt and Ferment the Vegetables
Weigh the cut vegetables on the kitchen scale and write the number down. For every 100 grams of vegetables, use 2 grams of salt. A 1-kilogram batch needs 20 grams of salt, which is a little under a tablespoon.
Measure the salt, sprinkle it over the vegetables in the large bowl, and put on gloves. Massage everything for 4 to 5 minutes until the cabbage leaves soften and shine and a layer of liquid starts pooling at the bottom of the bowl.
Pack the salted vegetables into the second bowl, cover with a plate or a smaller bowl weighted with something heavy, and let it rest for 2 hours at room temperature. This softens the cabbage without cooking it, and the liquid that collects is the start of your brine.
Rinse the vegetables three times under cold running water, lifting out a piece to taste between rinses. The goal is mild, not neutral. If the raw vegetables still taste like a lightly salted salad, rinse once more. Then let them sit in the colander for 20 minutes to drain, and press each handful firmly between your palms to squeeze out the excess water.
The squeezing is the step people rush, and skipping it is the most common reason homemade kimchi turns out watery and bland. Get as much liquid out as you can without crushing the vegetables.
How to Make Kimchi with Market Vegetables: Make the Flavor Paste
Put the gochugaru in a bowl and add the minced garlic, grated ginger, fish sauce, rice vinegar, sugar, and shrimp paste if you are using it. Add 2 tablespoons of the brine you saved from the vegetables.
Mix with gloved hands until it forms a thick, damp paste with no dry pockets of chili. Scrape down the sides of the bowl twice so everything is incorporated.
How to Make Kimchi with Market Vegetables: Make the Heat Match Your Taste
Start at 3 tablespoons of gochugaru for a mild kimchi, 4 to 5 tablespoons for standard heat, and 6 tablespoons plus a teaspoon of the chile seeds from the bottom of the gochugaru bag for a genuinely hot version. Gochugaru is not interchangeable with standard red chili flakes; Korean chili flakes are milder, more aromatic and less sharp.
If you cannot find gochugaru, blend dried arbol chiles or New Mexico red chiles in a coffee grinder and use about 1 tablespoon in place of every 2 tablespoons of gochugaru. Add a small pinch of sugar to round out the heat.
How to Make Kimchi with Market Vegetables: Pack and Ferment the Vegetables

Add the paste to the drained vegetables and massage it through with gloved hands until every piece is coated and the bottom of the bowl is evenly colored. Work from the bottom up; the first minute is where the seasoning either lands on everything or clumps in one corner.
Pack the seasoned vegetables into the jar a handful at a time. Press each layer down firmly with a spoon or a clean glass weight to push out air pockets, since trapped air is what causes jar lids to leak or pop.
Leave 1.5 inches of headroom above the vegetables. Then press a small weight directly on top of the kimchi so it stays submerged, and add brine from the bottom of the mixing bowl until the liquid level is a quarter inch above the vegetables. A zip-top bag filled with brine and sealed works well if your jar is too narrow for a weight.
Set the jar on a plate or in a bowl, out of direct sunlight, and leave it at room temperature. Somewhere between 68 and 75°F is ideal; a cool kitchen slows things down rather than ruining them.
From day two onward, open the jar once a day to let out a hiss of gas, then push the vegetables back down if they have floated up. Expect visible bubbles and a sour, fizzy smell by day three.
Start tasting at day three with a clean spoon. The kimchi is ready when it is pleasantly sour and fizzy rather than only salty. Some people stop at two days for a fresh, barely sour kimchi, while others ferment for two weeks or more for a deeply tangy result. Kitchen temperature decides most of this.
When the flavor is where you want it, spoon the jar into the refrigerator and close it. The kimchi continues to ferment slowly there, so taste it every week or two and eat it within a few months for the best texture.
Common Mistakes
Almost every disappointing batch traces back to one of four things: salt that was not rinsed off, water left in the vegetables, air trapped in the jar, or a ferment that got cold and stalled.
Why my kimchi is watery
You did not squeeze the vegetables hard enough after rinsing them, or you packed the jar loosely. Press each handful firmly and repack the jar in tight layers. The next time, weigh the drained vegetables after squeezing; they should feel dry and heavy for their size.
Why my kimchi is too salty
The cabbage was under-rinsed, or the salt sat for the full two hours without a third rinse. It is fixed during mixing: add a tablespoon of unsalted rice vinegar or a teaspoon of sugar, then dilute by adding a handful of fresh salted cabbage that you rinsed extra thoroughly.
Why the vegetables are mushy
The batch sat far too long, or the room was too warm. Mushy kimchi cannot be revived. Next time, refrigerate by day three if your kitchen runs warm, and slice the cabbage thicker so it holds up to the salt draw.
Why nothing is bubbling
First, check that you used non-iodized salt; iodized salt can stall a ferment. Second, check that the vegetables sit fully under brine, since exposed cabbage will not ferment safely. Third, consider the room temperature. A cold kitchen needs two weeks or more, so a quiet jar on day four in a 60°F room is normal and not a failure.
Why the jar is leaking or foaming
Carbon dioxide from a working ferment pushes the lid. Burp the jar daily, keep two inches of headroom instead of packing to the very top, and always set the jar on a plate. If the liquid level drops below the vegetables, top it up with plain water at a 2% salt concentration, which is about 10 grams of salt per cup.
Why the fish sauce flavor is overwhelming
Fermentation concentrates every flavor, so what tastes balanced on day one turns fishy by day five. Cut the fish sauce to 1 tablespoon next time, or use tamari for a gluten-free version, and pull the jar into the refrigerator a day earlier than planned.
Salt type and botulism: what actually matters
Use kosher or sea salt, never iodized table salt. Beyond flavor, home fermentation safety comes from three conditions: salt at roughly 2% of the vegetable weight, vegetables fully submerged under liquid, and an acidic environment that the ferment itself creates.
Clostridium botulinum cannot grow under those conditions. Keep everything submerged, and if you see a bulging lid, a foul smell that is more rotten than sour, pinkish or orange discoloration where the surface meets the air, or fuzzy mold, discard the whole jar rather than skimming the top. Eating a few bites of suspicious fermented food is not worth the risk.
Ways to Use and Store Kimchi
Refrigerated kimchi keeps for several months, and it stays good as long as it smells sour rather than rotten. Some people find it easier to eat once it stops fizzing entirely, around a week or two in the fridge.
Store the jar upright on a plate, sealed, away from raw meat. Pull out only what you plan to eat and push the rest back under the brine, since anything left above the liquid line dries out and can mold.
Ways to cook with it
- Fried rice: the classic. Chopped kimchi, day-old rice, a fried egg, and a spoon of sesame oil on top
- Pancakes: blend kimchi, flour, scallions, and an egg into a batter and fry until crisp
- Soup and stew: add a handful to a pork or tofu stew in the last ten minutes so the heat does not kill the tang
- Noodle bowls: ramen, soba, or rice noodles topped with kimchi and a soft egg
- Sandwiches and burgers: a layer of sour kimchi cuts through rich grilled beef
- Scrambled eggs: sautéed first, then added back into the pan with a splash of sesame oil
A fresh version for people who are not ready for sour
Slice 6 radishes and 2 carrots into thin matchsticks, salt them for 30 minutes, rinse twice, then dress with 1 tablespoon gochugaru, 1 teaspoon fish sauce or soy sauce, and a pinch of sugar. This is a quick salted radish dish that shares the kimchi profile but needs no fermentation.
Frequently Asked Questions
Which vegetables work best for kimchi?
Napa cabbage is the classic base because its thin, crinkly leaves absorb brine quickly. Daikon radish, carrots, and scallions are the standard supporting cast because they hold their crunch through fermentation. Cucumbers turn soft, so add them only if you like a softer texture. Kohlrabi, radish greens, green garlic, and fresh fennel all work too, chopped small and mixed in with the cabbage.
Can I make kimchi without fish sauce?
Yes. Replace the fish sauce with an equal amount of tamari, a vegetarian mushroom seasoning, or a mix of light soy sauce and a spoonful of miso for depth. The ferment supplies the tang, so the result is milder and slightly less funky than a traditional batch. Skip the salted shrimp paste as well if you are avoiding shellfish.
How long does homemade kimchi need to ferment?
Plan on 2 to 7 days at room temperature for a lightly sour kimchi, and up to two weeks or more for a deeply tangy one. A warm kitchen between 68 and 75°F ferments fastest, while a cool room can double the time. Taste daily with a clean spoon starting on day three and move the jar to the refrigerator once the flavor is where you like it.
Why is my kimchi watery?
The vegetables release water during salting and fermentation, and any moisture left in them at packing time makes the problem worse. Rinse three times, squeeze each handful firmly in the colander, and press the seasoned vegetables down hard in layers so no air pockets remain. If the jar is still loose, pack it tighter and keep a weight on top so everything stays under the brine.
Can I use cabbage, radishes, and carrots together?
That combination is the standard mix in most home kimchi recipes. Napa cabbage supplies the body and absorbs the seasoning, radishes and carrots bring crunch and mild sweetness, and scallions add sharpness. Cut the radishes and carrots into thin matchsticks so they salt at the same rate as the cabbage, and keep all three at roughly equal weight for an even ferment.
How should I store kimchi after it has fermented?
Move the jar straight to the refrigerator once the flavor is right and close it tightly. Keep the vegetables submerged under the brine, and pull out only the amount you are about to eat. Expect it to keep for several months, though it will continue to ferment slowly and slowly get more sour, so taste it every week or two.
Conclusion
Start with the freshest cabbage you can find, weigh your vegetables, and use 2% of that weight in non-iodized salt. Rinse three times, squeeze until the pieces feel dry, and mix the gochugaru paste in with gloves so nothing clumps at the bottom of the bowl.
Pack the jar tight, keep everything under brine, and burp it daily. Taste from day three and stop when it tastes sour rather than only salty. Once it is where you like it, move it to the refrigerator and eat it through the month.