Blind baking means baking an empty pie shell before the filling goes in, and doing it properly takes three things: cold dough, even pressure across the whole shell, and a final few minutes uncovered. Bake at 425°F for about 15 to 20 minutes with weights, then pull the weights and parchment and bake 5 to 10 minutes more until the base looks dry and lightly golden. Most soggy, shrunken, or hollow crusts trace back to skipping one of those stages.
The whole process takes maybe 45 minutes including chill time, and most of that is hands-off. This matters most for custard and cream pies — pumpkin, pecan, key lime, lemon meringue, banana cream, coconut cream, quiche, fruit tarts — where the filling is either wet enough to soak through raw pastry or never cooked at all.
Table of Contents
- What You Need
- Step-by-Step: How to Blind Bake a Pie Crust Properly
- 1. Chill the pie dough before rolling
- 2. Roll and fit the dough into the pie plate
- 3. Dock the crust and protect the edges
- 4. Add pie weights without shifting the dough
- 5. Bake the weighted crust until the edges set
- 6. Remove the weights and bake until golden and crisp
- 7. Cool the crust before adding the filling
- Common Mistakes
- Frequently Asked Questions
- At what temperature do I blind bake my pie crust?
- What happens if you blind bake without weights?
- Can I blind bake a pie crust without pie weights?
- How long do I let a blind baked crust cool before filling it?
- How do I know when a pie crust is baked enough?
- Conclusion
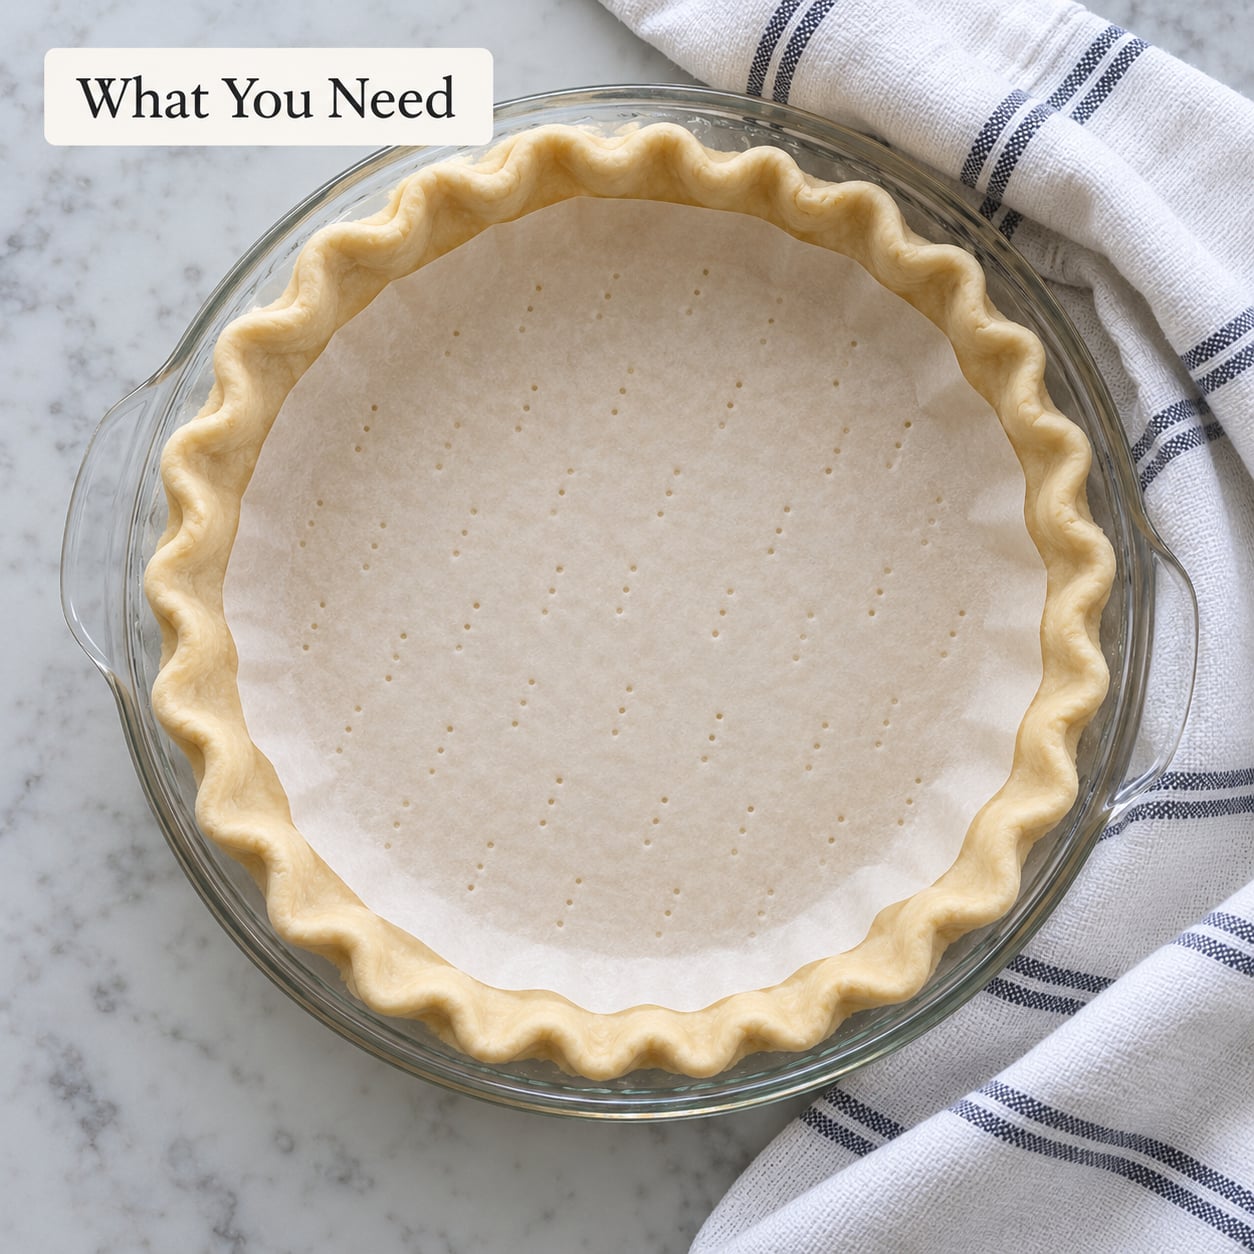
What You Need
You need a pie plate, a rolling pin, a fork, and something to weigh the shell down. Everything else is a substitute. Set the plate on a baking sheet so that if anything spills, it spills onto the sheet rather than the oven floor.
For weights, in order of what I reach for:
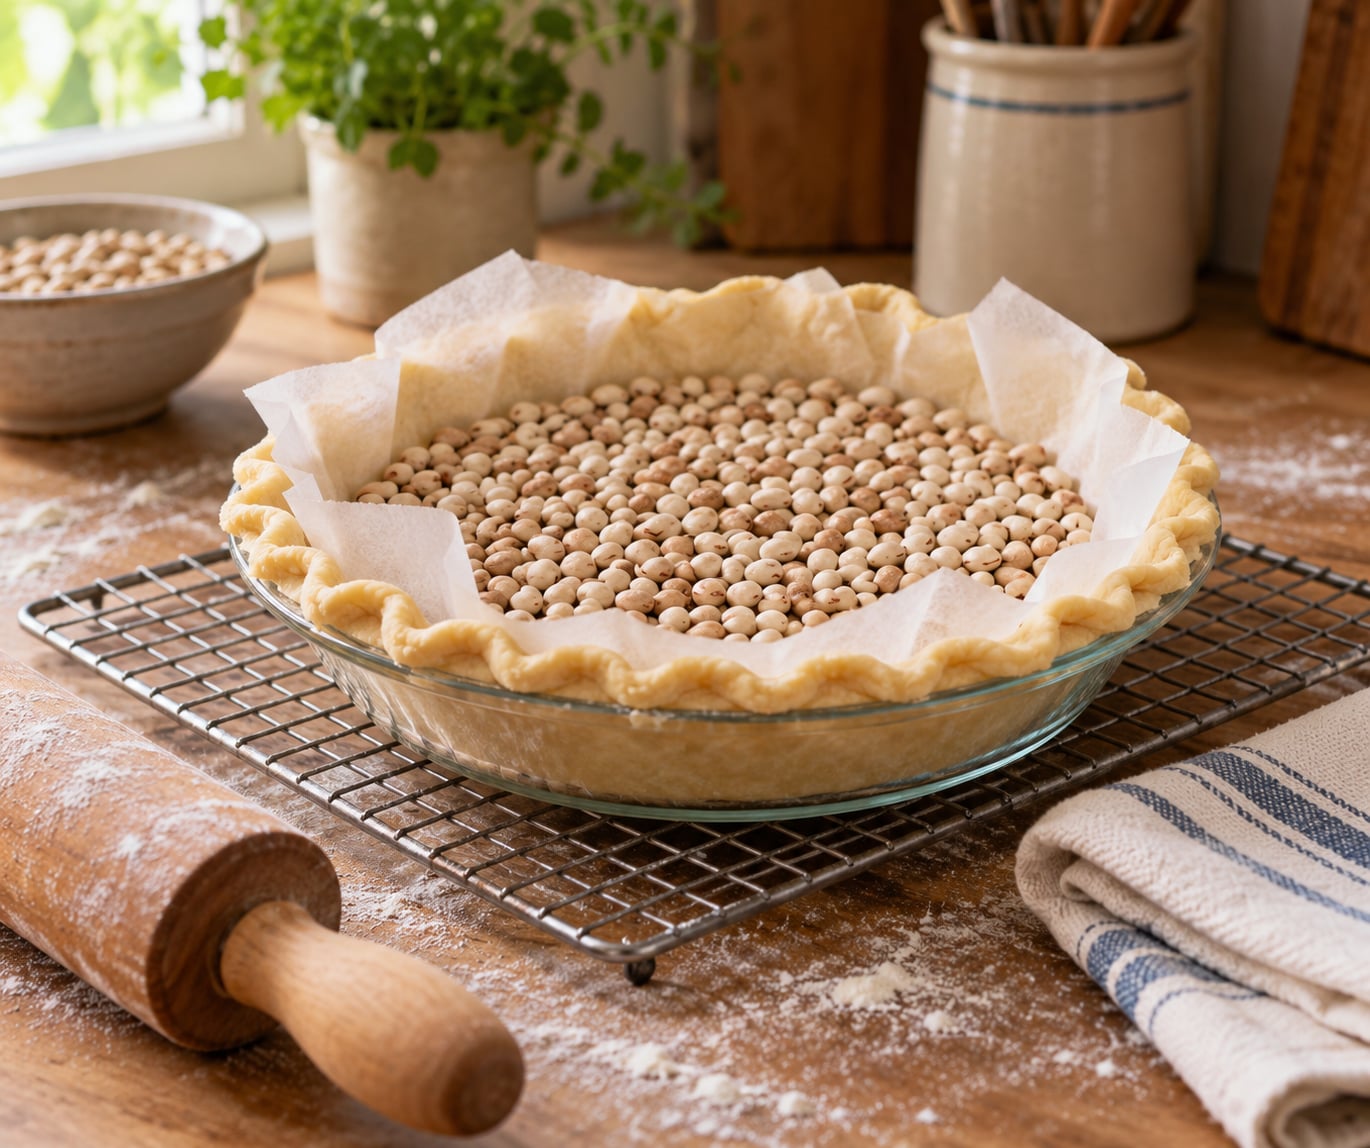
- Dried beans — the best pantry option. Fill the shell 3/4 of the way up the sides so the weights press the dough against the pan all the way around.
- Rice — works the same way, and it is cheap enough that you do not mind dedicating a jar to baking.
- Ceramic pie weights or pie chains — these sit low and leave the sides exposed, so they do less work than beans on a deep-dish shell.
- Granulated sugar — an unconventional one, but it works and it can be reused. It also toasts during the second bake and smells good.
Whatever you use has to be dry. Damp weights create steam, and steam is the enemy here.
For the liner, parchment is the familiar choice because you can crumple it and reuse it. Aluminum foil is the better choice in my book: it molds to the corners of the pan instead of bridging over them, which is where pools of liquid like to sit. If you use foil, crimp it up the sides a little higher than the rim so it stays put.
Set a rack in the lower-middle position and heat the oven to 425°F. A metal plate conducts heat better than glass or ceramic, which is why many bakers favor it for a crisp base. Glass works, it just runs cooler and wants a few extra minutes.
Step-by-Step: How to Blind Bake a Pie Crust Properly
1. Chill the pie dough before rolling
Cold dough resists shrinking. Warm dough is sticky and slack, and it stretches as you handle it, and stretched pastry springs back in the oven and pulls away from the sides of the pan. That is the single most common reason a pie crust shrinks.
Refrigerate the dough at least 2 hours before you roll it. For a crust you want to hold a crisp decorative edge, 2 hours in the freezer works even better — cold, firm dough holds a crimp under heat.
You know it worked when: the disc is firm enough to lift without bending or sticking to your fingers, and it cracks rather than smears when you start the roll.
2. Roll and fit the dough into the pie plate
Roll to an even 1/8 inch, about 2mm. You are aiming for a thickness you could see your thumbnail through — thick walls bake into a hard, pale rim, and thin spots burn before the middle finishes.
Lift the dough by the flat end, drape it over the rolling pin, and unroll it onto the plate so it lands without stretching. Press it into the center and up the sides with your fingertips, working outward from the middle. Do not push it down into the corners with force; let the dough relax into the curve instead.
Tuck the excess pastry underneath itself so the edge sits under the rim, and that gives you a thicker band of dough to crimp. It also creates a double layer that holds its shape better than a single thin rim.
You know it worked when: no dough is visible stretching thin up the sides, and the overhang is even all the way around.
3. Dock the crust and protect the edges
Prick the base all over with a fork, working in tight rows so the holes are evenly spaced and you cover the entire floor. This lets steam escape so the crust does not puff up into a dome when the weights come out.
Trim the rim to about 1 inch of overhang if you have not already tucked it under. Leave a little pastry exposed around the edges, because the exposed band is what sets the shell’s structure while the base is still cooking.
You know it worked when: the base is dimpled everywhere, with no smooth untouched patches between the holes.
4. Add pie weights without shifting the dough
Press your parchment or foil circle down into the base so it lies flat against the dough, then fill with weights. Tuck the paper up the sides first so the weights rest against the wall of the shell rather than sliding toward the center.
Fill the weights to about 3/4 the height of the sides. If you only cover the floor, the walls are free to slump inward and the shell bakes unevenly.
Slide the plate onto the hot baking sheet and into the oven immediately. Every minute the shell sits at room temperature is a minute of slackening dough.
You know it worked when: the liner is flat against the base with no tenting or air pockets, and the weights hold the sides against the pan.
5. Bake the weighted crust until the edges set
Bake at 425°F for 15 to 20 minutes with the weights in place. Look at the exposed rim: when it has gone pale golden and no longer looks translucent or raw, the shell has enough structure to stand up without support.
Pay attention to the difference between the rim and the base. The rim browns first because it is thin and sits at the hottest part of the shell. The base is insulated by the liner and the weights, so it lags well behind — that lag is exactly why you need the second stage.
If your rim is already dark brown at this point, move the pie to the lower rack or tent it loosely with foil. Edges burning before the bottom cooks is a common problem, and it is a heat-distribution problem, not a recipe problem.
6. Remove the weights and bake until golden and crisp
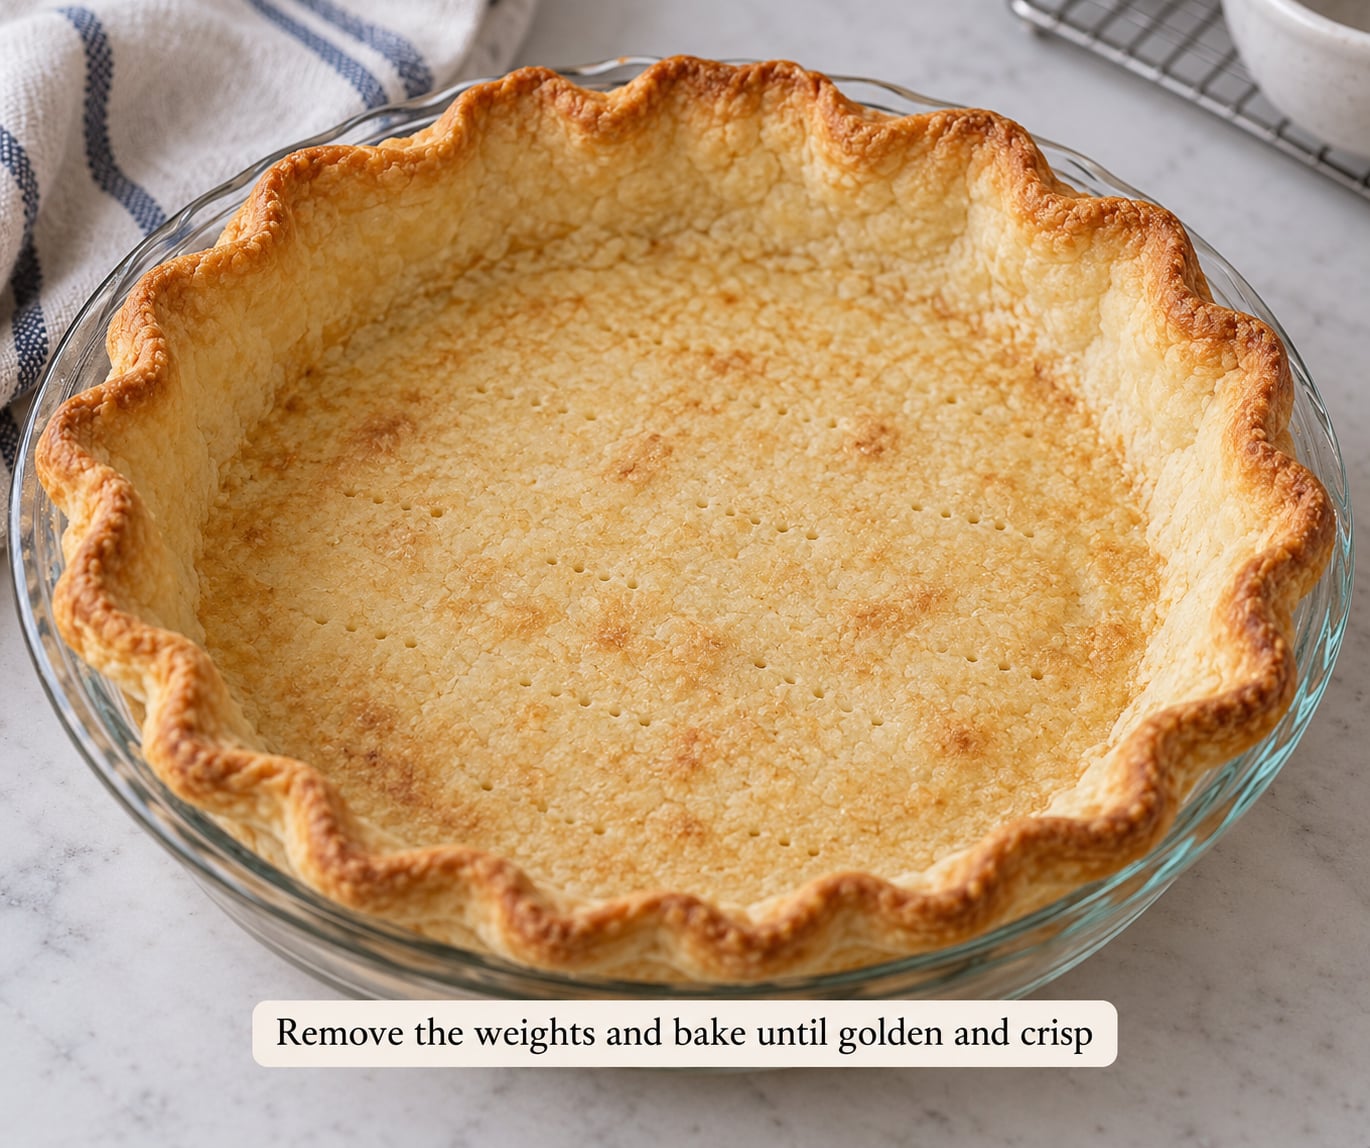
Carefully lift out the parchment and weights, using oven mitts and working from the edge so the baked rim does not catch. If the liner sticks, leave it in place and bake over it — baked-on paper is far better than tearing a hole in the bottom of your shell.
Put the crust back in the oven for 5 to 10 minutes. You are looking for a base that looks matte and dry with a light golden tone across the whole surface, including the center. Raw dough looks slightly darker and damp where it is still wet, and it often has a faint translucent quality you can spot before anything else.
Run a finger across the center of the base. If it feels soft and cool rather than firm and just-warm, give it another two or three minutes. The crust should read as dry all the way through when you tap it with your knuckle.
7. Cool the crust before adding the filling
Let the shell cool on a wire rack for at least an hour before filling a custard pie. Filling poured into a warm shell melts the butter in the dough, which is how you end up with a flat, greasy bottom and a leak down one side of the plate.
The exception is a meringue, which goes onto a hot shell so the sugar in the meringue melts into the top of the crust and bonds to it.
For a fruit pie filling that you are cooking, cool the shell fully. For a cooked custard that finishes in the oven, a slightly warm shell is fine. Bakers regularly bake a shell a day ahead and keep it in an airtight container at room temperature.
Common Mistakes
The bottom is soggy. The shell went into the filling before it was fully dry, or it did not get enough uncovered time. Also check your timing: a store-bought refrigerated crust runs faster than homemade because it has less water to evaporate, so it usually needs closer to 12 to 15 minutes with the weights rather than 20.
The crust shrank away from the sides. The dough was stretched rather than eased into the plate, or it was not cold enough. Chill longer, and if the shell has already been shaped, 10 to 15 minutes in the freezer sets it up for the bake.
The decorative crimp melted flat. Usually too little dough in the rim, or a rim that is too thin. The tuck-under technique gives you a doubled band that survives the heat, and the freezer trick does the rest.
The crust puffed into a dome after the weights came out. You skipped docking, or docked too lightly. Prick the base again with a denser pattern before the second bake.
The edges browned while the base stayed pale. That is the oven’s top element doing too much work. Move the pie to a lower rack for the second stage and tent the rim with foil if it is close to done.
The parchment lifted and the dough moved with it. Cut it to fit the base rather than using a full sheet, and press it into the corners with your hands before adding the weights.
One more note for anyone above about 3,000 feet: water boils below 212°F there, so a shell can dry out before it browns properly. Add a couple of minutes to the uncovered stage and watch color rather than clock time.
Frequently Asked Questions
At what temperature do I blind bake my pie crust?
425°F is the standard temperature for blind baking a pie crust, and it is where most home bakers should start. Bake with the weights in for 15 to 20 minutes, then remove them and bake 5 to 10 minutes more at the same temperature. The reason for the high heat is structure: the rim needs to set and brown quickly so the shell can stand on its own once the weights are gone.
What happens if you blind bake without weights?
Without weights, the base puffs up as steam forms under the dough, and that puff collapses into hollow spots when the crust cools. The sides often slump inward at the same time because nothing presses them against the pan. Docking alone reduces puffing but does not support the shell, so it is a partial fix rather than a substitute.
Can I blind bake a pie crust without pie weights?
You can, and it works better than most people expect. Dock the base thoroughly, use parchment or foil, and bake at 425°F. Expect a slightly thinner, less even bottom and more risk of buckling. If you have dried beans or rice in the pantry, use them instead, and reserve the no-weights version for shallow shells and shallow fillings.
How long do I let a blind baked crust cool before filling it?
At least 60 minutes on a wire rack for custard, cream, and fruit fillings poured in cold. A warm shell melts the butter in the dough, which gives you a greasy, flat bottom and a leak down the side of the plate. The exception is a meringue topping, which goes onto a hot shell so the sugar melts and bonds to the crust.
How do I know when a pie crust is baked enough?
Color and feel beat the clock. The base should look matte and dry with a light golden tone all the way to the center, with no damp or translucent patches. Press a knuckle against the center of the base: it should sound hollow and feel firm, not soft or cool. For a par-baked crust you plan to fill with a cooked filling, stop a minute or two earlier and let it finish on the rack.
Conclusion
Start tonight with a shell you chill for a full 2 hours before you roll it. Everything after that is follow-through: dock the base, weight it evenly to three-quarters of the side height, bake at 425°F with the weights in, then give it those last 5 to 10 minutes uncovered until the base looks dry and matte.
Once that shell comes out looking right, keep the routine and change the filling. A crisp, stable base is the foundation every custard, cream, and fruit pie in a market bakery is built on.