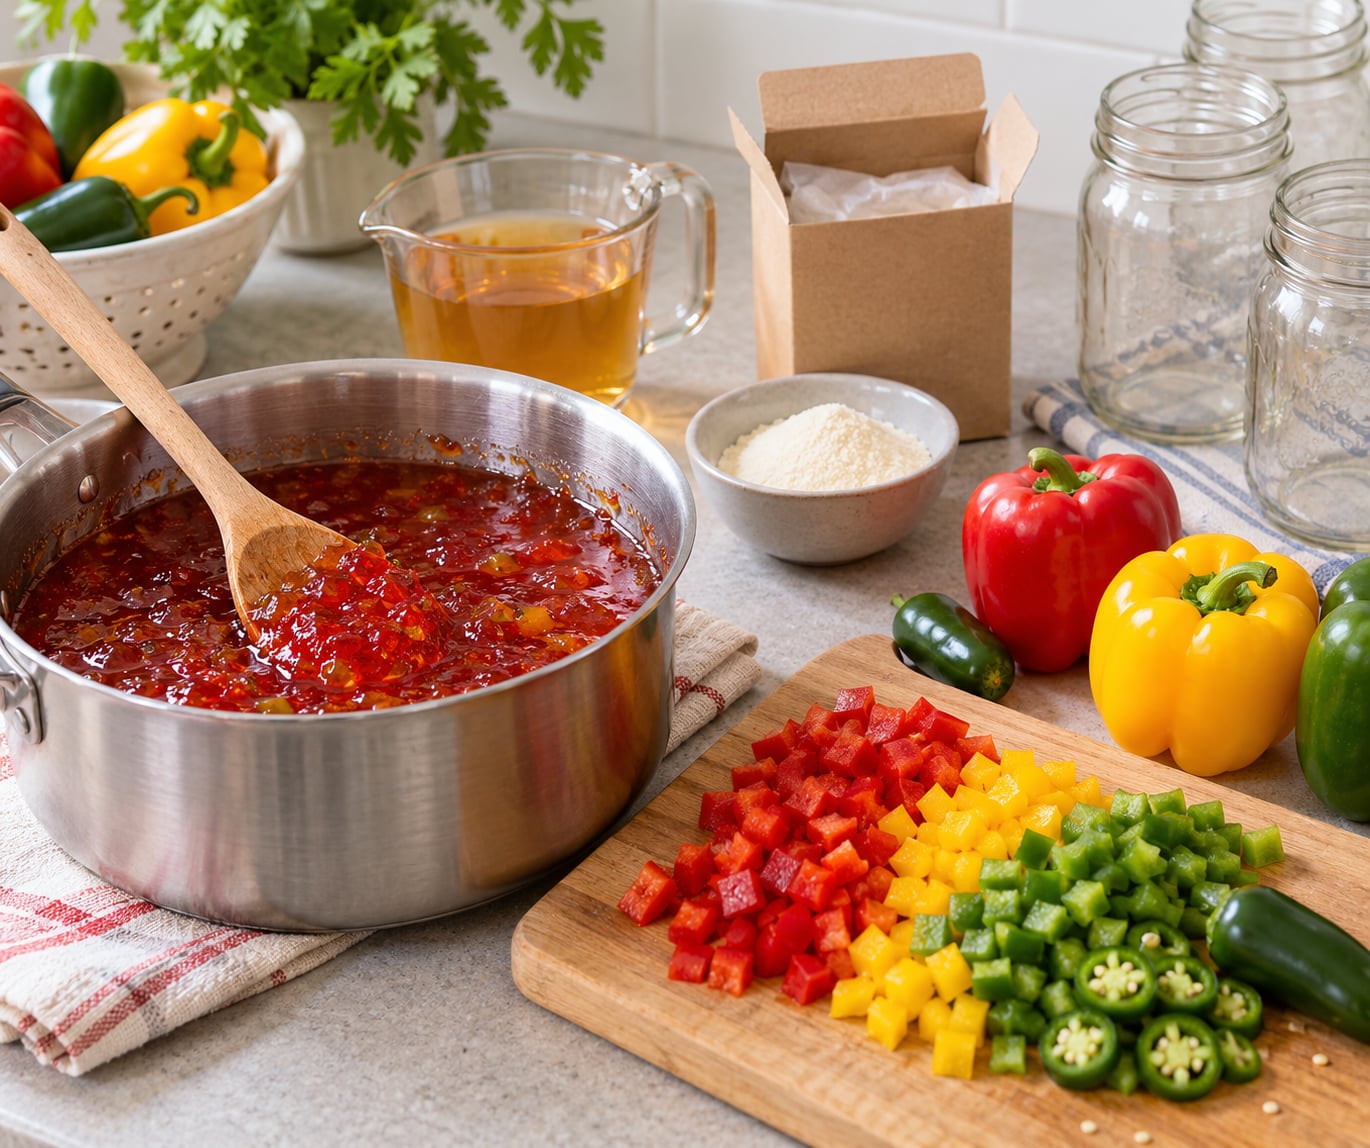
Pepper jelly is a sweet-and-spicy preserve made by cooking finely chopped sweet and hot peppers with cider vinegar, sugar and pectin until it hits a full rolling boil, then water-bath canning it into sealed jars. Learning how to make pepper jelly from scratch takes about 50 minutes start to finish and yields roughly six 8-ounce jars. The whole batch boils in one pot, so it fits comfortably in a home kitchen.
I make this every August when the jalapenos come in faster than I can use them. One batch turns into jars that sit in the pantry until Christmas, and the confetti of red, yellow and green pepper suspended in the gel is the part people ask about every single time.
Last tested for October 2026.
Table of Contents
- Quick Look: Homemade Pepper Jelly at a Glance
- What You Need for How to Make Pepper Jelly from Scratch
- The peppers
- The vinegar, sugar and pectin
- The canning equipment
- What to have on hand but not in the pot
- Step-by-Step
- Step 1: Wash and heat the jars
- Step 2: Chop the peppers and wear gloves
- Step 3: Get the canning water going
- Step 4: Measure the pepper liquid that collects
- Step 5: Combine peppers and vinegar
- Step 6: Add the pectin and sugar
- Step 7: Hit a full rolling boil for one minute
- Step 8: Test the set before you fill the jars
- Step 9: Skim and fill the jars
- Step 10: Apply lids and screw bands
- Step 11: Water-bath process the jars
- Step 12: Check the seals
- How to Get the Right Jelly Texture
- Choosing the Peppers for Your Flavor
- Which Vinegar to Use and Why You Cannot Reduce It
- Which Pectin to Use
- Common Mistakes
- How to Fix Pepper Jelly That Did Not Set
- What to Do With Jelly That Still Will Not Set
- How to Tell When the Jelly Has Set
- Water-Bath Processing Times and Altitude
- How to Keep Peppers from Floating in the Jar
- Using Surplus Peppers and Scaling a Batch
- Labeling Jars for Gifts and Markets
- Storage and Shelf Life
- Three Variations to Try
- Frequently Asked Questions
- Can I make pepper jelly without pectin?
- Which peppers are best for a sweet pepper jelly?
- How do I know when pepper jelly has set?
- Can pepper jelly be canned for shelf storage?
- How hot does jalapeño pepper jelly become?
- How long does homemade pepper jelly last?
- Conclusion
Quick Look: Homemade Pepper Jelly at a Glance
| Prep time | 20 minutes |
|---|---|
| Cook time | 30 minutes |
| Total time | 50 minutes, plus cooling |
| Yield | About 6 half-pint (8-ounce) jars |
| Heat level | Medium, adjustable by pepper choice |
| Pectin type | Powdered fruit pectin, one 1.75-ounce box |
| Shelf life | 18 months to 2 years sealed; 2 to 3 weeks refrigerated after opening |
| Difficulty | Easy, but the set test is not optional |
If you want to skip straight to the method, jump to the step-by-step instructions.
What You Need for How to Make Pepper Jelly from Scratch
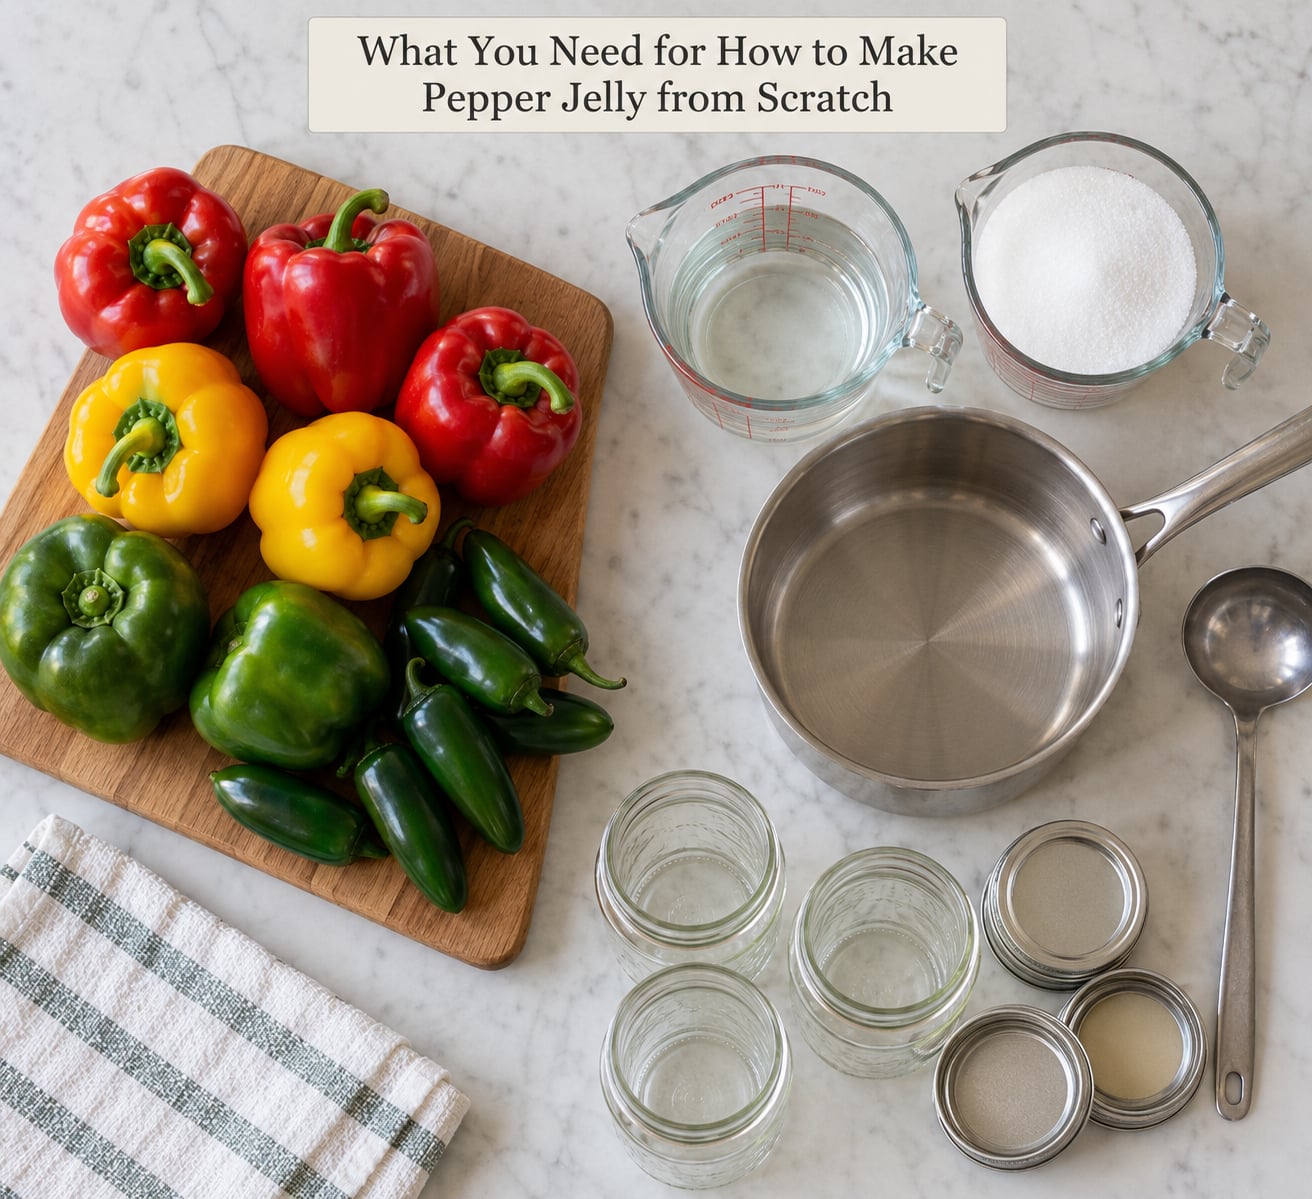
You need three categories of things: the peppers, the liquid and sweetener that make the preserve shelf-stable, and the canning gear that seals it. Everything here is available at a normal grocery store, and the equipment is a one-time buy if you plan to can more than once.
The peppers
A balanced batch uses about 3 3/4 cups of chopped pepper, and most of it should be sweet bell pepper with a smaller amount of hot pepper for heat.
- 1 1/2 cups red bell pepper, seeded and finely chopped (about 2 medium peppers)
- 1 cup yellow bell pepper, seeded and finely chopped (about 1 large pepper)
- 1 1/4 cups green bell pepper, seeded and finely chopped (about 1 large pepper)
- 1/4 cup jalapeno, seeded and finely chopped (about 2 medium jalapenos)
Finely chopped means pieces roughly the size of a kernel of corn. Uniform dice matters more than size, because uneven pieces cook at different rates and the big ones stay tough in the finished jar.
The vinegar, sugar and pectin
- 1 cup apple cider vinegar with 5% acidity
- 1 (1.75-ounce) box powdered fruit pectin, such as Sure-Jell or Ball RealFruit
- 5 cups granulated sugar
Do not reduce the sugar either. Sugar is not only there for sweetness; it is part of what makes pectin set, and cutting it changes both the texture and the safety profile of the finished jars.
The canning equipment
- Boiling water canner, or any pot deep enough to hold jars on a rack with 2 inches of water above the lids
- 6 half-pint (8-ounce) canning jars, such as Ball or Kerr jelly jars with quilted crystal pattern
- Fresh canning lids and screw bands, 6 of each
- Jar lifter and jar wrench
- Wide mouth funnel, or a clean ladle if you do not have one
- Headspace gauge, or a plain ruler for a rough quarter inch
- Canning rack
- Lid lifter or clean magnetic wand, optional but convenient
- Dish towel, a timer and a plate for testing the set
Use standard canning jars, not mason jars bought decoratively without canning lids. Decorative lids have a soft gasket that will not hold a vacuum seal.
What to have on hand but not in the pot
Nitrile or latex gloves for cutting hot peppers, a cutting board, a sharp knife, a colander, and clean towels. The gloves matter more than most recipes admit, especially if you are handling habanero or serrano and plan to touch your face later.
Step-by-Step
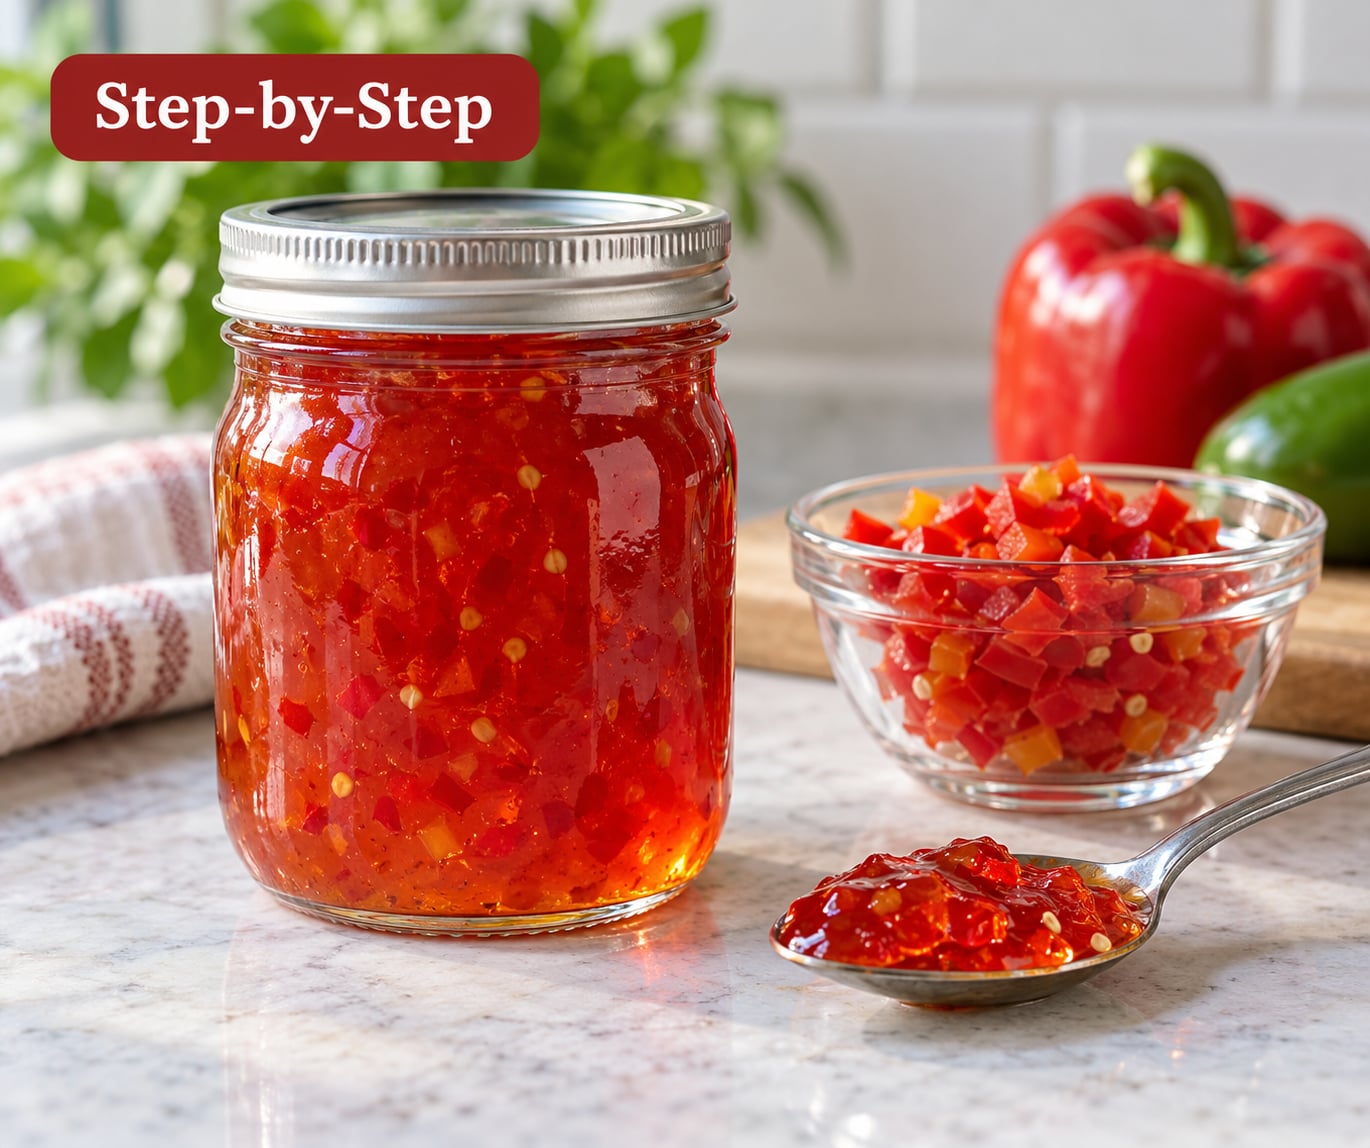
Work in this order and the recipe takes about 50 minutes: prep the peppers, make the jelly, test the set, then process the jars. Canning equipment heats while you cook, not before, so start the water bath right after you fill the pots.
Step 1: Wash and heat the jars
Wash the jars, lids and bands in hot soapy water and rinse them. Keep the jars warm by setting them upside down in a pot of simmering water, or run them through the dishwasher and let them stay hot.
Never heat empty canning jars in a dry oven or dry pan. That is a real cracking risk with tempered glass, and it is the fastest way to lose a batch before you even start cooking.
Step 2: Chop the peppers and wear gloves
Put on gloves before you cut. Cut off the tops, slice each pepper in half, pull the stem out, and scrape the seeds and the pale inner membrane away with a small spoon.
Dice the flesh into even pieces about the size of a corn kernel. The seeds and membrane are where a lot of the heat lives, so how hard you clean them out is the single easiest heat control you have.
Chop each pepper type separately, then measure each one into its own pile on the board. Once they are mixed you cannot back out of a batch that is hotter than you wanted.
Step 3: Get the canning water going
Fill your water bath pot about two-thirds with water and bring it to a simmer while you cook the jelly. Do not start with cold water and rush it. A pot that is already hot when the jars go in gives you an even, reliable processing time.
Warm the lids in a small pan of simmering water too. Hot lids go onto hot jars, and that combination makes a much better seal than room temperature lids on room temperature jars.
Step 4: Measure the pepper liquid that collects
Chopped peppers release water as they sit. After a few minutes you will see a shallow pool of liquid at the bottom of the pile, and that is exactly the amount of extra liquid that most tested pepper jelly recipes allow for.
Do not squeeze the peppers dry. That advice circulates widely and canners on r/Canning push back on it hard, because squeezing changes the balance the recipe was tested with. If there is a large puddle, drain it off and use the peppers right after.
Step 5: Combine peppers and vinegar
Put all the chopped peppers in a large nonreactive pot with the entire cup of apple cider vinegar. Stainless steel or enamel-coated is right; bare aluminum and cast iron will dull the color and can pick up an off flavor.
Bring the mixture to a boil over medium-high heat, stirring often, and boil for 10 minutes exactly. This ten-minute cook is what reduces the pepper mass to the right ratio for the sugar and pectin you are about to add, and it is a tested step rather than an estimate.
Step 6: Add the pectin and sugar
While the peppers boil, mix the pectin into the sugar in a separate bowl until the powder is evenly distributed with no dry streaks.
Stir the pepper and vinegar mixture again, then add the pectin-sugar mixture all at once. Bring it back to a boil while stirring constantly, and keep stirring through the whole boil so nothing scorches on the bottom.
Step 7: Hit a full rolling boil for one minute
This is the step beginners rush, and rushing it is why so many batches stay runny. Return the pot to full heat and boil for one minute at a full rolling boil that cannot be stirred back down.
A simmer or a bubble you can calm by stirring does not count. If you can slow the boil by turning the spoon once, keep turning the burner up. Pectin builds its gel network during this one minute of uninterrupted high heat, and a weak boil builds a weak gel.
Step 8: Test the set before you fill the jars
Put a small saucer in the freezer and chill it while you boil. Scoop a teaspoon of jelly onto the cold plate and push it with your fingertip.
If the jelly wrinkles and holds its shape when you push it, it is done. If it runs across the plate, keep boiling and retest every minute. Overcooked pepper jelly gets gummy, dark and syrupy, so test and remove as soon as the wrinkle appears.
Step 9: Skim and fill the jars
Lift the pot off the heat and let the foam that rises to the top settle. Skim it off with a spoon, then fill the hot jars through a wide mouth funnel, leaving a quarter inch of headspace at the top.
Headspace is the empty space the vacuum needs to pull the lid down flat. Too much and the lid cannot seat; too little and the contents push up against the seal and it fails. A headspace gauge is worth the few dollars, and a ruler works if you measure the empty space from the top of the jar rim.
Wipe the rim of each jar with a clean damp paper towel before the lid goes on. Jelly is sticky and a smear of pepper on the rim will hold the lid off no matter how long you process it.
Step 10: Apply lids and screw bands
Place a hot lid on each jar and screw the band down until it is fingertip tight. That means snug with a bit of resistance, not tightened with a wrench. The metal expands during processing, and over-tight bands make it impossible for steam to escape and for a vacuum to form.
Set the sealed jars on a towel in a spot where they can sit undisturbed for 12 to 24 hours. Jars stacked on a towel stay warm longer, which helps the vacuum seal take hold.
Step 11: Water-bath process the jars
Lower the jars into the simmering water with a jar lifter, keeping the water level at least 1 inch above the tops of the lids. If they knock together, add a second canning rack or use a butter knife to create a buffer.
Start the timer when the water returns to a full rolling boil. Ten minutes is the standard processing time for half-pint jars at sea level, and the number goes up at altitude. See the table below before you start if you live above 1,000 feet.
Turn off the heat, wait five minutes, and then lift the jars out and set them on a folded towel for 12 to 24 hours. Do not put hot jars on a cold surface, and do not retighten the bands as they cool.
Step 12: Check the seals
Press the center of each lid with your fingertip. A sealed lid is flat, does not flex, and does not move when you press it. A lid that is dented in the middle, rocks, or makes any sound at all did not seal.
Store sealed jars in a cool, dark pantry for up to 18 months to 2 years. If a jar did not seal, put it in the refrigerator and eat it first.
How to Get the Right Jelly Texture
Texture comes down to three things: how much seed and membrane you leave in, how far you blend, and which pectin you use. Change any one of those and the same recipe produces a noticeably different result.
Seed and membrane. Leaving seeds and the pale inner ribs in creates a slightly coarse, rustic jelly with flecks throughout. Scraping every bit of membrane out and then blending gives a smooth, glossy, almost restaurant-style spread that pours off the spoon.
Blending. Pulse in a blender for just a few seconds at the end of the ten-minute pepper and vinegar boil, before the sugar goes in. A quick pulse gives a smoother body while keeping visible pieces. A full blend takes the jelly closer to a hot sauce consistency than a preserve.
Pectin type. Standard powdered pectin in a full-sugar recipe gives a firm, clean set you can slice. Liquid pectin gives a softer set and a longer processing window, which makes it more forgiving of a slightly off boil. Low-sugar pectin gives a loose, syrupy set that is closer to a glaze, and it comes with its own processing times that you must follow exactly.
Whatever you choose, do not add extra liquid to thin a jelly. The pepper and vinegar volume is fixed by the tested ratio, and extra water is the most common reason a home batch fails to gel.
Choosing the Peppers for Your Flavor
Sweet bell peppers carry the color and the bulk, and hot peppers carry the heat. The table below shows how the common varieties stack up.
| Pepper | Sweet or hot | Relative heat | What it does in the jar |
|---|---|---|---|
| Red bell pepper | Sweet | None | Bright red color, the classic look, high moisture |
| Yellow bell pepper | Sweet | None | Golden flecks, slightly fruity, lowest moisture of the bells |
| Green bell pepper | Sweet | None | Adds a slightly grassy note, a more savory jelly |
| Banana pepper | Sweet with tang | Very mild | Yellow color, a pickling tang, good for beginners |
| Jalapeno | Hot | Medium | The benchmark heat level for most pepper jelly recipes |
| Serrano | Hot | Medium-hot | Sharper, brighter heat than jalapeno, holds up in long cooks |
| Red jalapeno | Hot | Medium | Riper and sweeter than green jalapeno, lands as a deep red jelly |
| Habanero | Hot | Very hot | A few pieces go a long way; easy to overshoot |
Bell peppers carry more water than hot peppers, which is why the tested recipes lean on them for the body of the jelly. If you make a batch that is mostly hot peppers, expect a thinner result and add a spoon of extra pepper in a second small batch rather than changing the ratio of a tested recipe.
To make it sweeter, keep the pepper count the same and swap in yellow or red bell pepper for the green. To make it hotter, double the jalapeno and cut the green bell pepper by the same amount so the total pepper volume stays put. To make it milder, seed and membrane every hot pepper thoroughly and start with half the recommended heat pepper.
Fresh and frozen both work. Frozen peppers are usually picked and frozen at peak ripeness, so they are often better quality than a winter grocery store pepper, and you can thaw a bag overnight and skip straight to chopping. Thaw them in a colander in the fridge rather than on the counter.
Which Vinegar to Use and Why You Cannot Reduce It
Apple cider vinegar at 5% acidity is the standard choice, and it is the vinegar that gives pepper jelly its bright edge under the sugar. White distilled vinegar works and keeps a clearer color, but cider vinegar tastes more like the pepper jelly people expect.
Rice vinegar makes a noticeably sweeter, lighter jelly because of its added sugar. Balsamic, wine vinegars and homemade infusions are not tested in this application and can shift the acidity in ways you cannot measure at home.
Whatever you use, keep it at one full cup. This is the acidifying agent that makes the jars shelf-stable and safe, and peppers are a low-acid food. Cut the vinegar or replace it with lemon juice and you are no longer making a tested recipe, which is exactly the kind of change home canners flag as a genuine safety problem rather than a texture problem.
Check the label for the acidity percentage. If it is not 5% or higher, do not use it for canning.
Which Pectin to Use
Regular powdered fruit pectin, such as Sure-Jell or Ball RealFruit, is the one most tested pepper jelly recipes are written for. Use it as directed and the results are repeatable.
Liquid pectin produces a softer set and gives you more time between the boil and the fill, so it is a reasonable swap if that is all you have. You will use roughly the same amount and follow the same boil, but expect a looser jelly that is better as a glaze than as a sliceable spread.
Low-sugar and no-sugar-needed pectins are a different recipe, not a substitution. They cut the sugar dramatically and they carry their own processing times, which are usually longer. Do not swap one for the other and assume the original instructions hold, because the safety profile changes with them.
Pomona’s Universal Pectin is worth calling out for anyone who plans to make large batches. It works in bigger quantities, gives more reliable results at volume, and because it is not a once-only pectin, you can reprocess a batch that failed to set. For a single six-jar batch, standard powdered pectin is the simple choice.
Common Mistakes
Almost every failed pepper jelly comes down to one of five causes: an under-boiled final boil, a doubled batch, a changed pepper and liquid ratio, a pectin swap, or altitude. Here is how to spot each one.
How to Fix Pepper Jelly That Did Not Set
First, wait. Jelly keeps tightening for up to 24 hours as it cools, so a batch that looks loose from the pot sometimes sets fine on the counter overnight. Test it cold from the jar, not warm from the pot.
If it is still liquid the next morning, work through these in order before you give up on the batch.
- Check your batch size. A doubled recipe is the single most common cause of failure, and experienced canners describe it as the only time their batches ever let them down. Deep pots change the temperature recovery time, so the one-minute boil no longer does the same work. Make two separate batches instead.
- Check your pan. A wider pan heats faster and reduces faster, and a deeper one takes longer to come back to a full boil. An enormous stockpot of peppers is a common home mistake that produces a loose set every time.
- Check the liquid. If you did not measure your peppers, or you added extra vinegar, the pectin has more water to work with than it can handle. Extra liquid is the reason pepper jelly turns to syrup.
- Check the pectin. If you used liquid pectin or a low-sugar pectin, the set and the processing time are different from the recipe you read. Follow that pectin’s own instructions rather than the ones you remembered.
- Check the boil. If the last minute was a gentle boil rather than a rolling one you could not stir down, that alone explains a soft or runny result.
If the batch is still safe, a common home rescue is to bring it back to a boil, add an extra half box of powdered pectin mixed with a little sugar, and give it another full rolling boil. Home canners do report that this works on the second cool-down. Treat it as an experiment for a refrigerator batch, not as a validated shelf-stable rescue.
For a canner who wants a protocol they can trust, the honest answer is the guidance from the tested recipes on pectin boxes and from the National Center for Home Food Preservation, not forum anecdote. A pepper jelly batch that has already been processed should not be re-cooked on a hunch.
What to Do With Jelly That Still Will Not Set
Judge each jar by two separate things: whether it sealed, and whether it set. Those two facts together decide where the jar goes.
| Sealed? | Set? | Where it goes |
|---|---|---|
| Yes | Yes | Pantry, up to 18 months to 2 years |
| Yes | No | Refrigerate and eat within a week, or freeze it. Do not leave it in the pantry as a runny preserve. |
| No | Yes | Refrigerate and eat within two weeks, or move the jar to the freezer right away |
| No | No | Refrigerate and eat promptly, or discard if it has been sitting out unrefrigerated for more than a day at room temperature |
A jar that did not seal is not automatically dangerous, and a jar that did not set is not automatically dangerous either. The real red flags are signs of spoilage: an off or fermented smell when you open the jar, visible bubbling in a sealed jar that has been sitting still, mold at the surface, or a lid that is bulging and refuses to move. If you see any of those, discard the jar without tasting it.
Botulism risk in a vegetable-based preserve comes from inadequate acidity, not from the heat level of the peppers. That is why the vinegar volume is fixed, and why substituting a low-acid liquid for the vinegar is the one change worth never making.
How to Tell When the Jelly Has Set
Use the cold plate test, and use it before you fill the jars rather than after. Chill a saucer in the freezer during the cook, spoon a teaspoon of hot jelly onto it, and push it with your fingertip.
A properly set jelly wrinkles when you push and holds the shape instead of running back together. If it is still soft, boil another minute and retest. If it is rubbery and leaves no wrinkle at all, you have gone too far and should use it as a glaze.
The finished jar tells you too. Invert it after it has cooled completely: a good set stays put. A faint gel that slides toward the lid is a soft set, which is still perfectly edible, just better as a sauce than as a spread.
Water-Bath Processing Times and Altitude
Ten minutes in a boiling water canner is the processing time for half-pint jars at sea level. Above 1,000 feet, water boils at a lower temperature, so the processing time increases.
| Altitude | Half-pint and 8-ounce jars | Pint and quart jars |
|---|---|---|
| 0 to 1,000 feet | 10 minutes | 15 minutes |
| 1,001 to 3,000 feet | 15 minutes | 20 minutes |
| 3,001 to 6,000 feet | 20 minutes | 25 minutes |
| 6,001 to 8,000 feet | 25 minutes | 30 minutes |
| 8,001 to 10,000 feet | 30 minutes | 35 minutes |
Missed altitude adjustments are the most serious mistake on this list, because under-processing is a real safety problem rather than a texture problem. If you are unsure how high you live, your county extension office or the National Center for Home Food Preservation has a map.
Start your timer when the water returns to a full rolling boil after the jars go in, not when you set them on the rack.
How to Keep Peppers from Floating in the Jar
Peppers float because chopped pepper is lighter than the syrup around it, and during the boil any air in the pieces comes to the surface. You cannot stop it entirely, but you can make it much less noticeable.
Use jelly jars, not pint or quart jars. A wider jar means a shorter column of liquid above the peppers, so they cannot drift as far.
Let the jelly sit for 5 to 10 minutes after the final boil and skim the foam before filling. A quick skim removes trapped air that would otherwise carry pieces upward in the jar.
Pour slowly down the side of the jar and let each jar sit for a minute or two before you move on, rather than filling all six at once. Lastly, pick up your jars by the body and not by the band, and keep them still for a few minutes before starting the processing timer.
The last jar having no pepper in it is almost always a tilting problem on a wet towel. Set the filled jars on a flat towel rather than stacking them on a folded one right after filling.
Using Surplus Peppers and Scaling a Batch
A bag of frozen jalapenos from a summer surplus is the best possible starting point for this recipe. Freeze them whole on a tray first, then bag them once they are solid so they do not clump, and label the bag with the date and the variety.
To thaw, move the bag to the refrigerator overnight and drain the pieces in a colander. Thawing on the counter softens the peppers too much to dice cleanly, and thawed peppers hold less structure when chopped.
When a batch fails, the cause is almost always scale. For a double batch, make two separate pots rather than one enormous one, and stagger the start times so the second pot is not sitting finished while you process the first. A deeper pot of peppers also takes longer to recover to a full rolling boil, so the final one minute no longer does the same work.
If you regularly make more than a dozen jars at a time, switching to Pomona’s Universal Pectin is the change that makes the biggest difference. It handles large batches more reliably, and because it is not a once-only pectin, a batch that under-sets can be reprocessed with the same pectin and another proper boil.
Labeling Jars for Gifts and Markets
Home labels are where a good batch becomes a good gift. Put the contents, the date made, and the heat level on the front, and do not skip the refrigerate after opening line.
- Contents and heat level, for example Sweet and Hot Pepper Jelly
- Date made
- Refrigerate after opening
- Best used within 12 months for best flavor
If you are selling jars at a public market, your state or local health department sets the rules for cottage food operations, and those rules cover which products you may sell, from where you may sell them, and what has to appear on the label. A jelly canned in a home kitchen usually qualifies under cottage food rules, but the labeling requirements are specific and they are not optional.
Check with your state department of agriculture or health before your first market day rather than after. Some states also require a kitchen inspection or a food handler course, and the requirements differ enough that guessing wastes a season.
Storage and Shelf Life
A properly sealed jar of pepper jelly is shelf-stable for 18 months to 2 years, and the quality is at its best in the first year. Store it in a cool, dark pantry away from the stove and out of direct sunlight.
Once you open a jar, it does belong in the refrigerator. A few canners skip the fridge for unopened red pepper jelly, but once a spoon has been in there, treat the jar as refrigerated food and use it within 2 to 3 weeks. Small jars turn faster than big ones, so a barely touched half-pint may go weeks after a well-used one is finished.
For longer storage after opening, freeze half-pint jars with a quarter inch of headspace and leave the band loose. Thaw in the refrigerator overnight and stir before using.
Label the jar with the contents, the date, and a note about the heat level. If you are giving them away or selling them, add refrigerate after opening on the label, since that instruction is the one most often omitted from home labels.
Three Variations to Try
Once the classic batch is reliable, these three are the ones people make most often. Each changes one variable, not the whole method.
| Variation | What changes | How to keep it |
|---|---|---|
| Sweet bell pepper jelly, no heat | Use only red, yellow and green bell peppers, with the jalapeno left out entirely | Water-bath can as written; it is a lower acid load, so keep the vinegar at one cup and follow the same processing time |
| Refrigerator jelly, no pectin | Skip the pectin, cut the sugar to about 2 cups, and add a tablespoon of lemon juice | Fridge only, use within 2 to 3 weeks. Do not attempt to shelf can a no-pectin version |
| Freezer jelly | Use the standard recipe, skip processing entirely | Freeze in half-pint jars with a quarter inch of headspace, loosen the band, thaw in the fridge |
The refrigerator version is the fastest route to a good result for a beginner, because you skip the canning step entirely and simply pour into any clean jar. The trade is shelf life: you are making fridge food, not pantry food, and it should be labeled and treated that way.
Frequently Asked Questions
Can I make pepper jelly without pectin?
Yes, but the result is a softer, syrupier preserve rather than a sliceable jelly, and it cannot be water-bath canned the same way. Traditional pepper jelly relies on pectin, sugar and the one-minute full rolling boil to build a gel. Without pectin, reduce the sugar to roughly 2 cups, add a tablespoon of lemon juice, and store the result in the refrigerator for 2 to 3 weeks or freeze it.
Which peppers are best for a sweet pepper jelly?
Red, yellow and green bell peppers, with the seeds and inner membrane scraped out, give the sweetest result. Red carries the brightest color, yellow adds golden flecks, and green adds a slightly grassy note. For a beginner-friendly jelly with a little warmth instead of heat, swap in banana peppers, which are sweet with a pickling tang and no real heat.
How do I know when pepper jelly has set?
Use the cold plate test. Chill a saucer in the freezer during the cook, spoon a teaspoon of hot jelly onto it, and push with your fingertip. A set jelly wrinkles and holds its shape rather than running back together. If it runs, boil another minute and retest. Jelly also keeps tightening for up to 24 hours as it cools, so always check a cold sample, never one straight from the pot.
Can pepper jelly be canned for shelf storage?
Yes, and that is exactly what the vinegar is for. Peppers are a low-acid food, so the full cup of 5% acidity vinegar in the recipe is what makes the jars shelf-stable. Water-bath process half-pint jars for 10 minutes at sea level, longer at altitude, and do not reduce the vinegar or replace it with lemon juice. Sealed jars keep 18 months to 2 years in a cool, dark pantry.
How hot does jalapeño pepper jelly become?
A jalapeño batch lands at a medium heat, roughly the level of a good hot sauce. Seeds and the pale inner membrane hold most of the capsaicin, so scrubbing them out well softens the heat noticeably. Doubling the jalapeño while cutting the green bell pepper by the same amount makes it hotter without changing the tested pepper ratio. Habanero goes in by the teaspoon, not by the cup.
How long does homemade pepper jelly last?
A sealed, properly processed jar keeps 18 months to 2 years in a cool, dark pantry, with the best flavor in the first year. After you open a jar, it must be refrigerated and used within 2 to 3 weeks, and small half-pint jars turn faster than larger ones. If a jar did not seal, refrigerate it and eat it first, or move it to the freezer right away.
Conclusion
Start by measuring everything before you turn on the heat: 3 3/4 cups of chopped pepper, a full cup of 5% acidity cider vinegar, five cups of sugar and one box of powdered pectin. Once the peppers are chopped and the canning water is on, the cook itself is 30 minutes and the only real judgment call is the one-minute full rolling boil followed by a cold plate test.
Leave the vinegar and sugar exactly as written. Those two ingredients are what make the jars safe on a pantry shelf, and adjusting them is the difference between a preserve and a jar of warm sweet peppers.
Once the jelly is made, most people serve it spread thick over cream cheese with crackers. It also works spooned over goat cheese on crostini, brushed onto pork or chicken as a glaze near the end of cooking, thinned with a little vinegar for a dipping sauce, or stirred into a Bloody Mary. A jar with a date and a heat note on the label is a good holiday gift, and it is the easiest thing on a market table to sell by the jar.
{ “@context”: “https://schema.org”, “@type”: “Recipe”, “name”: “Homemade Pepper Jelly”, “description”: “A sweet and spicy pepper jelly made with red, yellow and green bell peppers, jalapeño, apple cider vinegar, sugar and powdered pectin, water-bath canned into 8-ounce jars.”, “author”: { “@type”: “Organization”, “name”: “Sweet Auburn Curb Market” }, “dateModified”: “2026-10-03”, “prepTime”: “PT20M”, “cookTime”: “PT30M”, “totalTime”: “PT50M”, “recipeYield”: “6 half-pint (8-ounce) jars”, “recipeCategory”: “Preserves”, “recipeCuisine”: “American”, “keywords”: “pepper jelly recipe, jalapeño pepper jelly, pepper jelly canning, water bath canning pepper jelly”, “recipeIngredient”: [ “1 1/2 cups red bell pepper, seeded and finely chopped”, “1 cup yellow bell pepper, seeded and finely chopped”, “1 1/4 cups green bell pepper, seeded and finely chopped”, “1/4 cup jalapeño pepper, seeded and finely chopped”, “1 cup apple cider vinegar with 5% acidity”, “1 (1.75-ounce) box powdered fruit pectin”, “5 cups granulated sugar” ], “recipeInstructions”: [ { “@type”: “HowToStep”, “text”: “Wash the jars, lids and bands in hot soapy water. Keep the jars warm in simmering water and the lids in a small pan of simmering water.” }, { “@type”: “HowToStep”, “text”: “Wearing gloves, seed and finely chop the bell peppers and jalapeño into even, corn-kernel-sized pieces. Measure each variety separately.” }, { “@type”: “HowToStep”, “text”: “Bring a pot of water to a simmer for the water bath canner.” }, { “@type”: “HowToStep”, “text”: “Combine all the chopped peppers with the vinegar in a large nonreactive pot. Boil for 10 minutes.” }, { “@type”: “HowToStep”, “text”: “Mix the powdered pectin into the sugar, then stir it into the boiling pepper mixture. Return to a boil.” }, { “@type”: “HowToStep”, “text”: “Boil for exactly 1 minute at a full rolling boil that cannot be stirred down.” }, { “@type”: “HowToStep”, “text”: “Test the set on a chilled plate: the jelly should wrinkle and hold its shape when pushed.” }, { “@type”: “HowToStep”, “text”: “Skim the foam, fill hot jars leaving a quarter inch headspace, wipe the rims, and apply lids with fingertip-tight screw bands.” }, { “@type”: “HowToStep”, “text”: “Process half-pint jars in a boiling water canner for 10 minutes at sea level, adjusting for altitude, then cool the jars 12 to 24 hours.” }, { “@type”: “HowToStep”, “text”: “Check that each lid is flat and does not flex when pressed, then store sealed jars in a cool, dark pantry.” } ] }