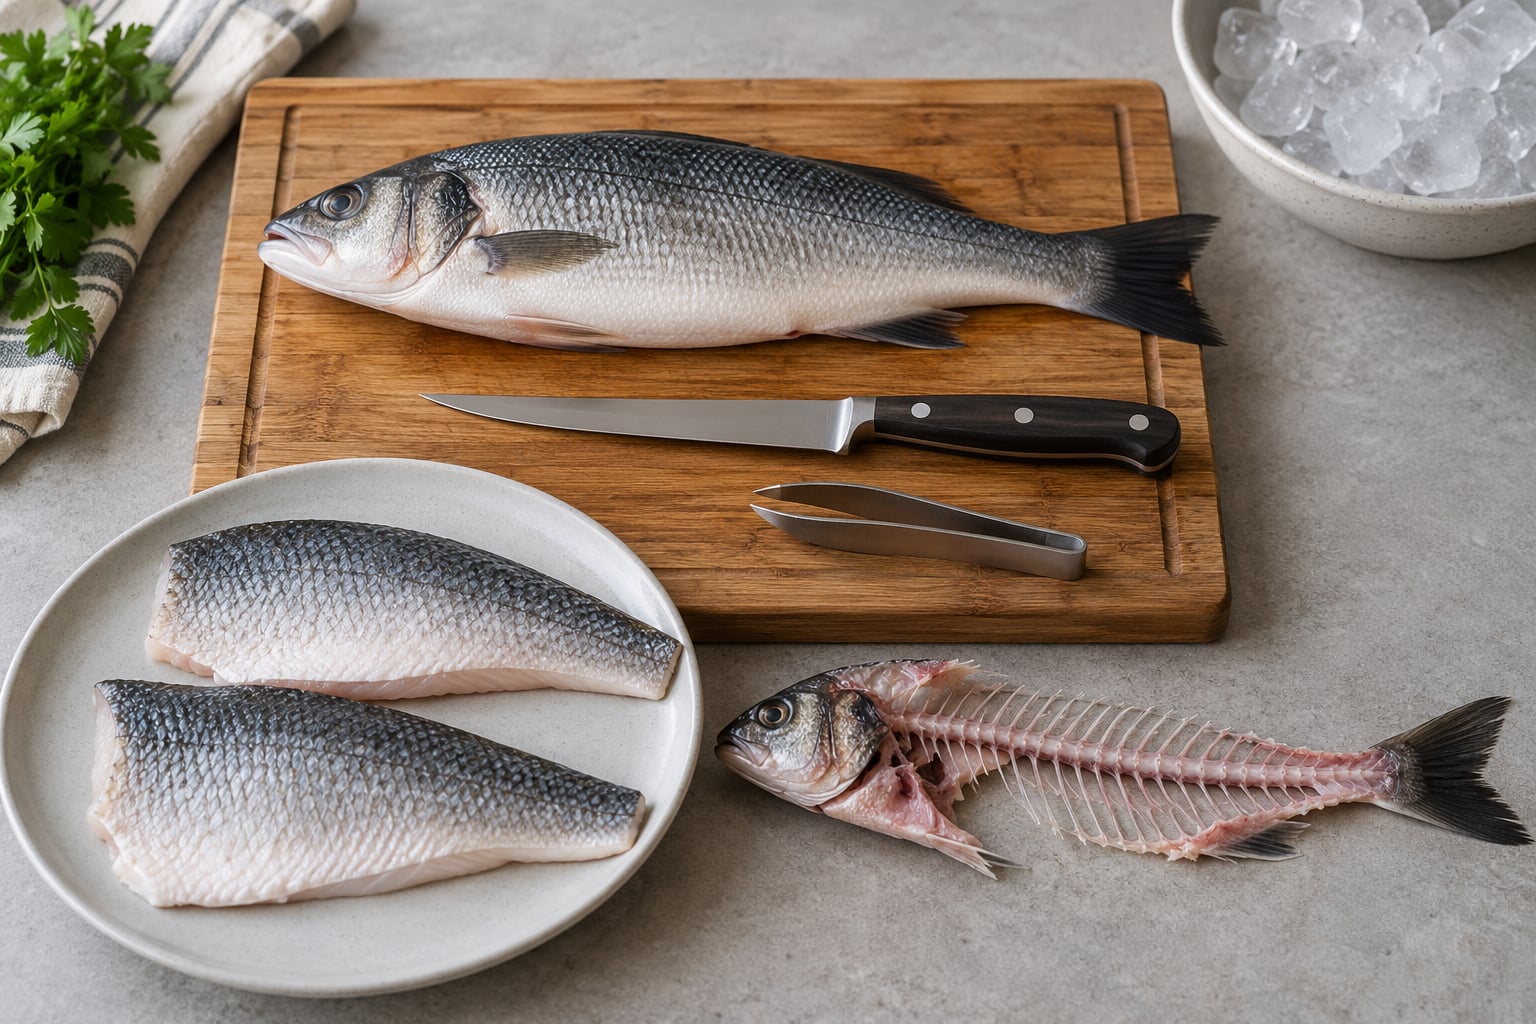
Filleting a whole fish at home takes about 20 minutes once the fish is thawed, and all it really needs is a sharp flexible knife and a steady grip. You cut behind the gill cover down to the bone, then run the blade along the backbone in long strokes until two fillets come away.
Yes, the fish needs to be gutted before you fillet it. Scaling is optional, but removing the guts and the gills is not, because that is where the mess and most of the fishy flavor live.
A round fish like sea bass, trout or red snapper takes about 15 minutes of knife work once you have the hang of it. The first attempt on a bigger fish can run double that, so start with something in the two-pound range and let the bones build confidence.
Below is the same seven-step sequence I use at a market counter: prepare, scale and gut, find the fillet line, take the first fillet, take the second from the tail side, trim, store.
Table of Contents
- What You Need
- Step-by-Step: How to Fillet a Whole Fish at Home
- 1. Prepare the Fish and Your Work Surface
- 2. Scale, Gut, and Rinse the Fish
- 3. Find the Fillet Line Behind the Head
- 4. Remove the First Fillet
- 5. Take the Second Fillet From the Tail Side
- 6. Trim and Finish the Fillets
- 7. Store or Cook the Fish Promptly
- Common Mistakes and Proven Tips
- Frequently Asked Questions
- What knife is best for filleting a whole fish at home?
- What is the easiest fish to fillet for a beginner?
- How do I remove pin bones from fish fillets?
- Should I remove the skin before cooking a fish fillet?
- How long can I store raw fish fillets in the refrigerator?
- Conclusion
What You Need
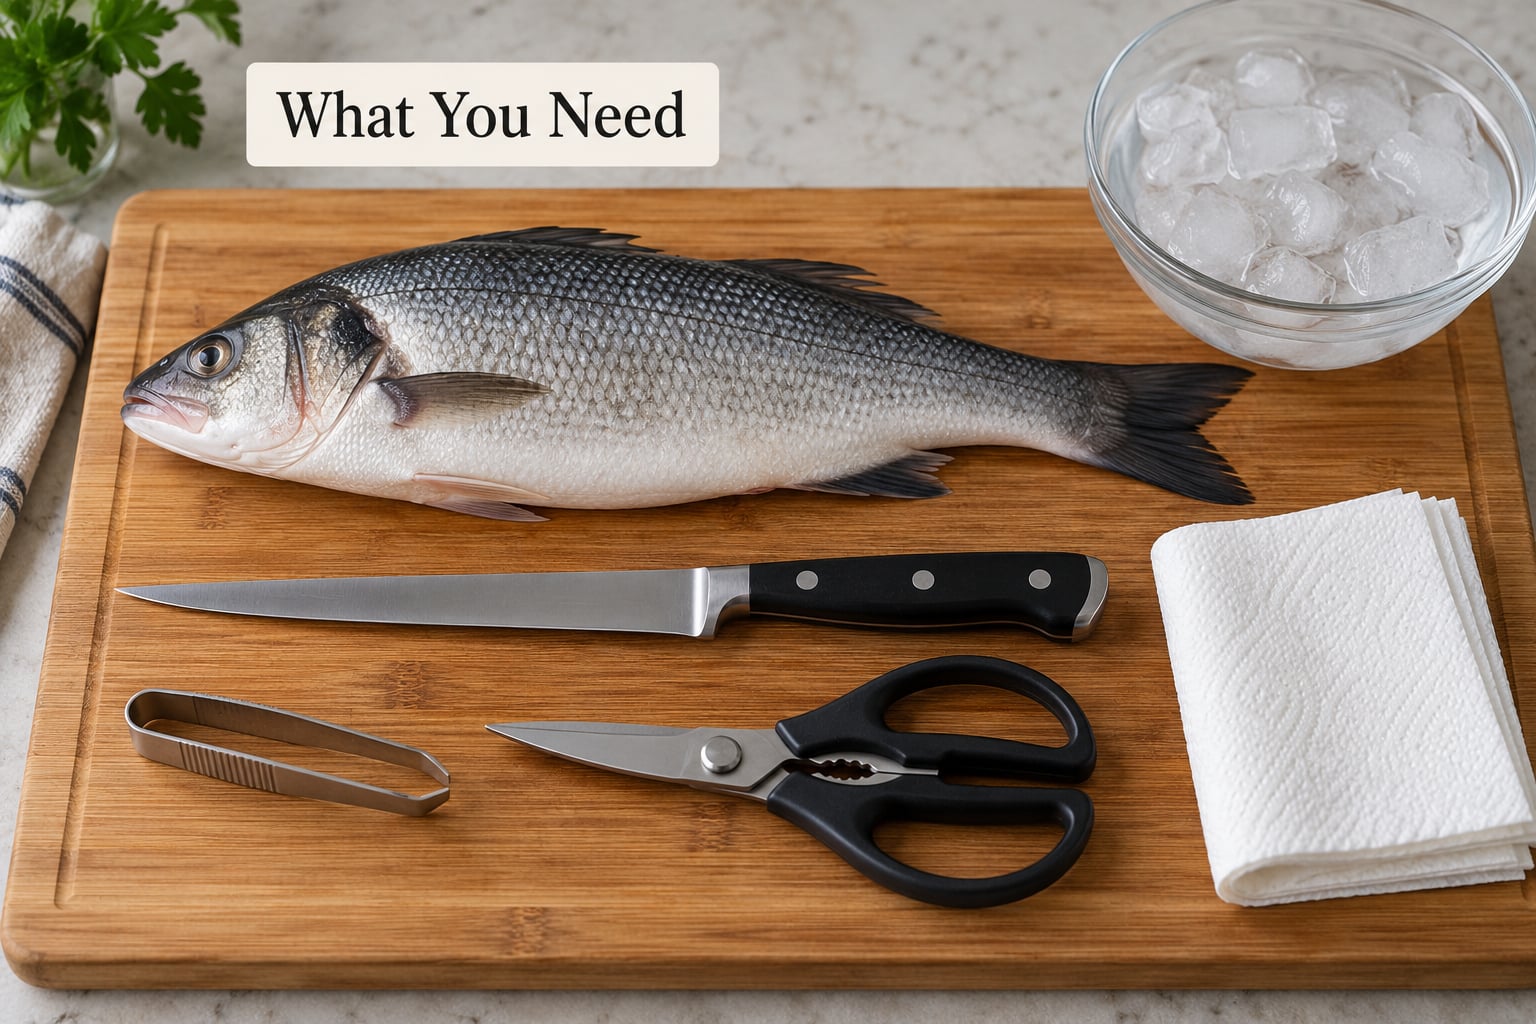
The one tool that decides how this goes is the knife. Look for a fillet knife with a thin, flexible blade about 6 to 8 inches long. Thin slices through flesh as it passes over the bones; a thick chef’s knife has to be pushed, and pushing is how you end up with ragged fillets and a sore wrist.
A stiff boning knife works, and a serrated knife does not. Serrations tear. If you only own one knife, spend your money on a decent fillet knife and use a dull paring knife for nothing else.
The board matters just as much, because a wet fish on a wet board is the single most common way beginners hurt themselves. Use a board with a groove or a rubber mat underneath, or wedge a damp towel under a plastic board. A glass board is slick, and a tiny one gives your support hand nowhere to go.
- Fillet knife, 6 to 8 inches, thin and flexible.
- Cutting board with a non-slip base or a damp towel underneath.
- Fish tweezers or needle-nose pliers for pin bones.
- Kitchen shears for fins, packaging and the belly cut.
- Paper towels for drying the fish and your hands.
- A shallow bowl of ice to hold finished fillets while you work.
- Scale remover or back of a spoon if the fish is not pre-scaled.
Two more things worth knowing. Professional counters soak fillets in ice water to firm up the flesh, which firms the protein and makes it easier to slice, and a bowl of ice water is the same idea at home. And if your fish arrives frozen, put it in the refrigerator overnight or run it under cold water for 20 to 30 minutes; never fillet a fish that is still solid or icy in the middle.
Step-by-Step: How to Fillet a Whole Fish at Home
1. Prepare the Fish and Your Work Surface
Rinse the fish briefly under cold running water, then pat it dry with paper towels. A dry fish grips the board better and the skin is far easier to slice through later. Trim off the pectoral and pelvic fins with your shears and snip away any packaging or netting still attached.
Clear the sink, take out the trash, and lay your tools within arm’s reach before the fish hits the board. Wash your hands and the counter with hot soapy water. Rinsing the surface with cold water alone does not count as cleaning, and fish slime transfers bacteria to any surface it touches.
To keep the fish from sliding, either press a damp paper towel into the board groove, or hold it with your free hand using a towel for grip. Filletting is one of the few kitchen tasks where the flat of your hand, not your fingertips, does the holding.
Checkpoint: the fish sits still when you press the tail, and your knife hand is not reaching across the fish body to change tools.
2. Scale, Gut, and Rinse the Fish
Hold the fish on its side and scrape from tail toward head with the scale remover or the back of a spoon. Scaling from head to tail pushes scales the wrong way and drives them into the skin. Many market fish come pre-scaled, so check first and skip this if the skin feels smooth and slick.
Slide the shears into the belly opening, cut through the belly wall, and pull out the innards as one piece. Then reach into the cavity with your hand and pull the rib cage and backbone attachments away. Scrape the inside of the body cavity with the back of the knife until the bone is pale and clean, then lift out the gills, which sit in the head end behind the collar.
Rinse the cavity by running water through it from the tail end toward the head, so anything loose washes out instead of being pushed deeper inside. Pat it dry again.
Checkpoint: the cavity shows pale bone and clean flesh with no dark membrane, no pink organs and no red or brown gill tissue. If any of that is still there, it goes in the stock, not in the pan.
3. Find the Fillet Line Behind the Head
Lay the fish on its side with the head pointing away from your knife hand. Feel just behind the gill cover, on the shoulder, and run a fingertip along the top of the backbone until you hit the collar, the first big bone at the base of the head. That V-shaped notch is where the first cut goes.
Make a short cut straight down from the top, just behind the gill cover, angling slightly toward the head until the blade tip touches the backbone. Cut down and forward in one motion rather than pressing straight down. Then make a matching cut from the belly up to that same point, and you have an opening.
For round fish the fillet runs between the top of the ribcage and the dorsal fin. Find the row of finlets along the back and cut just under it, about a finger’s width above the rib bones.
Checkpoint: you can see pale bone through the opening, and the first slice of top fillet lifts away from the ribs without your knife having cut through them.
4. Remove the First Fillet
Hold the fish steady with your free hand, fingers on the far side, and turn your knife so the blade lies flat against the backbone. The blade should be almost horizontal, spine side down against the bone and edge angled slightly toward the tail.
Now cut in long strokes, from head toward tail, using the whole length of the blade. Each stroke should travel two or three inches, then lift the knife slightly and start the next one. Do not drag the blade backward. Cutting forward, using the sharp edge the whole way, is faster and leaves a cleaner seam than sawing.
Watch the texture change. When the flesh goes from slightly springy to noticeably firm against the blade, the edge has passed the ribcage and is riding bone. That is your signal to roll the blade angle a little flatter and keep going.
Where the rib bones curve down toward the belly, turn the blade handle-side down and slice over them, following the curve of the cage rather than pressing through it. This is where most torn fillets start.
Checkpoint: the fillet lifts as one piece and the backbone shows a clean, dark line of meat removed from either side, with no chunks still clinging to the bones.
5. Take the Second Fillet From the Tail Side
Flip the fish over and repeat on the other side, starting from the same collar position. Many home cooks try to mirror the first motion exactly and end up angling the blade into the rib cage. Instead, keep the blade flat against the backbone on this side too, and move the fish rather than the knife.
Lift the backbone a few inches off the board once the fillet is nearly free. The tail fin and frame will raise up, and that lifted position gives you room to slide the blade in underneath the rib bones instead of sawing down into them. Follow the natural curve, keep the blade edge angled toward the tail, and the second fillet comes off just as cleanly as the first.
Checkpoint: you have two fillets, one from each side, and a bare frame that you can rinse and freeze for stock later.
6. Trim and Finish the Fillets
Lay a fillet skin-side down and run your fingers along the thick middle section. You will feel small, hard pin bones in a row near the center, roughly a third of the way up from the edge. They are thin and nearly translucent, which is exactly why they get missed.
Use tweezers or needle-nose pliers to grasp each one and pull it out in the direction it points, which is usually toward the head. Repeat until you can sweep your fingertip along the whole strip and feel nothing hard.
Trim the rib strip from the belly end by slicing a thin band off the edge with the blade held at a low angle. Many cooks keep this piece; it is the fattiest, tastiest part and good for a broth. Then cut away ragged flaps and dark bloodline meat near the head end.
Rinse the fillets lightly, pat them dry, and either lay them skin-side down on a clean plate over ice or move straight to cooking. Skinning is optional and comes after the fillet is done, not before.
Checkpoint: no exposed bones, no ragged belly edge, and a clean pink or white seam where the fillet meets the former backbone.
7. Store or Cook the Fish Promptly
Cook fish to an internal temperature of 145°F, which is 63°C, measured at the thickest part with an instant-read thermometer. Fish flakes and looks opaque at that point, and it keeps cooking after you take it off the heat, so pull it a shade early if you like it moist.
Raw fish keeps one to two days in the coldest part of the refrigerator, at or below 40°F, in a sealed container or bag on a plate set low to catch drips. Get it into the refrigerator within about 30 minutes of finishing. Home cooks often talk about a ten minute rule for getting fish into the fridge, but the honest number is sooner rather than later, especially in a warm kitchen.
For freezing, lay the fillets in a single layer on a tray first, freeze them solid for an hour, then transfer to airtight bags or containers with a layer of parchment between pieces and the date written on it. Double wrapping protects the flesh from freezer burn, and frozen fillets keep around three to four months at 0°F.
Scrape and rinse the frame, bag it, and freeze it for a week or two. It makes a very good quick stock: cover with cold water, bring it to a simmer, skim, and let it go for 30 minutes with a strip of kombu if you have one.
Hand-wash the board, the knife and the sink with hot soapy water, and dry them fully. Fish residue left damp on a wooden board is the fastest route to a board you have to throw out.
Common Mistakes and Proven Tips
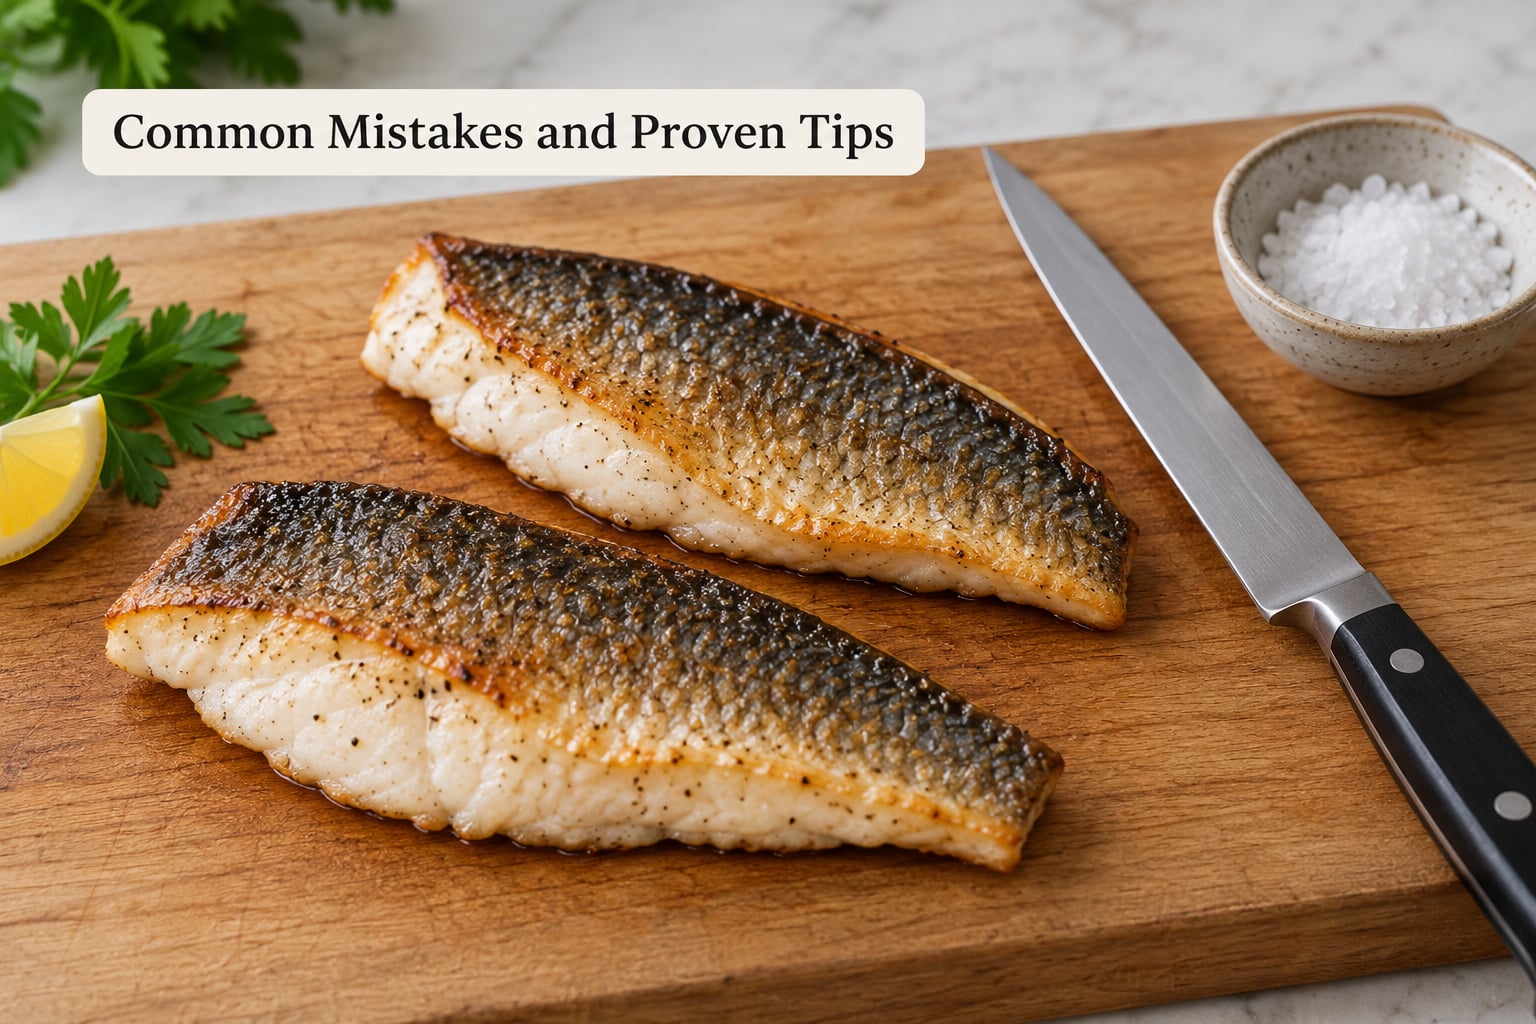
Nearly every bad first fillet traces back to one of a handful of habits. Here they are, with the fix.
- Using a dull or wrong knife. A dull blade must be pushed, and pushing drives it into bones. Sharpen before you start, or use a thin flexible fillet knife, and let the blade do the work.
- Cutting straight down through the ribs. Turn the blade handle-side down where the ribcage curves, and slice over the bones with the edge pointing toward the tail.
- Sawing the blade backward. Cut forward in long strokes and lift between them. Back-and-forth sawing dulls the edge fast and tears the flesh.
- Leaving gills behind. The red or brown gill tissue is bitter and muddy. Pull it out before the first cut, not after.
- Missing pin bones. Run a fingertip along the thick center of every fillet before it goes in the pan. Tasting is not a substitute for feeling.
- Tearing the skin. Fillet skin-on, cut a shallow strip along the base of the tail fin, then pull the skin against the blade in one steady motion instead of sawing it off.
- Rinsing the counter instead of sanitizing it. Cold water moves slime around. Hot soapy water on every surface the fish touched, including your hands and the sink handle.
- Letting the fish skate. A damp towel under the board, or a paper towel gripped in your free hand, is the whole solution. Do not try to hold a bare wet fish with bare fingertips.
A few habits that make the work easier. Cut at room temperature rather than ice cold; a refrigerated fish is stiffer and harder to slice. Let a whole fish sit out for 15 minutes before the first cut, no longer, and keep the whole session under about 30 minutes. Keep one hand on the fish whenever the knife is not in it, and keep the blade pointed away from that hand with the edge on the far side of the body.
Beginners often ask whether a class is worth it. Most people I know learned by watching someone else and then burning two or three fish, but plenty of fish counters will show you their first one free if you buy a few pounds and ask. Professional cooks say the same thing about technique: use the whole back of the knife against the bone and let the edge lead.
Frequently Asked Questions
What knife is best for filleting a whole fish at home?
A fillet knife with a thin, flexible blade, 6 to 8 inches long, is the right tool. It slides between flesh and bone instead of needing to be pushed through. A stiff boning knife works in a pinch, and a serrated knife does not, because the teeth tear the flesh. Keep it sharp, and if your knife drags rather than glides, stop and sharpen before you continue.
What is the easiest fish to fillet for a beginner?
Trout, tilapia and sea bass are the easiest, because they have a clean backbone and firm, even flesh. Pick something in the one to two pound range from a round-fish shape, so the anatomy matches the steps here. Flat fish such as flounder and sole are simpler still, since there is no rib cage to work around, but the technique is different and easier to spoil.
How do I remove pin bones from fish fillets?
Lay the fillet skin-side down and feel along the thickest part of the flesh with a fingertip. You will find a row of small hard bones a third of the way up from the edge. Grip each one with fish tweezers or needle-nose pliers and pull it in the direction it points, usually toward the head. Repeat until your finger sweeps the whole strip and finds nothing hard.
Should I remove the skin before cooking a fish fillet?
Usually no. Skin acts as a heat barrier, so it keeps the flesh from drying out during roasting or grilling, and it crisps nicely. If you want skin-on fillets, score the skin lightly and salt it, then cook it skin-side down until it releases from the pan. If you prefer skinless, cut a thin strip along the base of the tail fin and pull the skin against the blade in one steady motion after filleting.
How long can I store raw fish fillets in the refrigerator?
One to two days at 40°F or below, stored in a sealed container or bag on a plate set low to catch drips, is the safe window. Get fillets refrigerated within about 30 minutes of cutting, and use the coldest part of the fridge rather than a door shelf. For longer storage, freeze on a tray first, then bag airtight with parchment between pieces and the date written on the package.
Conclusion
The whole method in one line: a sharp flexible knife on a board the fish cannot slide on, guts and gills out, a shallow cut down behind the gill cover to the collar, long forward strokes along the backbone for the first fillet, the same on the other side with the frame lifted, then trim, check for pin bones and refrigerate or cook within the half hour.
If you are new to this, your first action is not the knife. Pick a small round fish, dry it well, park a damp towel under the board, and do the whole thing in one sitting without rushing. Ten minutes of prep is what makes the twenty minutes of cutting go smoothly, and the frame you get back is a bonus.