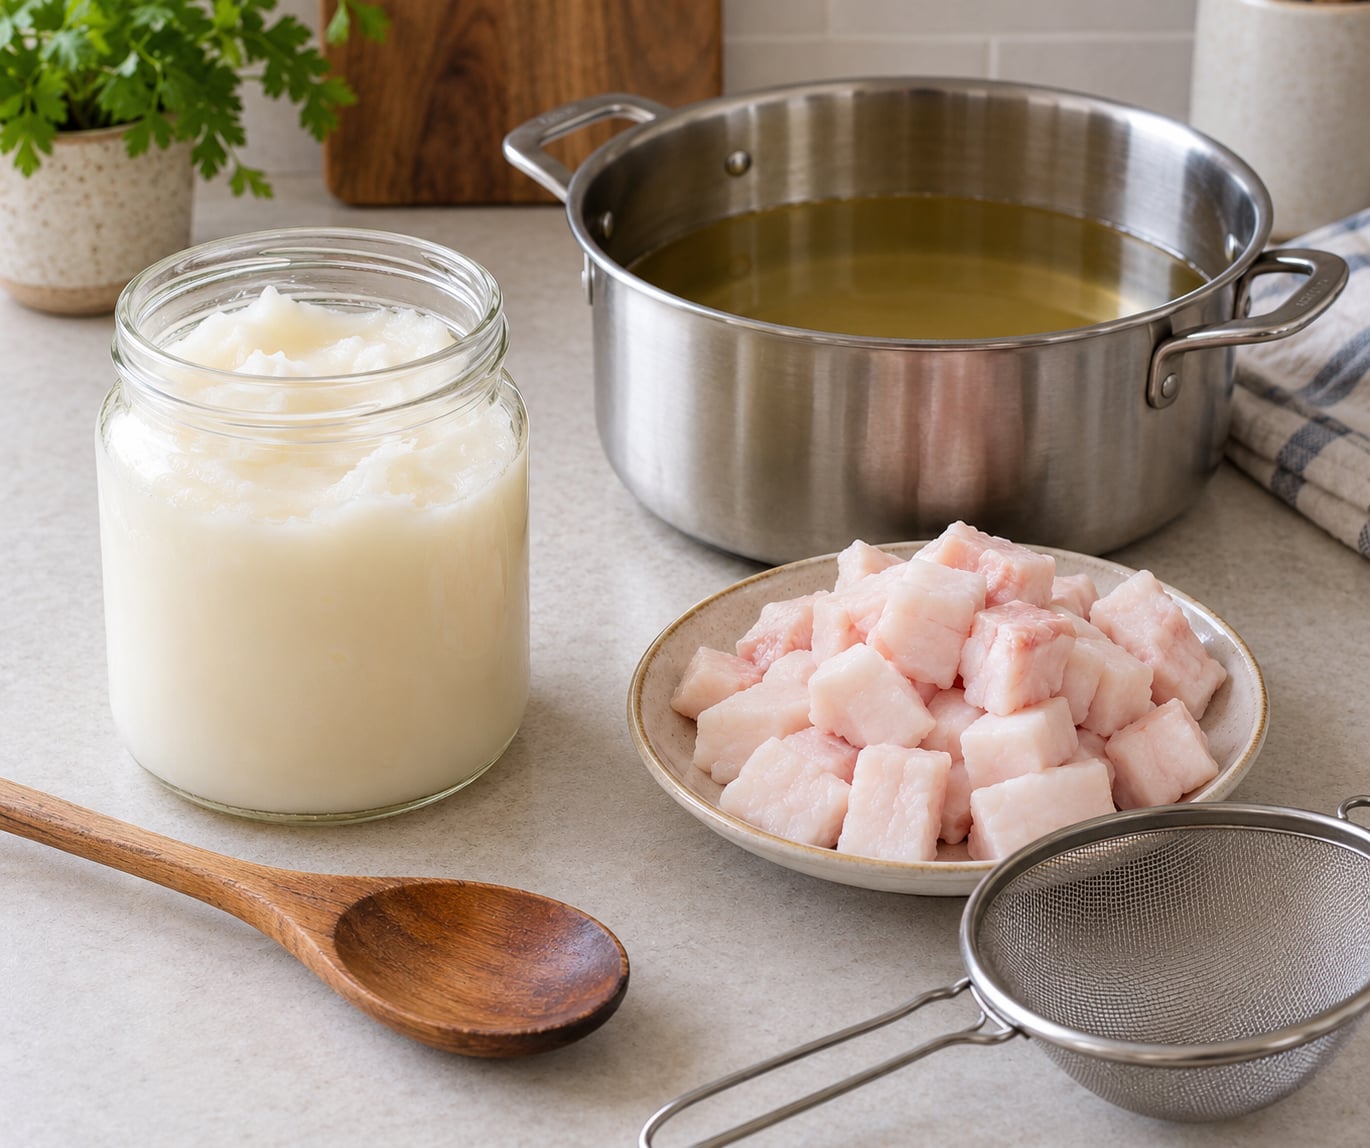
Rendering lard at home means melting pork fat slowly over low heat until the clear liquid fat separates from the browned solids, then straining it into a clean jar where it cools into smooth, white, semi-solid lard. A pound of trimmed back fat yields roughly three-quarters of a pound of clean lard, and the whole job takes about two hours of mostly unattended stovetop time.
You need a heavy pot, a wooden spoon, a fine-mesh strainer, jars, and 2 to 3 pounds of trimmed pork fat. No thermometer is required, though one helps you confirm what the pot is doing.
Table of Contents
- What You Need
- How to Render Lard at Home: Step-by-Step
- How to render lard at home: trim and cut the pork fat
- How to render lard at home: melt the fat slowly
- How to render lard at home: remove the cracklings
- How to render lard at home: strain and store the finished lard
- Common Mistakes
- How to Render Lard at Home: Tips for Better Results
- Frequently Asked Questions
- How long does it take to render lard at home?
- Can I render lard in a slow cooker?
- How do I know when pork fat has finished rendering?
- Why is my rendered lard brown or smells burnt?
- How long does homemade lard keep in the refrigerator?
- Can I use rendered cracklings as food?
- Conclusion
What You Need
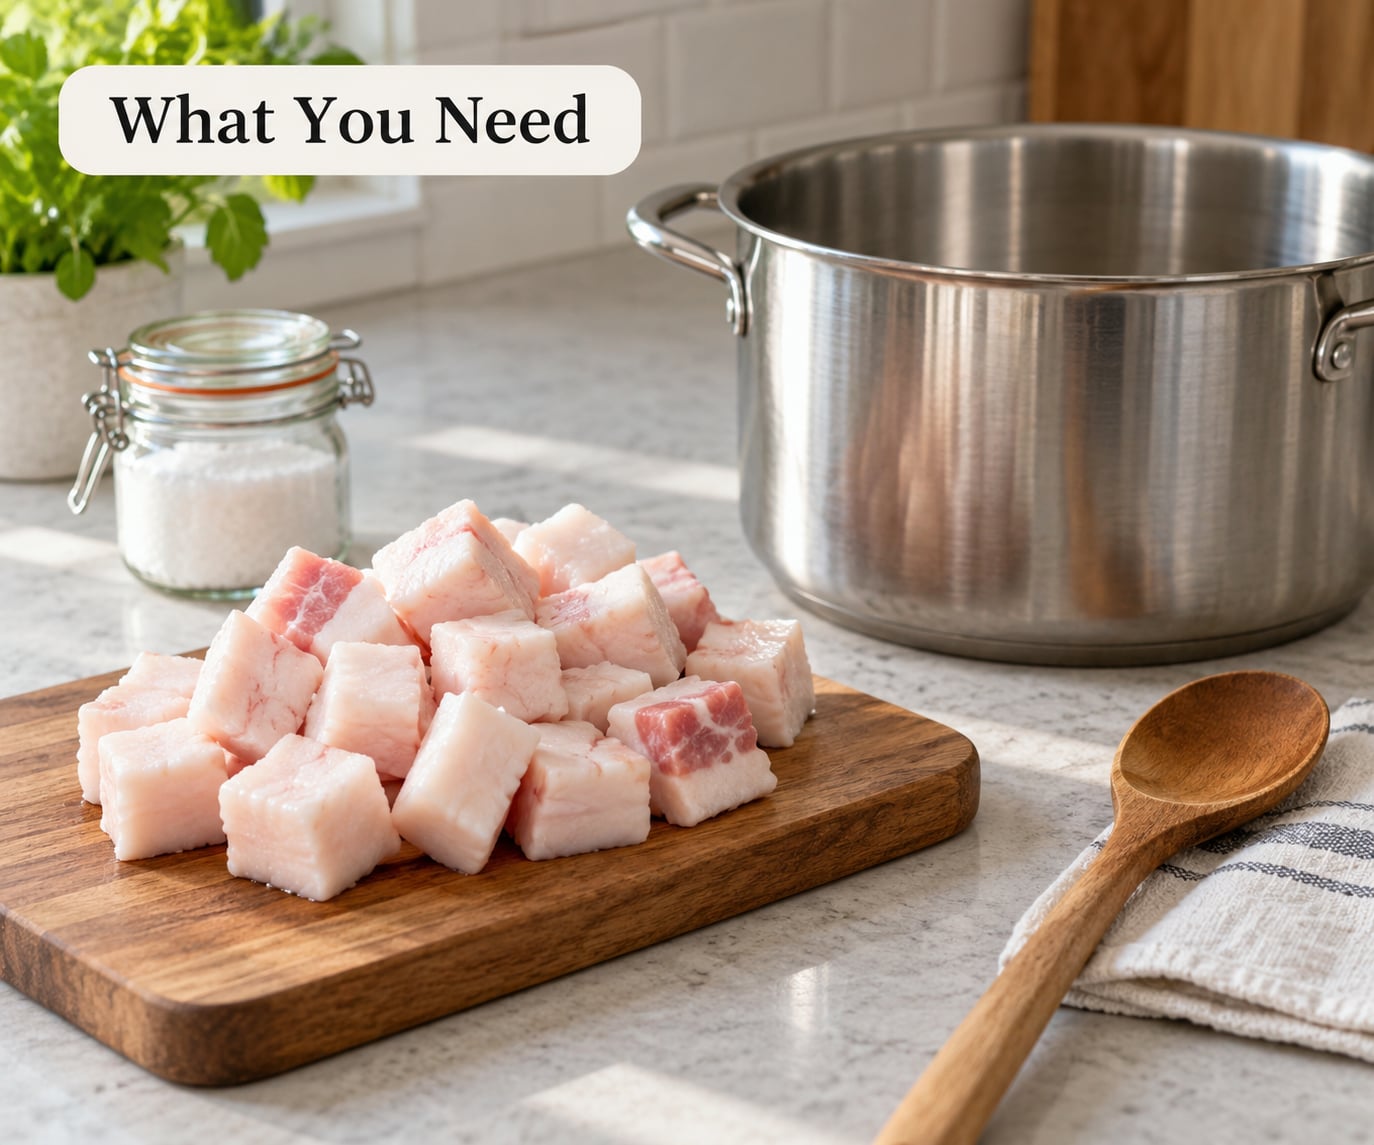
Start with the fat. Leaf lard comes from the layer around the kidneys and loins, and it renders nearly flavorless, which makes it the one you want for pie crust and biscuits. Back fat, sometimes sold as fatback, is the outer layer under the skin; it carries more porky flavor and a slightly higher yield, which suits frying, roasting and cast-iron cooking.
Ask the butcher for fat trimmed from the shoulder, or buy a chunk of a Boston butt and cut it yourself. A pound of untrimmed fat gives you noticeably less lard than a pound of clean fat, so spend your trimming time up front. Skin, sinew and dark meat all carry water and protein, and that is where off flavors and a short shelf life come from.
Freezing the fat for 30 minutes or so before cutting makes it firm enough to handle without slipping. If you render regularly, a hand-crank meat grinder cuts the work down a lot; people on r/carbonsteel grind their scraps first and report it renders faster with more fat recovered.
- Heavy pot with a lid — a Dutch oven or heavy saucepan with a tight-fitting lid and a splatter guard, or your oven mitts ready.
- Wooden spoon or spatula — for stirring without damaging a nonstick surface.
- Fine-mesh strainer or sieve — plus cheesecloth or a paper coffee filter if you want extra clarity.
- Heatproof measuring jug and glass jars — wide-mouth pint or quart jars, clean and completely dry.
- Optional thermometer — handy for the second-pan step, not needed for the main render.
How to Render Lard at Home: Step-by-Step
How to render lard at home: trim and cut the pork fat
Trim every piece of skin and hard connective tissue off the fat, then cut what remains into cubes about half an inch to an inch across. Smaller pieces render faster, which is why a meat grinder is the shortcut most experienced renderers reach for.
What you are aiming for is uniform, pearly white cubes with no pink meat and no dark membrane clinging to them. If a cube looks grey or has a papery edge, cut it away. Set the trimmed fat on a cold plate or tray so it stays firm while you work through the pile.
How to render lard at home: melt the fat slowly
Put the fat in a heavy pot and set it over the lowest heat your stove offers. Do not add water, do not add oil, and do not raise the heat to hurry it along. Fat renders at a low temperature because you are separating it, not cooking it.
Stir every few minutes so the pieces do not catch on the bottom. In the first 20 minutes the cubes will soften and shrink slightly, and a shallow pool of clear liquid will appear underneath them. That is the point where rendering has properly started, and it should look steady rather than violent: no bubbling, no smoke, no browning.
If you see smoke or hear a hiss, turn the burner down immediately. Smoke means the fat is cooking rather than melting, and that is how a neutral lard turns bitter and smoky. Some renderers work around a stove that runs hot by using an oven at a low temperature instead, holding a covered pot at 225 to 250 degrees Fahrenheit for a few hours; it takes longer but almost never scorches.
How to render lard at home: remove the cracklings
After roughly 60 to 90 minutes, the volume of liquid fat in the pot should have grown until the solids are floating in it, shrunken and pale gold to deep brown. When those pieces look dry and hard rather than soft and rubbery, the fat has finished coming out of them.
Ladle or strain off the clear liquid, pressing on the solids to squeeze out the last of it. Many people set a colander inside a bowl and pour the whole pot through, though the two-pan method is better: move the strained fat into a second clean pot and heat it gently to boil off any water that came along with it.
That evaporation step is what separates a waxy, soft lard that goes off in a few weeks from a firm, white, shelf-stable one. Let it simmer a few minutes, no more than five per pound of fat, until any foam subsides and the surface looks quiet and glassy. Do not let it brown.
How to render lard at home: strain and store the finished lard
Pour the hot fat through a fine-mesh strainer. For the clearest result, line the strainer with cheesecloth or a paper coffee filter and pour a second time through the same setup after folding out the first filter, which catches the fine sediment that a sieve lets through.
Pour into dry glass jars and leave them on a counter until the fat stops steaming, then refrigerate. Cooling it fast in the fridge gives you a firmer, whiter finished lard. Keep the jars sealed and dated; refrigeration is treated as a safe storage method by food-safety guidance, and rendered fat that is strained clean, kept cool and handled with clean utensils keeps for months in the fridge or a year or more in the freezer.
If a jar smells sour, has a cloudy film sitting on top of the solid fat, or shows mold at the edges, throw it out without tasting it. Once melted back, the smell is much harder to detect than when it was cold, so check the chilled jar rather than the warm one.
Common Mistakes
Rushing the heat. Medium or high heat browns the meat solids before the fat is out of them, and it drives off the mild flavor along with the water. Low and slow is slower only for the first twenty minutes; after that the pot does the work for you.
Leaving skin and meat on the fat. Every scrap of membrane you leave behind lowers the yield and adds a porky taste to an otherwise neutral lard. Ten minutes with a knife at the start is worth more than ten minutes of extra heat at the end.
Crowding the pot. Render at most a few inches deep. A heaped pot holds onto heat, steams instead of browns, and spatters when you stir it.
Burning the fat. A burnt smell means the solids went too far and the rendered fat absorbed the bitterness. Pour it out and start again; there is no straining trick that fixes smoke taint.
Skipping the second sieve. One pass through a coarse sieve leaves sediment that makes the lard look cloudy and slightly grainy. A paper filter or a folded cheesecloth second pass costs you five minutes.
Pouring grease down the drain. Cool lard solidifies in cold pipes and blocks them. Let it solidify in a can, wrap the can in a bag and put it in the trash, or pour the cooled fat into a container for the next batch of soap or soapmaking.
Sealing hot lard into jars. Warm fat condenses inside the jar and traps moisture, which is the main reason lard goes soft and off-smelling. Cool it first, and only store it clean and dry.
How to Render Lard at Home: Tips for Better Results
The wet method, where a little water is added and left to cook off, gives a slightly softer, more tender crackling and takes a good deal longer. The dry method described above gives you more control and a whiter, longer-keeping lard. Most home renderers land on dry, and the slow-cooker crowd gets there the same way with a long, barely-there simmer on low.
A slow cooker works, but read the manual first. Many run hotter than their low setting suggests, which is why people on r/AskCulinary report that a lower temperature gives cleaner fat and simply accepts a slower render. Rendering it in a pressure cooker is faster still, though you need to check the manual on venting and pressure limits, and the fat needs room to expand.
Use the thermometer as a confirmation, not a driver: if you chose the two-pan method, the strained fat should just reach a simmer during the moisture-evaporation step and no higher. Watching the solids turn dry and hard tells you more than any number on a dial.
Fat choice follows the job. Leaf fat for pastry, biscuits and tamales where you want flakiness and no pork note. Back fat for fried chicken, roasted vegetables, popcorn and eggs. A blend of the two, roughly half and half, is the compromise most people settle on after their first batch.
Plan yield by weight, not by guesswork: expect around three-quarters of a pound of clean lard from every pound of trimmed fat, and rather more if you grind it first. A 3-pound batch of trimmed back fat fills two pint jars comfortably.
On smell, render outdoors or with a window open if you can. The odor problem is mostly about moisture and length of time, not the fat itself, and a pot that has finished in about two hours on the stove sends far less of it through the house than a slow cooker left on for six.
Frequently Asked Questions
How long does it take to render lard at home?
On a stovetop over the lowest heat, trimming and cutting included, expect about two hours for 2 to 3 pounds of fat. Most of that is hands-off, but the pot needs stirring every few minutes. An oven at 225 to 250 degrees Fahrenheit or a slow cooker on low takes three to four hours because the heat is gentler.
Can I render lard in a slow cooker?
Yes, and most home renderers get good results from it on low, straining the liquid fat out every hour or two into a jar so the pot never fills up. The catch is that many slow cookers run hotter on low than the label suggests. Start at your stove’s lowest setting first, then compare.
How do I know when pork fat has finished rendering?
Watch the solids, not the clock. The cracklings look dry, hard and shrunken, and the volume of clear liquid fat stops increasing as you stir. If the pieces still feel soft and rubbery when squeezed, there is fat left in them. Press them before you pull them out, and give it another 15 minutes if they yield.
Why is my rendered lard brown or smells burnt?
Both point to too much heat. Smoke means the fat was cooking rather than melting, and that bitterness stays in the lard no matter how finely you strain it. It is not a filtering problem. Turn the heat down to the very lowest setting and start over; keep an eye on the fat for smoke for the first 20 minutes.
How long does homemade lard keep in the refrigerator?
Strained clean and kept in sealed glass jars, homemade lard keeps for several months refrigerated, and a year or more in the freezer. Some renderers skip refrigeration entirely for fat that is white, dry and well-strained, but refrigeration is the safer choice if you are new to this. Label jars with the date you filled them.
Can I use rendered cracklings as food?
Yes. Season the warm cracklings with salt, pepper or your favorite dry rub and eat them like pork rinds, or bake them at 350 degrees Fahrenheit for about 10 minutes to crisp up any that stayed chewy. Store the rest in an airtight container at the counter for a few days, or freeze them.
Conclusion
The first thing to do is trim the fat properly and cut it into even cubes, because no amount of careful heat will rescue meat and skin you left on. Render it slowly, watch the cracklings rather than the clock, strain the liquid fat twice, and let it cool before it goes near a sealed jar.
Stored cold and clean, that lard will keep for months, and it is the best fat you can put in a pie crust, a cast-iron pan or a pot of greens. It is also a good reason to ask your butcher for the trimmings they were about to throw away.