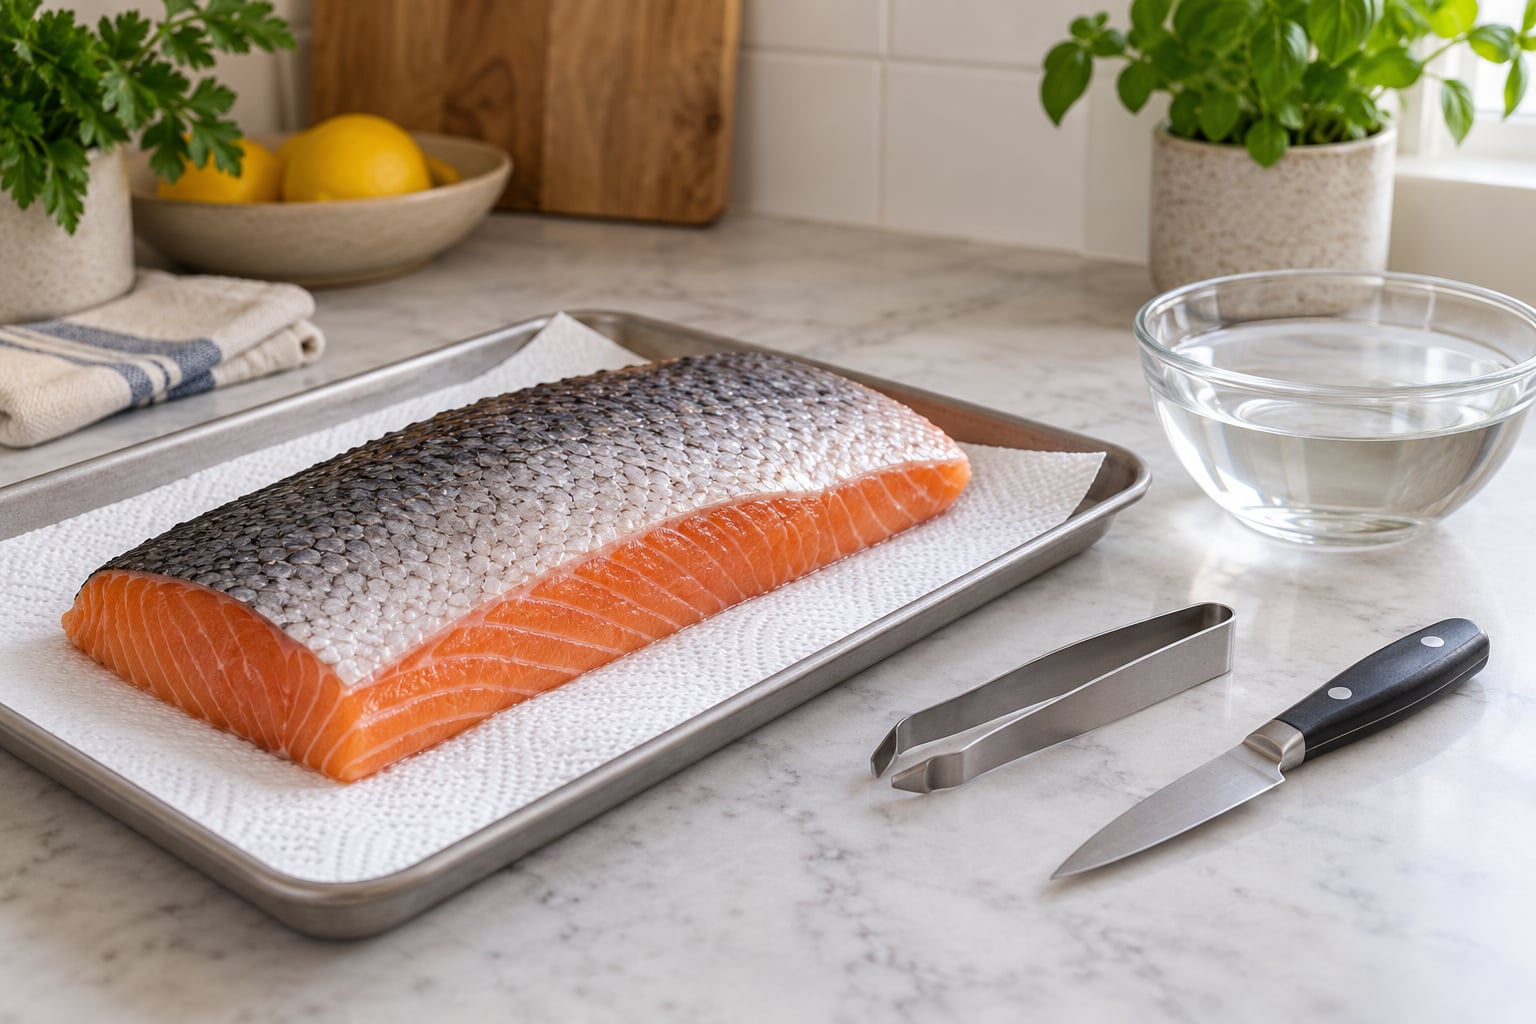
Learning how to remove pin bones from salmon takes about five minutes on a single side. Lay the fillet skin-side down, run a fingertip along the centre until you feel the small hard ridges, ease each tip up, then pull it slowly away from the tail and toward the head. Fishbone tweezers make it easier, but clean household tweezers do the same job.
The part that trips people up is pulling in the wrong direction. A pin bone is shaped like a long shallow hook, and it wants to come out the way it went in. Yank it sideways and you tear the flesh instead of lifting the bone.
One thing worth knowing before you start: fish that was frozen and thawed comes apart far more easily than a fish that was killed this morning. Anglers on fishing forums say frozen fillets debone with almost anything in your hand, and fresh-caught salmon is the genuine test. Store-bought salmon is usually days old and previously frozen, so if you are working from a supermarket fillet you have an easier job than most people imagine.
Most market counters will pin bone a fillet for you at the stall if you ask, which is worth remembering when you are buying rather than prepping. But knowing the method yourself means you can do it on a whole side, a tail section or a piece someone handed you at the last minute.
Table of Contents
- What You Need to Remove Pin Bones From Salmon
- How to Remove Pin Bones From Salmon, Step by Step
- Step 1: Examine the Salmon Fillet
- Step 2: Find and Expose Each Pin Bone
- Step 3: Pull the Pin Bones Out of the Fillet
- Step 4: Check the Fillet Again
- Common Mistakes When You Remove Pin Bones From Salmon
- Cooking and Storage Tips
- Frequently Asked Questions
- Can I remove pin bones from salmon with my fingers?
- What tool is best for removing salmon pin bones?
- Why can’t I see all the pin bones in a salmon fillet?
- Should I remove pin bones before or after thawing frozen salmon?
- What should I do if a salmon pin bone breaks?
- How long does it take to remove pin bones from salmon?
- Start With the Rib-Bone Area
What You Need to Remove Pin Bones From Salmon
You need very little, and almost none of it is specialised.
- The salmon cut – a whole side, a tail section or individual fillets. Skin on or skin off both work, though skin-on is easier to handle because the flesh does not slide around.
- A clean work surface – a board or tray lined with paper towels. Salmon flesh is slippery and oily, and a towel gives you something to grip the fillet by.
- Fishbone tweezers or fine needle-nose pliers – either one. Pliers with a narrow, pointed nose handle deep bones better; tweezers are more precise on shallow ones.
- A small shallow knife or paring knife – used only to ease bone tips up out of the flesh, never to saw at them.
- A small bowl of water – to rinse bone fragments off your tool between pulls so you do not smear them back into the fish.
- Optional: a wooden chopstick – surprisingly good for nudging bone tips up without cutting anything.
A quick safety note, since raw fish is involved. Wash your hands with soap and water before and after, keep the raw fillet away from your fruit and vegetables, and wipe down the board and knife when you are done. Raw salmon is a higher-risk food for older adults, young children and anyone with a weakened immune system, so those cooks should be especially careful with cross-contamination.
How to Remove Pin Bones From Salmon, Step by Step
Step 1: Examine the Salmon Fillet
Put the fillet skin-side down on your lined board with the belly flap facing you and the collar, the thick meaty end near the head, at the far side. The pin bones sit in a shallow arc between the rib cage and the backbone, so they run roughly along the centre line of the fillet and get closer together toward the collar.
The densest cluster is always in the thickest part, right where the ribs meet the spine. Start there and work toward the thinner tail section, because the bones thin out and get easier to feel as the flesh narrows.
Now use a fingertip, not your eyes. Run it gently along the centre line from the collar toward the tail and you will feel a series of small raised ridges or hard points under the surface. Many bones are effectively invisible from the top, which is exactly why searching visually wastes time. You know it worked when your finger stutters over a definite hard edge rather than sliding smoothly through flesh.
Step 2: Find and Expose Each Pin Bone
Once you have found a bone by touch, you need to lift its tip far enough out to grip. Lay the flat side of a paring knife against the flesh and draw it lightly across the tops of the bones toward the tail. This nudges each tip up and out so it stands proud of the meat instead of hiding under a thin layer.
Go slowly and keep the blade almost parallel to the surface of the fillet. You want to part the flesh, not cut into it. If you are using the chopstick, push it under the exposed tip and lever upward the same amount.
On a thick collar section the bones sit deeper and need a gentler hand. Push the knife tip into the flesh beside the bone and lift rather than slicing across it. Working out how to remove pin bones from salmon is mostly this one habit: expose the tip, do not dig for the whole bone.
Step 3: Pull the Pin Bones Out of the Fillet
Grip the exposed tip with tweezers or pliers as close to the end as you can. Squeeze lighter than feels sufficient – a firm crush on a fragile bone is how tips snap off – then pull slowly and steadily away from the tail, toward the head.
Shallow bones come free in one smooth draw. Deeper ones in the collar area may need a second pull at a slightly different angle, still generally pointing toward the head. Dip the tool in the bowl of water between bones so your fingers are not slick and no fragment gets pushed back into the flesh.
If a bone resists, stop and re-grip nearer the tip rather than adding force. Pulling hard bends the fillet and tears the muscle fibres, and the bone snaps anyway. Two patient pulls beat twenty hard ones every time.
Step 4: Check the Fillet Again
Do a final sweep with a fingertip along the rib area, exactly as you did in step one. Any spot that still feels sharp gets a second look under bright light. Hold the fillet up and angle it so the light rakes across the surface; a bone tip catches the light as a small bright line where flesh does not.
If a tip broke off and stayed in the flesh, probe for it with the pointed nose of the tweezers or pliers and pinch the fragment out along its length. It is uncomfortable work on a deeply embedded piece, and if you cannot get it cleanly it is better to trim a thin slice off around that area than to keep cutting at it blind.
Rinse the fillet lightly and pat it dry before it goes anywhere near a pan. Surface moisture steams instead of sears, and it keeps the flesh from breaking when you handle it.
Common Mistakes When You Remove Pin Bones From Salmon
Almost every ruined fillet traces back to one of a handful of habits.
- Dragging the tweezers sideways. The bone snags and the flesh tears. Fix: pull along the bone’s own line, toward the head.
- Pulling against the direction of travel. You are fighting the hook shape. Fix: turn the fillet if you need to so the head end is the easy, near end.
- Sawing at a buried bone with a stiff knife. You end up with a hole in the meat. Fix: use the knife flat and shallow to expose the tip, then switch to the tweezers.
- Using more force than the bone can take. Tips snap and stay behind. Fix: lighter squeeze, slower pull, re-grip closer to the tip.
- Assuming one pass caught everything. Bones hide under the skin side and in the tail. Fix: run the fingertip sweep again, always before cooking.
- Leaving it until after cooking. Cooked flesh contracts around the bones and they push up through the surface, which is when they surprise diners. Fix: debone raw.
One workaround experienced cooks use instead of pulling bone by bone: cut down both sides of the bone line with a sharp knife and lift out a thin strip of meat containing several bones at once. It is faster on a big side and it costs you a little flesh. A variation is to zip along the lateral line, the sensory line running down the middle of the fillet, with a shallow continuous cut and lift.
If you genuinely do not own tweezers, the no-tool method works. Pinch the exposed tip between your thumb and forefinger, moisten your fingers first for grip, and pull toward the head. For deeper bones, press with a chopstick or the handle end of a spoon to lift the tip until it is within reach of your fingers. Slow and steady works; speed just tears the flesh.
And if deboning is not something you enjoy, cut the fish into steaks instead. Bone-in salmon steaks cook beautifully and many experienced cooks prefer them. The bones are obvious and easy to pick out after cooking. Deboning pays off when you are serving fillets to children, older guests or anyone who would not notice a small bone until it catches.
Cooking and Storage Tips
Remove the skin first if your recipe calls for it, by sliding a knife between skin and flesh while the fillet is skin-side down. Pulling the skin as you go keeps it from tearing the flesh underneath.
Once deboned, treat the fillet gently. A whole side is stronger than two tail sections, so lift large pieces with two hands rather than a single edge, and keep the skin side down when you move it.
Store raw salmon in a sealed container or bag on the bottom shelf of the refrigerator for one to two days. For longer storage, freeze it in portions with a layer of parchment between them; it keeps well frozen for a couple of months before quality really slides.
Cook fish to a minimum internal temperature of 145°F (63°C), measured in the thickest part. That guidance exists for good reason, since raw salmon carries a higher risk of foodborne illness than most other meats, and it holds for children, older adults and anyone pregnant or immunocompromised.
Overcooking is the other big mistake people make with salmon. It dries the flesh, makes it flake apart when you try to turn it, and firms the bones so they press harder against the surface. Pull it off the heat while the centre still looks slightly translucent and let the carryover heat finish it.
Frequently Asked Questions
Can I remove pin bones from salmon with my fingers?
Often, yes. Pin the exposed bone tip between a damp thumb and forefinger and pull steadily toward the head. Fingers work best on the shallow bones in the tail section and on previously frozen fish, where the flesh has relaxed and released its grip. For the deeper bones in the collar area you will usually need to lift the tip with a chopstick or knife first, then pinch it out. Many home cooks use no tool at all on a supermarket fillet.
What tool is best for removing salmon pin bones?
Fishbone tweezers for shallow bones and fine needle-nose pliers for deep ones. The pliers give you leverage and a narrower nose, which matters when a tip has broken and you are trying to fish a fragment out of thick meat. Fishmongers who do this daily often reach for stainless needle drivers, the same narrow-nose instrument used in veterinary work. Clean household tweezers work fine too; rinse and sanitise anything you use on raw fish.
Why can’t I see all the pin bones in a salmon fillet?
Because most of them sit just under the surface rather than in it. The thin layer of flesh over the bone tips is translucent enough to hide them when the fillet is lying flat, especially over the thicker meat near the collar. They are far easier to find by touch than by sight. Run a fingertip down the centre line of the fillet and you will feel the bones as small hard ridges long before you can see anything.
Should I remove pin bones before or after thawing frozen salmon?
Wait until the fillet has thawed enough to handle, but not until it is warm and soft. Partly frozen flesh is stiff and slippery, and pin bones tend to snap in cold, rigid meat. Once the fillet has lost its ice glaze and bends without cracking, debone it while it is still cold and firm. Cold fish also holds its shape better, so the flesh tears less when you pull a bone free.
What should I do if a salmon pin bone breaks?
Do not squeeze harder. Set the fillet down, feel for the fragment with a fingertip, and use the narrow pointed nose of your tweezers or pliers to pinch it along its length and lift it out in line with how it lies. Rinse the tool in a bowl of water between attempts. If the fragment is wedged deep in the collar area and will not come out cleanly, trim a thin slice from around it rather than cutting blindly into the meat.
How long does it take to remove pin bones from salmon?
A single side takes about three to five minutes once you have found the bone line, and a few minutes more if the flesh is fresh rather than previously frozen. Most of that time goes on feeling for the bones, not pulling them. Working in batches across the fillet is faster and steadier than hunting bone by bone from one end. A whole side that takes ten minutes is still quicker than the trip back to the fish counter.
Start With the Rib-Bone Area
Start at the thickest part of the fillet near the ribs and collar, where the bones cluster and sit deepest, then work toward the tail where they get shallower. Feel for them rather than looking, ease each tip up, and pull away from the tail and toward the head with a grip lighter than feels necessary.
Before the salmon hits the pan, run one more fingertip sweep down the centre line. That last check takes ten seconds and it is the difference between a clean plate and a guest fishing a bone out of their teeth. It is a knack, and the third side you debone will be faster than the first.