To pressure can green beans, pack them hot into clean jars with 1 inch of headspace and process them at 10 pounds of pressure (11 on a dial gauge) for 20 minutes for pint jars or 25 minutes for quart jars. Then let the canner depressurize on its own and the jars cool undisturbed for 12 to 24 hours. Green beans are a low-acid vegetable, so a boiling water bath is never safe for them.
The whole process takes about an hour of active work, plus the cooling wait. If you have done water bath canning before, the new part is holding steady pressure on a dial or weighted gauge canner, which is exactly where most beginner batches go wrong.
Everything below follows the tested research published by the National Center for Home Food Preservation and the USDA Complete Guide to Home Canning. If a number here ever disagrees with your canner manual or a current tested recipe from NCHFP, follow those sources.
Table of Contents
- What You Need to Pressure Can Green Beans
- Step-by-Step
- How to Prepare Fresh Green Beans for Canning
- How to Load and Seal a Pressure Canner
- How Long to Pressure Can Green Beans
- How to Tell the Green Beans Are Properly Canned
- Common Mistakes
- Frequently Asked Questions
- Do green beans have to be pressure-canned?
- What pressure should I use for green beans?
- How do I adjust green-bean processing time at altitude?
- Can I pressure-can frozen green beans?
- How long do pressure-canned green beans last?
- Conclusion
What You Need to Pressure Can Green Beans
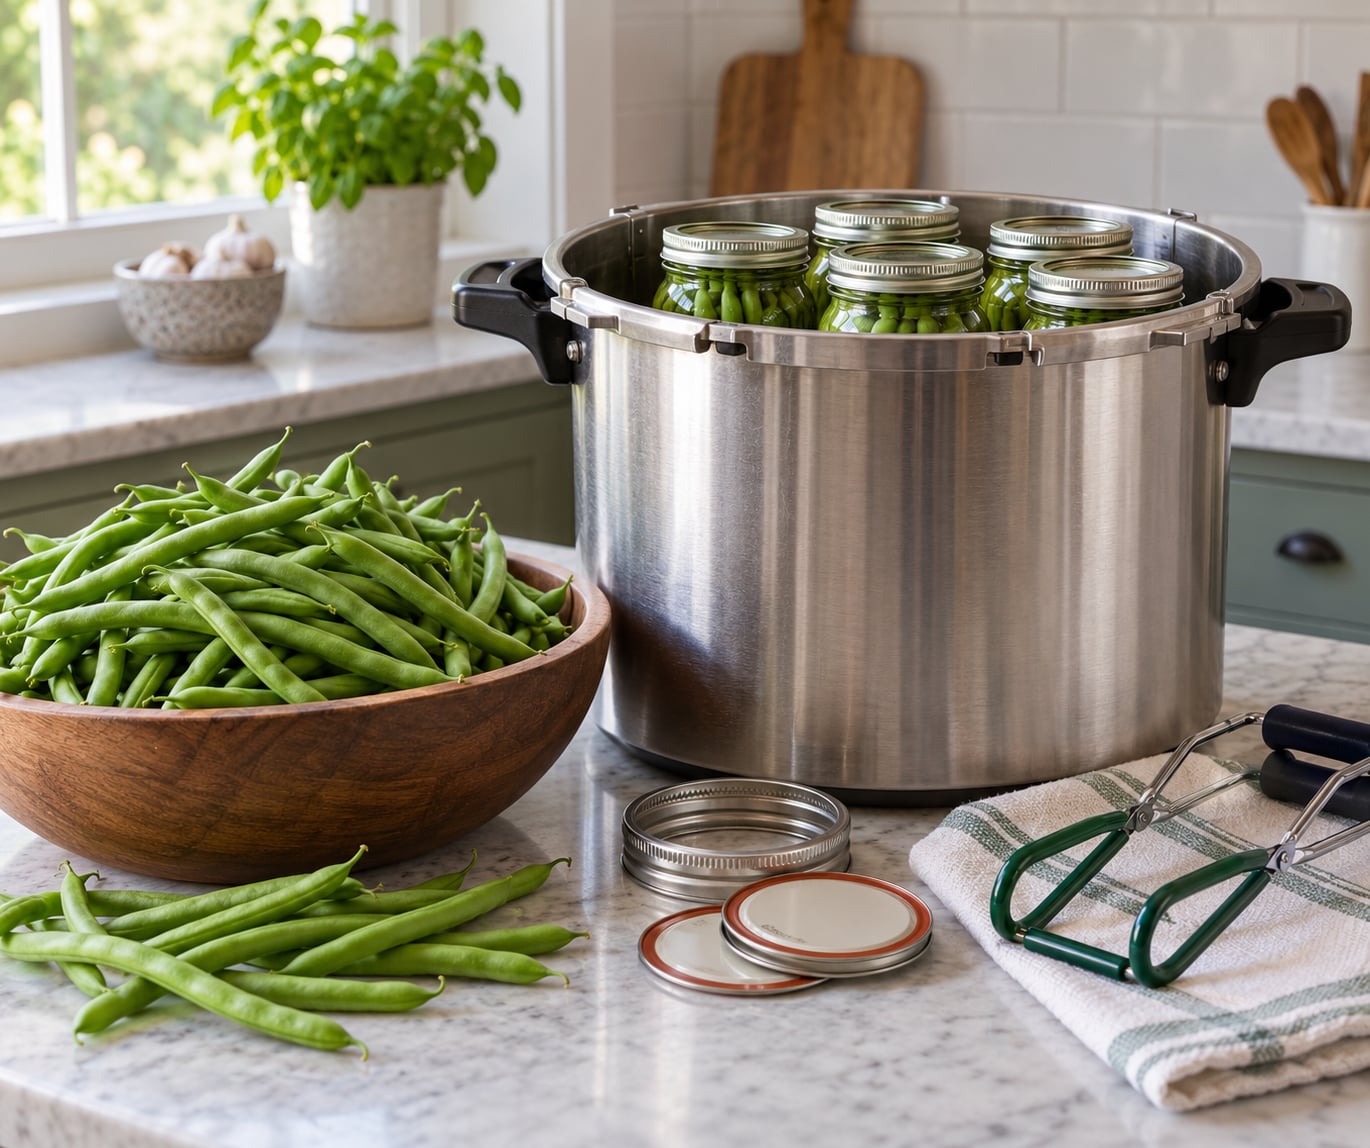
Pressure canning green beans takes less equipment than people expect. You need a pressure canner, not a water bath canner, because a water bath tops out near 212 F and cannot destroy botulism spores in a low-acid food.
- A pressure canner. Either a dial gauge canner with a pressure indicator and a vent pipe, or a weighted gauge canner that uses a 10 or 15 lb regulator weight. Both are safe when operated per the manufacturer manual.
- A canning jar rack and enough hot water to cover the jars by 2 to 3 inches.
- Canning jars in half-pint, pint or quart sizes. Inspect rims for chips, rust or bends and set aside anything damaged.
- New two-piece lids. Bands can be reused if they are not bent, but lids must be new every time.
- Canning salt, 1/2 teaspoon per pint or 1 teaspoon per quart, optional but traditional. Table salt is not a substitute because iodized salt can cause brine cloudiness.
- A jar lifter, a bubble remover or plastic knife, clean towels, and labels.
A dial gauge canner is not mandatory. A weighted gauge canner holds pressure by design and many experienced canners use nothing else; what matters is that your canner holds and holds steady at the pressure the recipe specifies.
Step-by-Step
How to Prepare Fresh Green Beans for Canning
Start with the freshest beans you can get. Rinse them under cool running water, snap or trim the ends, and cut them into 1 to 2 inch pieces. Beans that go straight from the garden or a market stall into jars within a few hours give the best results.
Keep the jars hot. Wash them in hot soapy water, rinse, and set them in a pot of simmering water so they are warm when you pack them. Cold jars meeting hot beans and hot water are the main cause of siphoning later.
- Blanch the cut beans for 3 minutes in boiling water if you want brighter color and firmer texture. Drain well.
- Pack the beans hot into the hot jars, tapping each jar gently on a folded towel to settle the pieces.
- Leave exactly 1 inch of headspace. Measure it with a ruler or a headspace gauge; more space means the beans sit loose and float, less space means the expanding liquid pushes the lid.
- Add 1/2 teaspoon canning salt per pint or 1 teaspoon per quart.
Tricky beans are a common complaint. Older late-season pods are stringy no matter how well you process them, so pick young beans and skip the tough ones.
How to Load and Seal a Pressure Canner
Fill each jar with boiling water down to that 1 inch of headspace. Slide a non-metallic bubble remover or the blunt end of a plastic knife down the inside wall of each jar to release trapped air, then top up with boiling water if the level drops.
Wipe each rim with a damp clean towel or a paper towel moistened with vinegar. Any grease, food particle or dried liquid on the rim is the number one reason a lid refuses to seal.
Screw the band on until it is fingertip tight. That means snug with no effort, not wrench tight. Over-tightening bends the flange and prevents the vacuum from pulling the lid down.
Use the jar lifter to set jars on the rack inside the canner. Never stack jars or squeeze them side by side, and keep your hands clear of the lid area.
Add hot water until the jars are covered by 2 to 3 inches, following your canner manual, and lock the lid in place.
How Long to Pressure Can Green Beans
Turn the heat to high until steam escapes steadily from the open vent pipe, and let it run a full 10 minutes. That vent purges air from the canner, which is what lets it reach and hold accurate pressure.
After venting, set the correct regulator weight or adjust the dial gauge so the needle sits on the target line, then start timing only once the pressure has held steady.
| Jar size | Weighted gauge pressure | Dial gauge pressure | Processing time |
|---|---|---|---|
| Half-pints (8 oz) and pints (16 oz) | 10 psi | 11 psi | 20 minutes |
| Quarts (32 oz) | 10 psi | 11 psi | 25 minutes |
Never lower the heat enough to let pressure drop while the timer runs. A dip below target gives up the safety margin you paid for. Running slightly above the target pressure is better than running below it, which is the single most common advice repeated on canning forums.
| Elevation | Weighted gauge | Dial gauge |
|---|---|---|
| 0 to 1,000 ft | 10 psi | 11 psi |
| 1,001 to 3,000 ft | 15 psi | 11 psi |
| 3,001 to 6,000 ft | 15 psi | 11 psi |
| 6,001 to 8,000 ft | 15 psi | 12 psi |
Above 1,000 feet water boils cooler, so the same weight cannot reach the temperature the tested times assume. Check your elevation before you start rather than guessing later.
How to Tell the Green Beans Are Properly Canned
When the timer ends, turn off the heat and leave the canner alone. It can take 15 to 30 minutes to depressurize naturally, and speeding that up is how people get scalded.
Do not crack the weight or run cold water over the lid. Once the gauge reads zero or the weight stops rocking, wait another 10 minutes, remove the weight if you use one, and lift the lid tilted away from your face so escaping steam goes up and back rather than at you.
Lift the jars out with the jar lifter and set them on a clean towel somewhere out of a draft. Leave them undisturbed for 12 to 24 hours. Do not test a lid, retighten a band or move a jar during that window, because the seal is still forming.
After the wait, press the center of each lid. A proper seal sits slightly concave and does not flex or pop. A small dented ring around a flat center is normal.
Remove the screw bands, wash the jars in hot soapy water, dry them, and label each one with the contents and the date. Store the jars in a cool, dark, dry pantry with steady temperatures, well under 95 F.
Discard any jar that is bulging, leaking, spurting liquid or foaming when opened, shows a fuzzy mould layer, or still has no firm seal after 24 hours. An unsealed jar gets refrigerated and used within two hours or frozen; never put it in the pantry.
Common Mistakes
Almost every failed first batch traces back to one of these, and each has a simple fix.
- Using a water bath canner. It cannot get hot enough. Switch to a pressure canner every single time; there is no processing time that makes a water bath safe for plain green beans.
- Packing jars too loosely. Beans floating and liquid shooting out under the lid is siphoning, and it happens because the beans were not packed snugly enough. Press each layer down as you fill.
- Wrong headspace. Too much space leaves air to expand and pushes liquid out. Too little leaves no room for boiling water to expand. Measure the 1 inch rather than eyeballing it.
- Skipping or rushing the 10 minute vent. Air left in the canner skews the reading and can keep pressure from ever settling.
- Processing at the wrong pressure. Dial gauge canners run at 11 psi for these times, weighted gauge canners at 10 psi. Setting a dial canner to 10 means you are processing cooler and longer than the tested research supports.
- Shortening the processing time. Cut nothing. Pints are 20 minutes and quarts are 25 minutes at the listed pressure, and altitude changes the pressure, not the reader’s patience.
- Ignoring altitude. A 1,500 foot cabin and a sea level kitchen are not the same process. Use the table above.
- Forcing the canner to cool. Cold water on a sealed canner, or lifting a weight under pressure, can cause a violent release of steam.
- Screw bands tightened hard. They must be fingertip tight so the seal can pull down.
- Handling jars too soon. Bubbling lids within a few hours of processing are normal. Wait out the full 12 to 24 hours.
One more common one: soaking beans overnight in the jars before processing. That practice changes the beans and the liquid, can leave a milky or cloudy result, and does not belong in a tested plain green bean process.
If you would rather skip the canner entirely, blanching and freezing preserves green beans well, and refrigerator pickling or an acidified tested pickle recipe are also safe options. Pressure canning is simply the route to a shelf stable pantry jar.
Frequently Asked Questions
Do green beans have to be pressure-canned?
Yes, if you want them plain and shelf stable. Green beans are a low-acid vegetable, sitting above pH 4.6, which means Clostridium botulinum spores can survive in them. A boiling water bath stays near 212 F and cannot destroy those spores no matter how long you process. Add vinegar or lemon juice and you have made pickled beans, which follow a different tested process. Plain green beans need a pressure canner at 10 psi weighted or 11 psi dial.
What pressure should I use for green beans?
Use 10 pounds of pressure on a weighted gauge canner, or set a dial gauge canner to 11 psi, at sea level. Do not set a dial gauge canner to 10 thinking it matches a weighted gauge. The timing of 20 minutes for pints and 25 minutes for quarts assumes the pressure listed here is reached and held. Start the timer only after pressure is steady, not when you first put the weight on.
How do I adjust green-bean processing time at altitude?
Above 1,000 feet, increase the pressure rather than the time. A weighted gauge canner goes to a 15 lb weight, and a dial gauge canner goes to 12 psi above 6,000 feet. Water boils at a lower temperature at elevation, so a sea level weight cannot reach the temperature the tested times assume. Check your elevation before starting and confirm the gauge holds steady, because dipping below target pressure mid-process is the real risk.
Can I pressure-can frozen green beans?
Follow a recipe written specifically for frozen green beans rather than applying fresh-bean times to frozen ones. Freezing changes both the texture and the water content, so the pack and the processing time are different. Blanch fresh beans and freeze them for a later batch, or can the fresh ones now. If you do use a canned-frozen-bean recipe, follow its times exactly and keep the same jar sizes and packing method.
How long do pressure-canned green beans last?
Properly sealed jars stored in a cool, dark pantry with a stable temperature below 95 F keep for about a year, and good seals often last well beyond that. Inspect every jar before opening it. Discard any jar that is swollen, leaking, shows cloudiness with floating gas bubbles, or spurts liquid or foam when the lid comes off. Do not taste jar contents to test them, and never store a jar whose lid did not seal.
Conclusion
If you are new to this, the first thing to do is pick up a current tested green bean recipe from NCHFP and read it against your canner manual before you fill a single jar. Then work the process in order: hot jars, snug packing, 1 inch of headspace, a full 10 minute vent, steady pressure for 20 or 25 minutes, and 12 to 24 hours of undisturbed cooling before you touch a lid.
Getting the numbers right on the first batch matters more than getting a fancy result on the fifth. And if your surplus beans came from a market stall rather than a garden, peak-season freshness is the one advantage you already have working for you.