Knowing how to hone a knife between sharpenings takes about two minutes before a prep session and saves you a full stone or whetstone session every few weeks. Honing straightens the microscopic edge that rolls over with every cut, and it does not remove metal, so the knife stays sharp longer and slices instead of sawing.
The short version: stand the steel upright on a damp towel, hold the blade at 15 to 20 degrees, sweep heel to tip in one slow motion, alternate sides, five or six passes per side, light pressure. Stop as soon as the knife glides through produce without dragging.
Honing is not sharpening. Sharpening grinds fresh metal to create a new bevel, and it happens far less often. Honing is the weekly touch-up that keeps a sharp edge from drifting dull.
Stick with a damp cloth under the rod and a board under that. It keeps the steel from skating off the counter, which is the single most common reason beginners give up on honing.
Table of Contents
- What You Need
- Honing vs sharpening, in plain terms
- Choosing a rod or stone for your experience
- Step-by-Step
- How to hone a knife between sharpenings
- How to use a honing rod correctly
- How to know when the knife is sharp enough
- Common Mistakes
- Frequently Asked Questions
- How often should I hone a knife?
- Can a honing rod sharpen a dull knife?
- Should I use a steel or ceramic honing rod?
- Is a whetstone better than a honing rod?
- How do I hone a Japanese knife?
- How often does a kitchen knife need professional sharpening?
What You Need
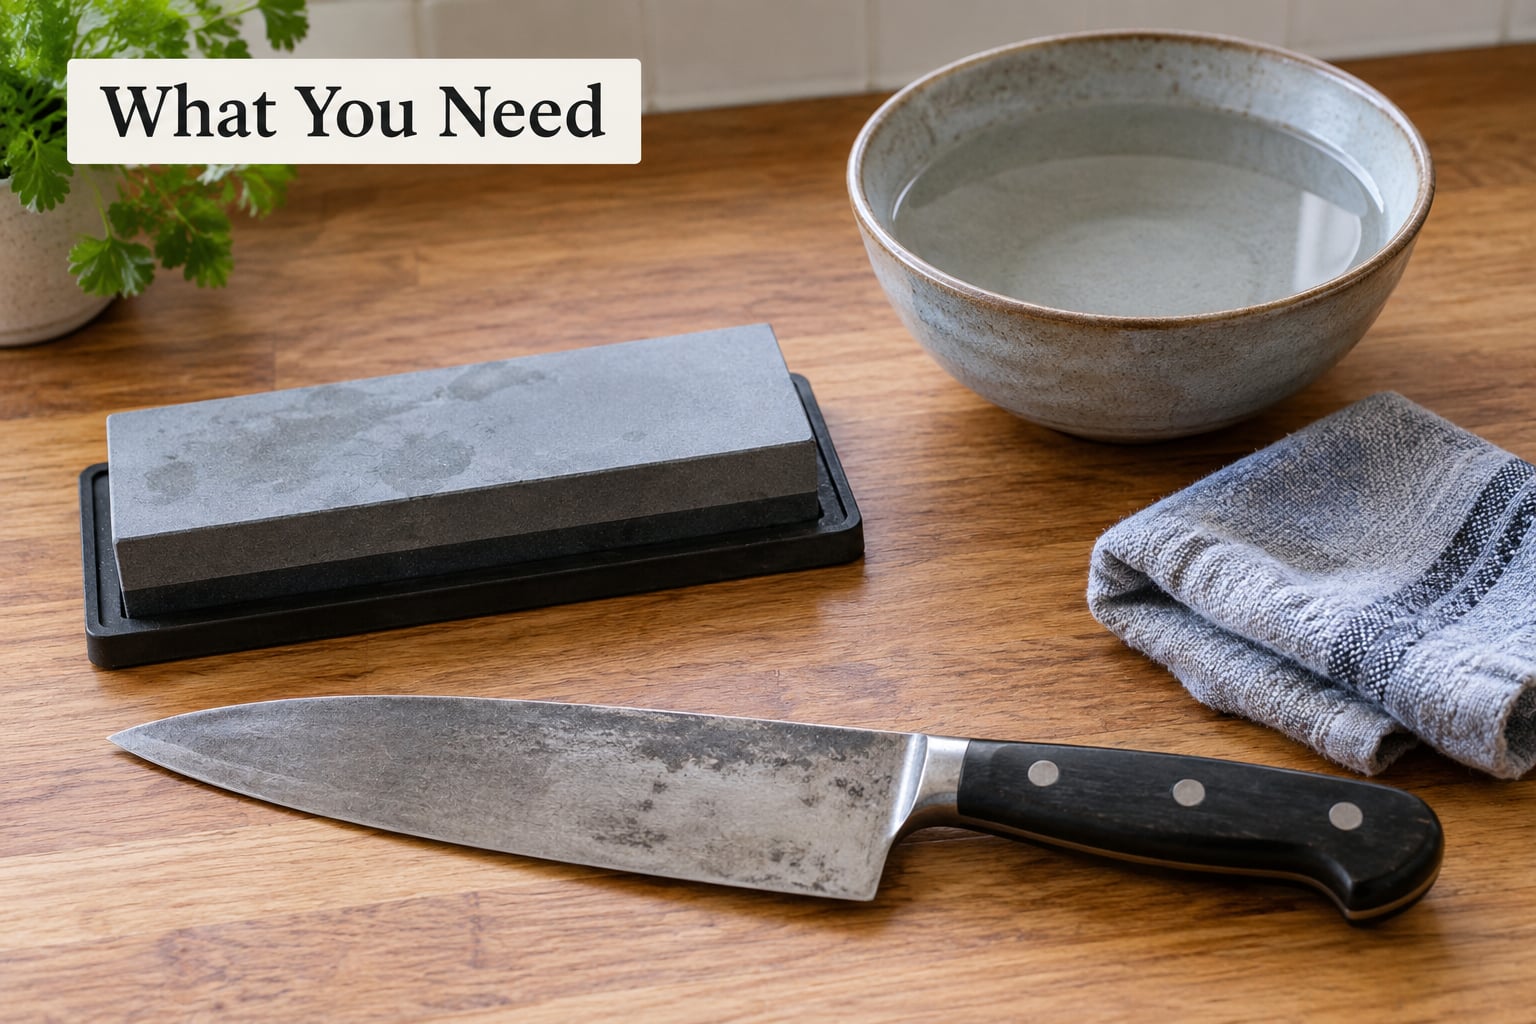
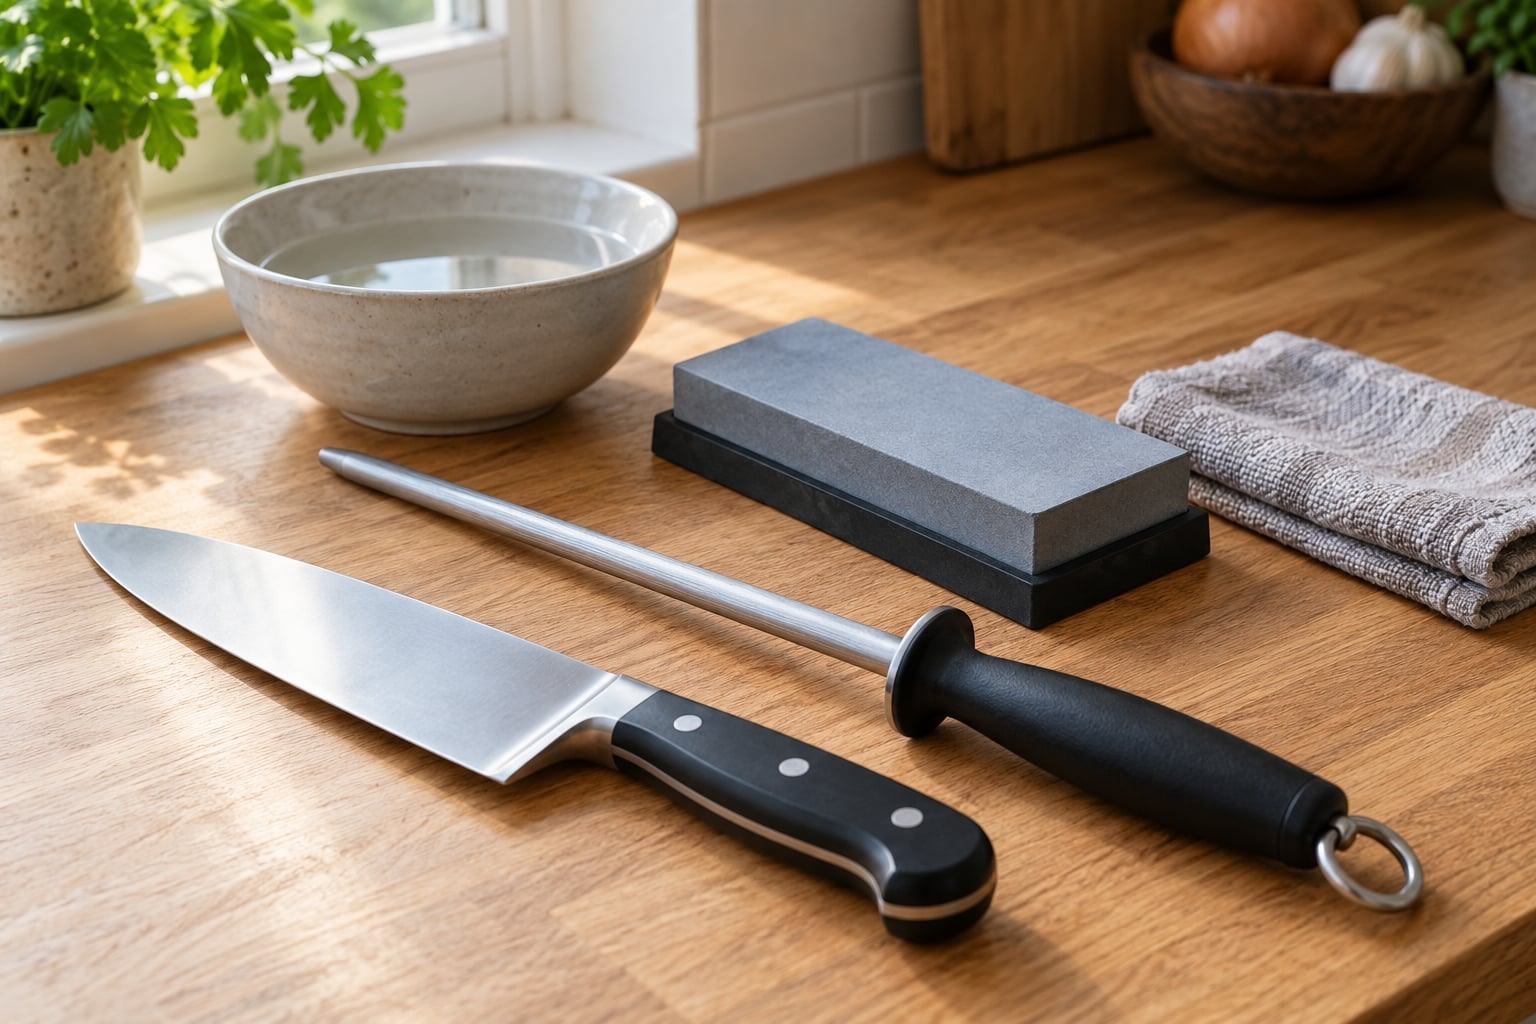
Required: a honing steel or ceramic rod, a folded damp towel, and a cutting board with room to work. That is it. If your knife came in a box with a rod tucked in the handle, that rod is a honing steel, whatever the packaging called it.
Optional: a leather strop with a little honing compound, and a whetstone or a knife sharpener if you want to reset the edge yourself instead of sending it out.
Honing vs sharpening, in plain terms
Honing realigns the existing edge. The metal stays exactly where it is, but the bent-over wire edge is straightened back into line. Sharpening removes metal with an abrasive surface, either a whetstone, a diamond sharpener, or a professional grind, and it reshapes the bevel into something new.
Think of it this way. A board of onions dulls an edge by bending the tip of the blade sideways, not by removing it. Honing bends it back. Once enough metal has rolled over that bending back stops working, and only sharpening will fix it.
Choosing a rod or stone for your experience
For most home cooks, a smooth steel honing rod is the right starting point. It is forgiving, cheap, and hard enough for the high-carbon steel in a Wusthof or Henckels chef’s knife without being so aggressive that beginners chew through an edge in a week.
A ceramic rod is harder than smooth steel and still used mainly for realignment. It bites a bit more, which helps if you cut a lot of dense produce, but it will put micro-scratches into a softer German blade if you lean on it.
A diamond-coated rod is not a hone in the strict sense. Diamond abrasive removes metal, which makes it a sharpener you use in short bursts between full sharpenings. It works, just understand that you are grinding a little each time.
If you sharpen on whetstones already, buy a leather strop. Repeated stropping on a soft surface refines an edge more gently than a steel rod and is what many sharpers on r/chefknives and r/sharpening reach for on the knives they care about most.
Step-by-Step
How to hone a knife between sharpenings
- Soak the steel for ten minutes. If it is a smooth steel rod, water softens any metal it has picked up and keeps the surface working smoothly. Ceramic and diamond rods do not need soaking.
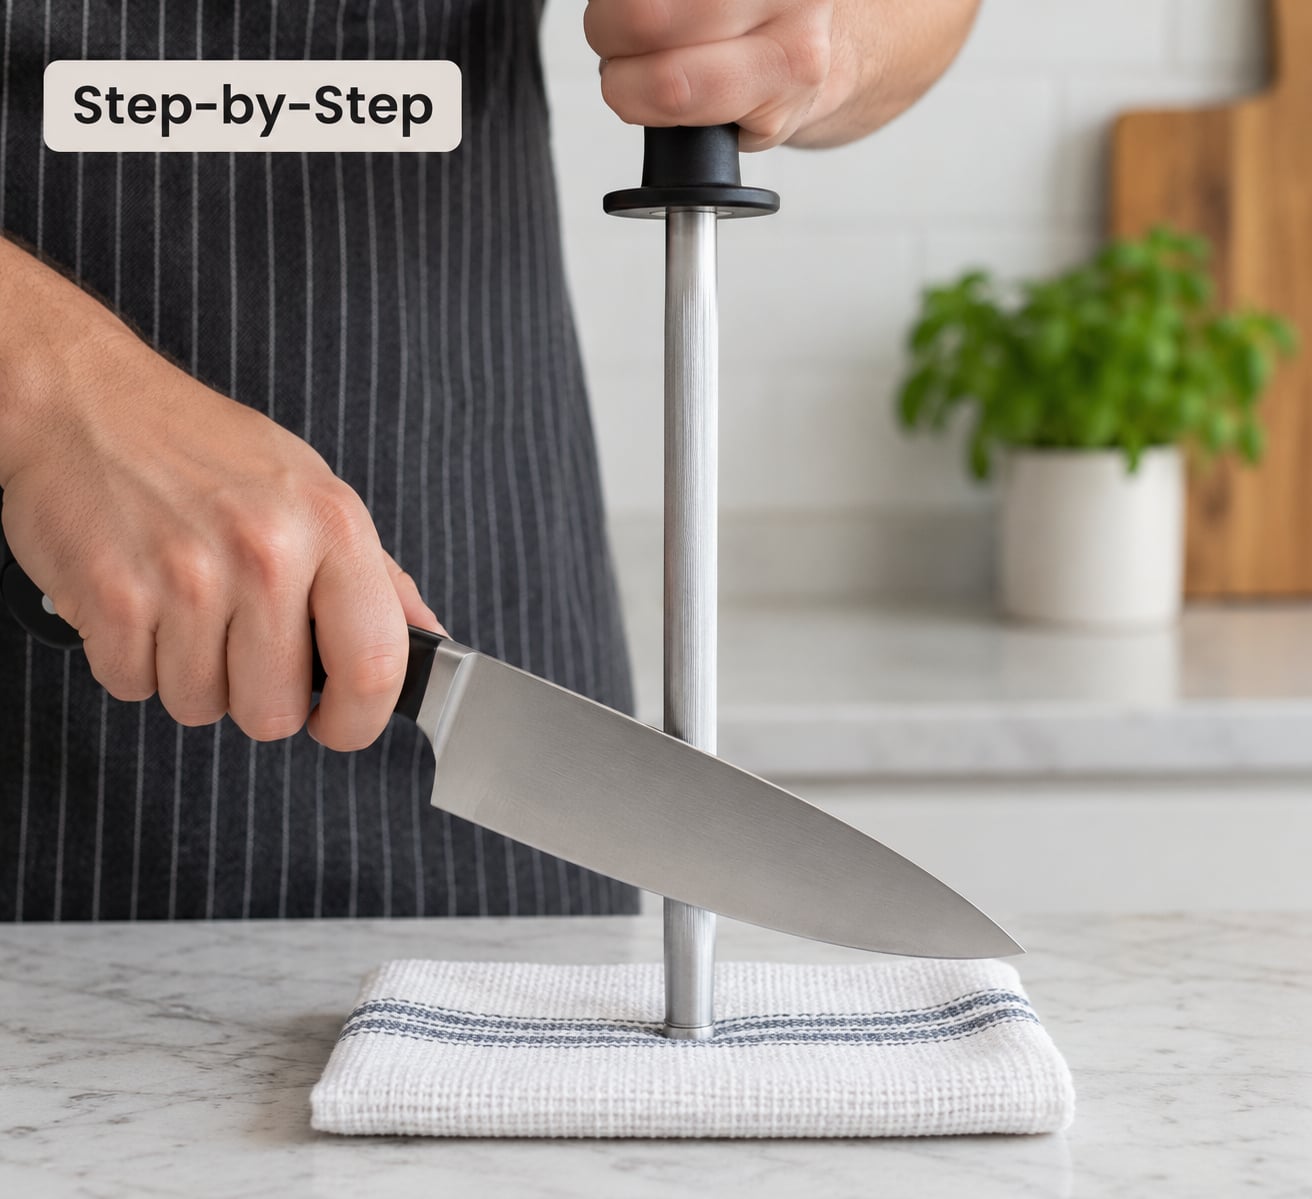
- Dry the steel and stand it upright. Plant the base on your folded towel on a board, your non-dominant hand holding the top. The rod should be vertical, not leaning.
- Set the angle before you move. Rough in your mind using a clock face: put the spine of the blade at the 12 o’clock mark of the rod, and the cutting edge at 1 or 2 o’clock. That is 15 to 20 degrees.
- Place the heel of the blade near the top of the rod. The whole bevel should touch the rod at once, from the heel forward.
- Sweep down and across, heel to tip. One slow, controlled stroke, pulling the blade toward you as it travels down the rod. No sawing, no rushing.
- Alternate sides. Five or six passes per side, then flip. Count out loud the first few times; the count keeps you from doing the fifty strokes per side that wear an edge out.
- Lighten up as you go. The last two passes should barely touch. You are guiding the edge, not forcing it.
- Test, then wipe and store. Slice a tomato or a piece of cabbage. If it glides, you are done. Wipe the blade dry and put it away.
The whole routine is a few minutes. Most people do it at the start of a prep session, before the onions, and again after a long stretch of cutting if the knife starts dragging.
How to use a honing rod correctly
A honing rod works best when the blade contacts it along its full length at a consistent angle. If you only touch the rod near the heel, the tip never gets corrected and the edge stays uneven, which is the single most common technique error.
Two hands work better than one, at least at first. One hand grips the knife, one grips the top of the rod, and the base stays planted on the towel. Once the angle feels automatic you can drop the top hand and just watch the angle.
Hone before you sharpen, never after. Sharpening leaves a burr, a wire edge that flips over to whichever side is softer. Running a burr along a rod folds it back and forth and leaves a wiggle in the edge that no amount of honing will remove.
Watch the direction of travel. The stroke goes down and toward you, from the base of the rod to the tip, with the whole blade sliding in one motion. Fast up-and-down waving in front of your chest, which is what a lot of us learned from cooking shows, does nothing except roll the edge further.
One last thing worth knowing: match the rod to the knife. Forum consensus among blade and sharpening communities is firm that a rod softer than the blade can cause chipping and edge fractures. A knife bought as a gift with an included rod is usually a hard steel with a soft rod, which is fine for realignment and worth replacing if you move to harder Japanese steels.
How to know when the knife is sharp enough
Stop honing based on what the knife does, not on a pass count. A tomato skin should split and fall away with almost no downward force. An onion should separate into clean layers rather than compress and slide. A sheet of paper should slice cleanly from one side to the other with no sawing.
That paper test is genuinely useful, with two caveats. Use a thin sheet, not card stock, and cut away from your fingers, never toward them. And do not trust it on a knife that has only been sharpened on a very coarse stone, where a perfectly straight edge can still feel rough.
The fingernail test is the quick one to reach for when the knife is already in your hand. Press the edge gently against the pad of your thumb, blade facing away, so the metal meets skin at a shallow angle. It should bite into the pad slightly and not glide off. If it glides off with no resistance, there is nothing to bite with and it is time to sharpen, not hone.
Run the thumb toward the tip of the blade rather than along the edge. It is the safer direction, and if the edge is ragged you will feel it as a hitch instead of a smooth slide.
Common Mistakes
Pressing too hard. The rod should do the work. Heavy pressure with fast, dramatic strokes is the TV chef habit, and it wears the edge rather than aligning it. Experienced sharpeners say the same thing repeatedly: light touch, every time.
Changing the angle mid-stroke. A wavering angle means the bevel gets polished in some spots and left rough in others. Set the angle once and hold it. If you cannot hold it, angle-guide attachments exist for rods, though they take some getting used to.
Honing a knife that is already dull. This is the mistake that actually ruins edges. A rod cannot remove metal, so if the edge has rolled far over, every pass bends it and leaves it weak and wobbly instead of straight.
Skipping one side. Finish on the side you started with and you leave a bias that makes the knife veer. Alternate evenly.
Doing fifty strokes per side. There is a point where you are no longer aligning the edge, just polishing it. Five or six light passes per side does the job.
Leaving the knife wet or dirty on the rod. Wipe the blade before and after, and clean the rod occasionally with warm soapy water and a dry cloth. Grit dragged along the edge is what causes micro-scratching.
Honing knives that should never be honed this way. Serrated bread knives have a different geometry with individual teeth and belong in a serrated-specific sharpener, not a straight rod. Ceramic blades take no rod at all. Single-bevel Japanese knives should be honed with a ceramic rod held at the same angle as their single side, because working both faces of a knife that has one is how you thin it without meaning to.
Two habits keep an edge alive between sessions. Store knives in a block or on a magnetic rack with the blade up rather than loose in a drawer where edges knock together, and hand-wash them. The dishwasher’s heat and detergent strip the resin that binds a stone handle and chew away the steel’s surface finish.
No equipment at all? A few passes on a strip of plain newspaper laid flat, or on the seam of a pair of jeans, will refine a slightly rolled edge. It is quick touch-up work, not a substitute for a rod, but it is better than nothing.
Frequently Asked Questions
How often should I hone a knife?
Hone every two to four uses, and always at the start of a prep session if the knife has been sitting. If you notice any dragging on the first cut, hone then rather than waiting. Over-honing does almost no damage when the pressure is light, so a quick five-pass touch-up is cheap insurance.
Can a honing rod sharpen a dull knife?
No. A steel or ceramic rod realigns a rolled edge and removes essentially no metal. A rod can bring back an edge that is a few sessions past its best, but once the wire edge is badly bent or damaged, only sharpening will fix it. Signs you are past the rod’s limit include sawing rather than slicing, and needing real force to cut a tomato.
Should I use a steel or ceramic honing rod?
Smooth steel is the better default for most home cooks because it is forgiving and gentle on German steels such as Wusthof or Henckels. Ceramic is harder and bites more, which some cooks like with dense produce, but it can scratch a softer blade if you press hard. Match the rod to your knife rather than picking a harder rod every time.
Is a whetstone better than a honing rod?
They do different jobs. A whetstone sets the edge, which means it removes metal and should happen every few months. A honing rod straightens an edge between those sessions and takes seconds. Plenty of sharpers own both: stone for the real sharpening, rod for keeping the edge true the rest of the time.
How do I hone a Japanese knife?
Use a ceramic rod, and be gentle. Japanese steels are often harder than the steel in an inexpensive German knife, and a soft rod can damage them. Many owners on r/sharpening prefer a leather strop instead. If your knife is single bevel, hone only the beveled side, matching the angle the knife was made at.
How often does a kitchen knife need professional sharpening?
For a home cook who hones regularly, every three to six months is typical. If you never hone, you will be sending it out every month or two, which is the main argument for learning the rod. If you sharpen on whetstones at home, professional work is usually only needed for a full thinning or a damaged edge.
Start with two minutes and one habit: pull the knife through a tomato at the beginning of the next prep session. If it drags, stand the steel on a damp towel, set the angle with the clock face, and run six light passes per side. Once that becomes automatic you will reach for the stone far less often, and the knife will feel like it has an edge every single time you pick it up.