Crispy skin comes down to three things: a dry surface, generous salt, and real oven heat. Pat the bird dry, salt it all over, and roast it uncovered at 425°F (220°C) until the thickest part hits 165°F (74°C). From prep to carving you are looking at about an hour of hands-on work for a bird under five pounds, most of it unattended in the oven.
It is a forgiving technique once you know the two failure points that trip everybody up. The first is moisture: wet skin steams instead of browning, and no amount of heat will fix it. The second is heat: an oven at 375°F slowly poaches the bird and leaves the skin leathery, while 425°F renders the fat under the skin and turns it blistered and hard. Everything else is seasoning.
I roast birds most weekends, and the method below is the one that works whether you dry-brine overnight or skip it entirely.
Table of Contents
- What You Need to Roast a Chicken With Crispy Skin
- Equipment
- Ingredients
- Step-by-Step: How to Roast a Chicken With Crispy Skin
- How to Dry and Season the Chicken for Crispy Skin
- How to Start the Roast Without Burning the Skin
- How to Crisp the Skin at the End
- How to Check Doneness and Rest the Chicken
- Roast Time by Bird Weight at 425°F
- Common Mistakes That Keep Chicken Skin From Getting Crispy
- Tips for Extra-Crispy Skin
- Choose an air-chilled bird when you can
- Skip the baking powder unless you want the trade-off
- Give the skin air on all sides
- Vent steam without drying out the meat
- Keep the skin crisp after roasting
- Frequently Asked Questions
- What temperature should I roast a chicken at for crispy skin?
- How long does it take to roast a whole chicken with crispy skin?
- Do I need to wash the chicken before roasting it?
- How do I keep the skin from burning while the meat stays juicy?
- How do I know when a roasted chicken is fully cooked?
- Can I roast a chicken breast instead of a whole bird?
What You Need to Roast a Chicken With Crispy Skin
You need very little, and almost all of it you probably already own. The two pieces of equipment that actually change the outcome are a wire rack and an instant-read thermometer.
Equipment
- Instant-read thermometer — the single most important tool here. Guesswork on chicken is how people serve raw middle with crisp skin.
- Roasting pan with a wire rack, or a rimmed sheet pan with a rack set inside it. A V-rack works too. The rack lifts the bird so hot air moves underneath, which is where a lot of the crispening happens.
- Cast iron skillet — a good alternative for smaller birds and for the sear-then-roast method below.
- Paper towels and a small bowl for the used towels.
- Kitchen twine, if you truss. Not required, but a tied bird cooks more evenly.
Ingredients
- One whole chicken, 3 to 5 pounds is the sweet spot for most home ovens. Roosters and large tom turkeys need their own timing.
- Kosher salt — about 1 tablespoon per 4-pound bird. Diamond Crystal is roughly half as dense as Morton, so use a bit more if that is what is in your cupboard.
- Fresh ground black pepper, a few teaspoons.
- 2 tablespoons neutral oil or olive oil, plus 2 tablespoons softened butter if you want richer flavor.
- Aromatics — a halved lemon, 4 to 6 smashed garlic cloves, and a few sprigs of thyme. Entirely optional.
- Root vegetables — potatoes, onion, carrots, or celery. Optional, but they catch the drippings and stop the pan smoking in a small kitchen.
- Baking powder — 1 teaspoon, optional. See the section on baking powder below, because the results are mixed.
Step-by-Step: How to Roast a Chicken With Crispy Skin
How to Dry and Season the Chicken for Crispy Skin
Dry the skin thoroughly before it ever goes near salt. Take the chicken out of its packaging, discard the giblets, and blot the skin dry all over with paper towels, paying extra attention to the breast, the wing tips, and the crease where the legs meet the body.
Now salt it. Work about 1 tablespoon of kosher salt into the skin and the cavity, rubbing it in with your hands until it feels tacky. Season the cavity more lightly than the outside. Add the pepper and the baking powder now if you’re using it, mixed in with the salt.
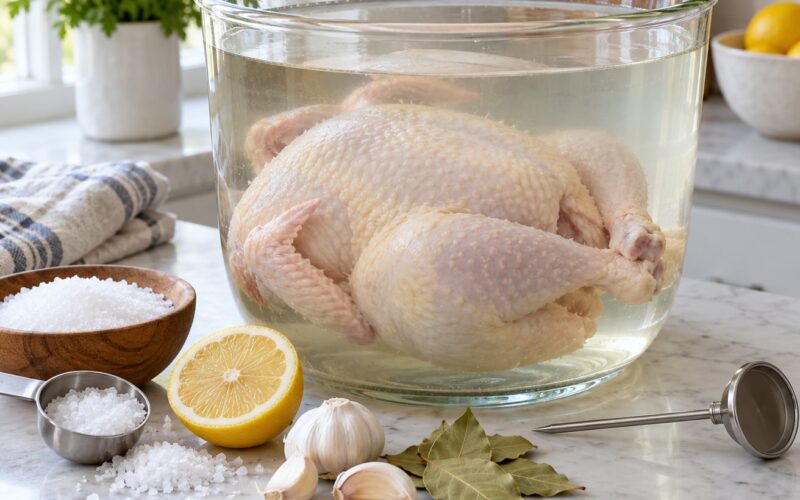
If you have time, this is where a dry brine happens: leave the salted bird uncovered on a rack in the refrigerator for 4 hours to overnight. The salt pulls water out of the skin, and the fan in the fridge keeps evaporating it. Skin that has sat uncovered overnight is noticeably crisper, and it’s the step most home cooks skip.
Do you have 15 minutes and no overnight window? Blot the bird dry a second time after salting and leave it sitting on a rack. Some of the moisture the salt drew to the surface wipes right off, and that’s most of the benefit for a fraction of the effort.
Finish the prep like this:
- Rub the skin with oil or softened butter so it browns evenly.
- Poke the skin all over with a skewer or fork tip, especially on the breast. You’re letting rendered fat escape instead of pooling under the skin.
- Optionally lift the breast skin and slide butter, lemon slices, and thyme underneath. It seasons the meat directly.
- Tie the legs and wings if you want even cooking. Tuck the wing tips under the body so they don’t burn before the rest of the bird is done.
How to Start the Roast Without Burning the Skin
Preheat the oven fully to 425°F before the bird goes in. A cold or half-hot oven is a real reason skin comes out pale — the bird sits in lukewarm air for the first 20 minutes while the fat slowly melts instead of rendering quickly.
Set the wire rack in the roasting pan, scatter your vegetables underneath if you’re using them, and set the chicken on top breast side up. Breast side up gives the largest surface area to the heat, which is what you want for skin.
Put the lemon, garlic, and herbs in the cavity now rather than at the end, so they roast and season the meat from the inside over the whole cook.
Roast uncovered. Covering the bird with foil traps steam against the skin, and steam is the exact opposite of what you want. The one exception is the breast early on, if you’re cooking a very large bird and the meat is trending dry — foil over the breast only, removed for the last 20 minutes, protects the lean meat without softening the skin everywhere.
Cooks who like the extra-crunch method sear the bird skin-side down in a hot cast iron skillet for 3 to 4 minutes before moving it to the oven. It adds browning you would otherwise wait 40 minutes for. The tradeoff is a hot pan and one more pan to wash.
How to Crisp the Skin at the End
For the last 15 to 20 minutes of cooking, the skin needs direct, aggressive heat. Two ways to do it:
- Bump the oven. Raise the temperature to 450°F for the final stretch. Watch it — the exposed breast and wing tips brown fast at this point.
- Broil. Move the rack to the top third of the oven and broil on high, 2 to 5 minutes, with the oven door cracked. Stay in the room. This is where a bird goes from golden to black in about 40 seconds.
Keep the skin at a safe distance from the heating element. Leave 3 to 4 inches of clearance, and on a broil pull the rack down a notch if you can. Direct contact with the element scorches the surface long before it crisps evenly.
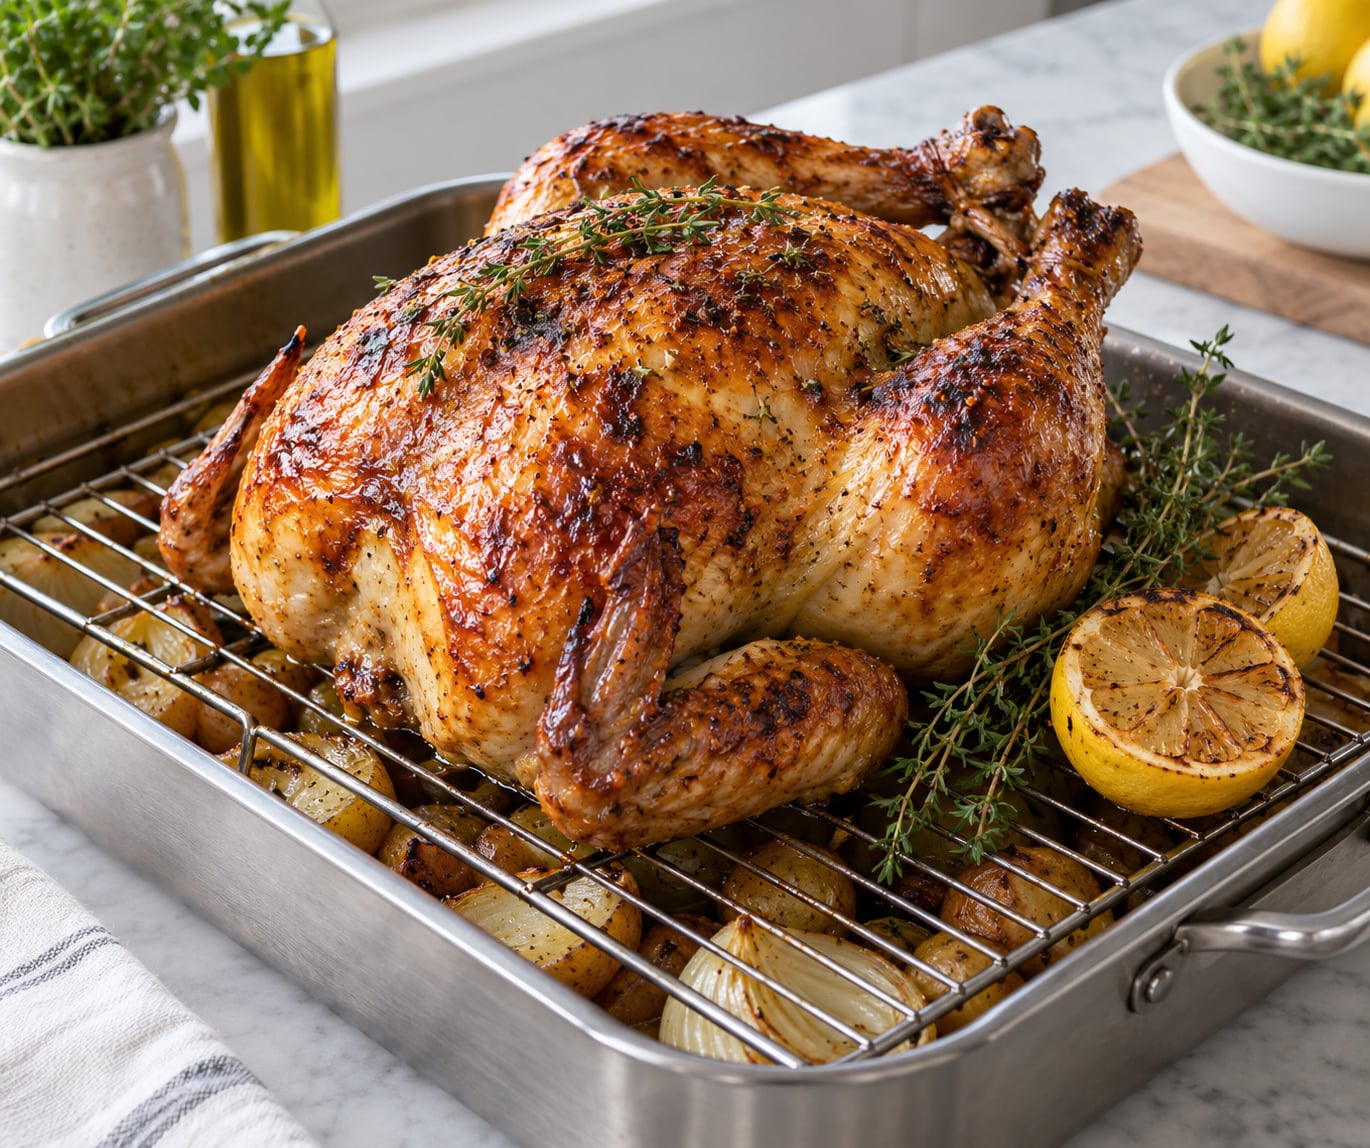
You’re looking for deep gold to mahogany, blistered and tight, with fat that has visibly rendered out. The skin should look thin and hard rather than papery. If it’s pale yellow and soft, give it another 3 minutes under the broiler.
Don’t baste during this phase, and don’t open the oven more than you have to. Every opening lets cool air in, and any liquid you pour on the skin cools it and reboots the steaming problem you already solved.
How to Check Doneness and Rest the Chicken
Check with the thermometer, never by cutting into the bird or by the cooking time on the label. Probe two places: the thickest part of the breast, avoiding the bone, and the inner thigh near the hip joint.
The USDA safe minimum internal temperature for poultry is 165°F (74°C). Pull the bird when the thigh and breast both read at least 165°F. Many experienced cooks pull the thigh at 170 to 175°F because collagen and fat render at that point and the meat is more forgiving; the breast is leaner, so it usually maxes out at 158 to 162°F before it dries out.
A thigh that reads 165°F feels loose at the joint and the juices run clear, not pink. Both are better cues than the number alone.
Rest the bird on the rack, uncovered, for 10 to 15 minutes. Do not tent it with foil. This is the mistake that ruins an otherwise perfect chicken: the trapped steam softens the crackle you just worked for, and the skin goes soft within minutes of carving. Resting still lets the juices redistribute and the carryover cooking finish the breast, so you are not trading crispness for a dry dinner.
Carve the legs and thighs off first, rest them a few extra minutes while you cut the breast, and spoon the pan drippings over everything. You’ll get more juice that way, and no slicing straight into the bird where the steam escapes.
Roast Time by Bird Weight at 425°F
These times assume a fully preheated 425°F conventional oven and an unstuffed bird. Stuffed birds need 30 to 45 minutes longer, and a convection oven cooks roughly 25 percent faster. Always confirm with the thermometer.
| Bird weight | Roast time at 425°F | With 20 minutes broiling | Good for |
|---|---|---|---|
| 3 to 3.5 lb | 40 to 45 minutes | 60 to 65 minutes | 2 to 3 servings |
| 3.5 to 4.5 lb | 45 to 55 minutes | 65 to 75 minutes | 3 to 4 servings |
| 4.5 to 5.5 lb | 55 to 65 minutes | 75 to 85 minutes | 4 to 6 servings |
| 5.5 to 6.5 lb | 65 to 75 minutes | 85 to 95 minutes | 5 to 7 servings |
| 7 to 8 lb | 75 to 85 minutes | 95 to 105 minutes | 7 to 9 servings |
For a 4-pound bird, plan on about an hour in the oven plus 20 minutes broiling, 15 minutes resting, and 20 minutes of prep and seasoning. A weekend morning, not a Tuesday.
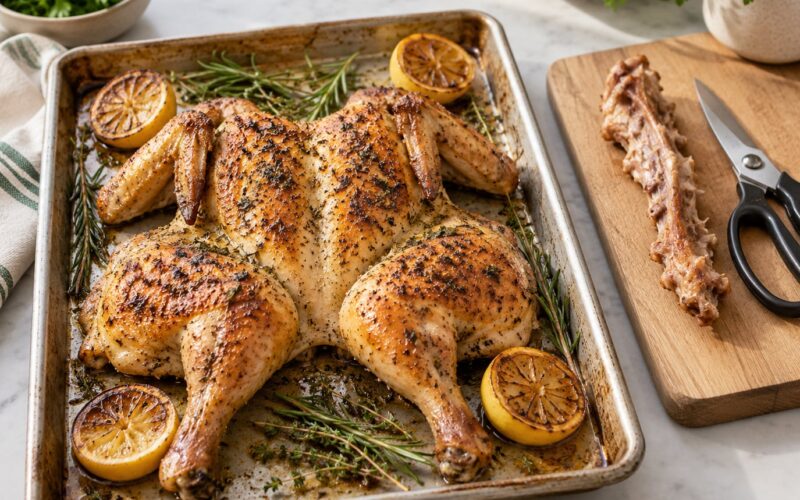
If you want to cut that in half, spatchcock the bird. Cut out the backbone with shears, press the bird flat breast bone down, and it roasts evenly in 40 to 45 minutes at 425°F with two people to eat.
Common Mistakes That Keep Chicken Skin From Getting Crispy
Almost every disappointing roast chicken traces back to one of these.
- You didn’t dry the skin. Surface moisture becomes steam, and steam softens skin instead of browning it. Blot with paper towels, or leave the bird uncovered in the fridge overnight.
- You salted too lightly, or too late. Skin needs salt touching it before heat, not after. Salt the bird and let it sit at least 20 minutes, or overnight.
- You roasted too cool. At 350°F or 375°F the fat under the skin melts slowly and the skin bakes instead of crisps. Push the oven to 425°F minimum.
- You covered it with foil. Foil traps steam for the entire cook. If you must protect the breast early, tent only the breast and uncover for the last 20 minutes.
- You basted early or often. Wet skin, cool skin, extended cook. Baste only in the last 10 minutes, with melted butter rather than a wet marinade.
- You didn’t preheat. Put the bird into a cold oven and you lose 15 to 20 minutes of the hot, dry heat that crisps the skin.
- You crowded the pan. Two birds on one tray, or a tray jammed into a small oven, means no air circulation and a steaming, soggy underside.
- You sliced it straight away. Cutting releases steam that softens the skin, and the meat loses juice. Rest it 10 to 15 minutes.
- You used a dry rub with a high oven. Paprika, garlic powder, and other ground spices burn above 400°F. Mix dry rubs with oil first, or use them only on birds roasted at 375°F.
- You skipped the thermometer. Time is a rough guide; temperature is the fact. Probe the thigh and the breast.
One more worth naming: small kitchens. High-heat roasting and smoke are a real pairing. A bed of potatoes and onion wedges under the rack absorbs most of the fat that would otherwise smoke up the room, and it makes gravy later.
Tips for Extra-Crispy Skin
Some of the following are essential and some are optional. The essentials are drying the skin, salting generously, roasting uncovered at 425°F or higher, and not cutting the bird for at least 10 minutes.
Choose an air-chilled bird when you can
Air-chilled chicken is refrigerated at temperature rather than chilled in ice water, so the skin absorbs none of that water and it stays noticeably tighter and crisper. Water-chilled birds are the ones that often disappoint. If you shop at a market counter, ask how the birds were chilled.
Skip the baking powder unless you want the trade-off
Baking powder is mildly alkaline, which raises the surface pH of the skin, dries out the proteins there, and produces a very loud crackle. The problem is that an alkaline surface also dries the skin’s texture itself, so the crust tends to turn leathery rather than flaky after it rests. Cooks who test both methods report the skin going tight and rubbery about 15 minutes after roasting. If you want maximum shatter, salt and dry alone. If you want a loud crackle and don’t mind the chew, add 1 teaspoon of baking powder with the salt.
Baking soda is a stronger alkali and is used for pretzels and fried chicken for good reason, but on a roasted bird it leaves a soapy taste and a dull crust. Cornstarch and flour work by absorbing the last of the surface moisture, which is a mild version of the drying effect. None of them beat a dry, well-salted, high-heat bird.
Give the skin air on all sides
Raise the chicken on a rack so the underside gets the same treatment as the top. Truss the legs tight, and tuck the wing tips under. Skin stretched tight and exposed to dry heat crisps; skin pressed against the pan steams.
Vent steam without drying out the meat
If you cook a very large bird, the breasts can reach 165°F before the thighs do. Tent only the breast with foil once the breast hits about 140°F, and take it off for the last 20 minutes so the skin finishes. The thighs sit in direct heat and catch up fine.
Keep the skin crisp after roasting
Rest and serve uncovered. If you are holding the bird before serving, leave it on the rack in a warm, dry oven turned down to its lowest setting, uncovered, rather than covering it.
For leftovers, refrigerate the skin separately from the meat where you can, and store it in an airtight container in the fridge for up to two days. A day later, spread the skin on a rack in a hot oven or an air fryer at 400°F for 4 to 6 minutes and it comes back close to original. Reheating the skin while the meat is still attached steams it, which is why separate pieces stay better.
Frequently Asked Questions
What temperature should I roast a chicken at for crispy skin?
Roast at 425°F (220°C) or higher for the best crackle. Anything below 400°F melts the fat under the skin slowly and bakes the skin leathery instead of crisping it. For the last 15 to 20 minutes, raise the oven to 450°F or switch on the broiler, with the rack 3 to 4 inches below the heating element, and stay in the kitchen while it browns.
How long does it take to roast a whole chicken with crispy skin?
At 425°F, a 4-pound bird needs 45 to 55 minutes of roasting plus 15 to 20 minutes under the broiler for the crisp finish. Add 10 minutes per additional pound. A 3-pound chicken is about an hour from oven to rested, a 5-pound bird closer to 90 minutes. Use those numbers as a guide only and pull the bird when the thigh and breast both hit 165°F.
Do I need to wash the chicken before roasting it?
No, and you should not. Rinsing raw poultry spreads water and bacteria across your sink, counter, and hands, and the moisture left on the skin works directly against a crisp finish. If you want to rinse for habit, pat the bird extremely dry afterward with paper towels. Many cooks go straight from the packaging to salting without any rinsing at all.
How do I keep the skin from burning while the meat stays juicy?
Move the wire rack to the middle of the oven so the breast is not sitting directly under the element, and keep the breast and wing tips from drying out by pulling them from the heat early if they color before the thighs are done. On big birds, tent only the breast with foil at 140°F and uncover for the last 20 minutes. Pull the whole bird when the thigh reaches 165°F, and rest it uncovered 10 to 15 minutes.
How do I know when a roasted chicken is fully cooked?
Probe the thickest part of the breast and the inner thigh with an instant-read thermometer, avoiding bone. The USDA safe minimum internal temperature for poultry is 165°F (74°C). A thigh that reads 165°F should feel loose at the joint, and the juices run clear rather than pink. Many cooks pull the thigh at 170 to 175°F for a more forgiving texture while the lean breast maxes out closer to 160°F.
Can I roast a chicken breast instead of a whole bird?
Yes, and a bone-in breast is much easier to keep juicy than a boneless one. Sear it skin-side down in a hot oven at 425°F for about 12 minutes, flip, then roast until the thickest part hits 165°F, usually another 10 to 20 minutes. Let it rest 5 to 10 minutes before slicing. A whole butterflied bird still beats a single breast for crispiest skin, though.
Start with the bird tonight: dry it, salt it well, preheat the oven to 425°F, and give the skin the last 15 minutes under a hot broiler. Those four things account for nearly every roast chicken that comes out crackling.