A market booth earns attention in three stages: it has to be visible from about 20 feet away, legible once a shopper is standing in front of it, and welcoming enough to keep them there. Get those three right and people stop; get them wrong and the best products in the market sell to nobody. Most of the work happens the day before, with a plan and a few hours of setup.
Here is how to set up a market booth that attracts customers, step by step, whether you have a single six-foot table or a full ten-by-ten canopy. Budget about two hours on site and an hour the night before, plus your normal prep time.
The booth is the storefront. Shoppers are walking, scanning, and comparing you to six other stalls within about ten seconds, so layout and signage decide how many people stop, how long they stay, and how much they buy before they move on.
Table of Contents
- What You Need
- Step-by-Step: Build a Booth Customers Notice
- 1. Define Your Main Customer and Offer
- 2. Plan the Layout Before the Market Opens
- 3. Create Signage People Can Read at a Glance
- 4. Display Products at the Best Selling Height
- 5. Use Samples or Small Tastings Carefully
- 6. Make Payment and Service Fast
- 7. Add a Reason to Remember and Return
- 8. Test the Booth Before Opening Day
- Common Mistakes
- Frequently Asked Questions
- How do I attract customers to my market booth?
- What are common booth design mistakes?
- How much does a market booth cost to set up?
- What do you need for a booth at a farmers market?
- How do I know if my booth is working?
- Do I need a canopy for a farmers market booth?
- Conclusion
What You Need
Most vendors can start with what they already own. Gather these before the market opens and the setup stops feeling improvised.
Display hardware
- A six-foot folding table, or a ten-by-ten canopy frame with two tables
- Risers to lift product: inverted wooden milk crates, tiered wire racks, folding shelves, or stacked sturdy boxes covered with cloth
- A ground-length tablecloth, which hides the pile of boxes and coolers underneath
- A table runner in a color that matches your sign
- A backdrop banner, blanket, or two framed panels on the rear frame for shade and for a story panel
- Clips, tape, bungee cords, and a small hammer for canopy stakes
Signage
- One large booth name sign, readable from roughly 20 feet
- A chalkboard or letterboard for the featured item or the day’s special
- Product name and price on every single item, printed or handwritten consistently
- Cards or a small sign stand for ingredient lists and allergens
- Payment signs: accepted methods, and a mobile payment QR code if you use one
Sales and payment tools
- A cash box with small bills, plus a coin pouch
- A card reader with a charged battery and a backup reader if you can carry one
- Receipt book or digital receipts
- Reusable bags, napkins, and a small trash bag for your own booth
- A phone or tablet on a charged battery, plus a portable charger
- A notebook or a sales spreadsheet for tracking the day
Food safety supplies, if you are sampling or selling prepared food
- Handwashing setup: insulated cooler with running water, soap, and paper towels for drying
- Single-use gloves, tongs, and small lidded containers
- A covered tray or sneeze guard for anything cut open
- A calibrated thermometer, insulated coolers, and ice packs
- Your permit or approved plan from the local health department, which most markets require before you offer samples
Paperwork and contact
- Vendor agreement, insurance certificate, and any food handler certificates the market asks for
- Market rules: load-in times, canopy rules, stall boundaries, and where you may place signs
- A sign-up sheet or QR code for your mailing list
Step-by-Step: Build a Booth Customers Notice
1. Define Your Main Customer and Offer
Pick the shopper you most want to stop, and the one thing you most want them to buy today. A booth that tries to serve everyone reads as cluttered from a distance, because the eye cannot find a single reason to approach.
Choose three to five hero items and put those front and center. Everything else becomes a second layer that rewards the shopper who already stepped closer. Write one sentence you could say out loud in five seconds: what you make, and who it’s for. If you can’t, the booth will try to say it for you and fail.
2. Plan the Layout Before the Market Opens
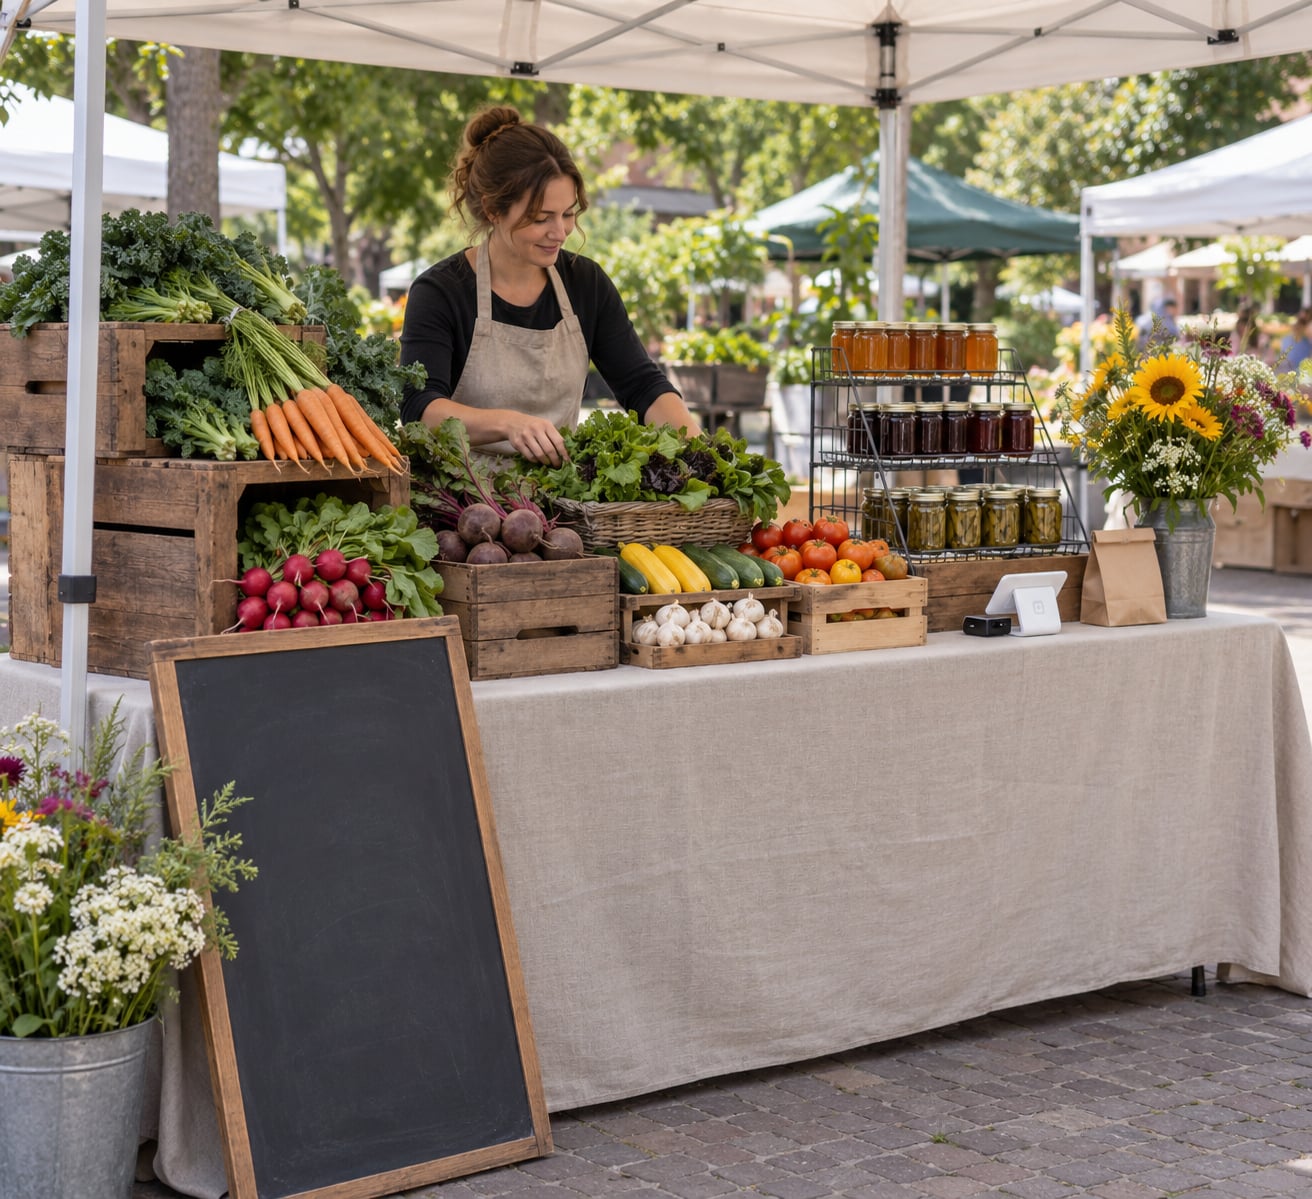
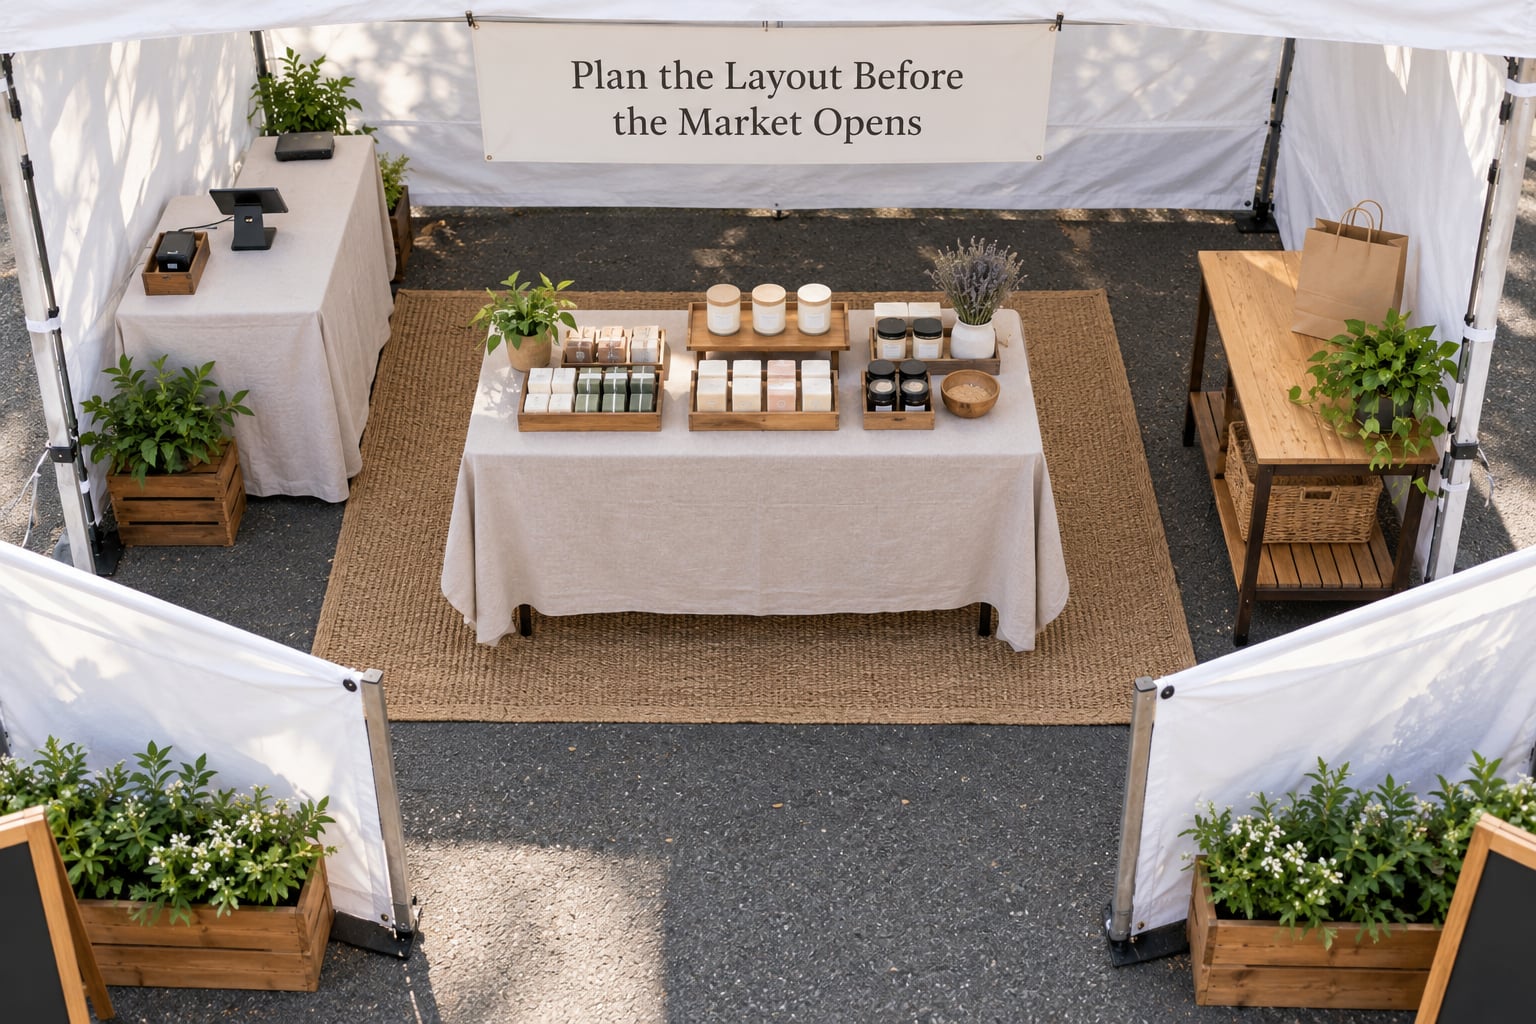
Draw the footprint on paper before you pack the car. A six-foot table is narrow: you have room for a display, a payment spot, and your own body behind it, so every item competes for the same surface. A ten-by-ten canopy gives you room for a center display table, a back storage table hidden behind a cloth, and a clear lane so two people can stand at the booth at once.
Map five zones: entry, browsing, purchase, pickup, and queue. In a ten-by-ten, put the tall risers at the back corners so they frame rather than block, keep the payment station at the front corner nearest the aisle so nobody reaches across your display, and stage pre-paid orders on a separate side table so pickup traffic never jams the sales conversation.
Mark your stall boundary with the ground cloth, not with signs you stick into the aisle. Markets fine you for out-of-footprint signage, and it puts you at a disadvantage with the neighbors whose foot traffic you depend on.
3. Create Signage People Can Read at a Glance
Test your booth name by standing twenty feet away and reading it aloud. If you squint, it is too small, too low-contrast, or too stylized. That distance rule comes from how the aisle works: people are moving, not browsing, so your sign has about three seconds to land.
Use a hierarchy instead of one crowded board. The booth name sits highest and largest. Product names and prices sit at the item, at reading height, never on one sign at the back that customers have to cross the booth to see. A short story panel, one or two lines about who made it and where, handles the trust question for the shopper who is deciding whether to spend ten dollars.
Keep the visual style identical everywhere. Two typefaces, two colors, one price format. A handwritten chalkboard is genuinely fine, as long as it is neat and the pricing style matches the printed tags, and it often outperforms a cheap printed banner. Label your display props if they could be mistaken for product, since shoppers who reach for a decorative crate are a small but real waste of your time.
4. Display Products at the Best Selling Height
A flat table is a wall of product tops that all sit below eye level, so people see lids and labels instead of the goods. Lift things. Inverted milk crates, tiered wire racks, and folding shelves stack your product into two or three heights, and the tallest item becomes the thing visible over the heads in front of you.
Group by type rather than by price or by color, so a shopper can read the whole table in one pass. Put your best seller at the front edge, at hand height, where someone already browsing can pick it up without asking. Repeat the same product in a small cluster rather than spreading single items across the table, because variety reads as abundance and a single lonely item reads as a leftover.
Leave real gaps. Cramming the table to the edges says discount bin; generous spacing says these goods are worth a few dollars. For baked goods, keep pieces in covered trays with a clear label for flavor and allergens, and stack so the second row is visible. For fresh produce, use shallow crates angled toward the aisle, and keep a backup shade layer for the hottest hours. For packaged and value-added goods, put the front label of every item facing out, in identical orientation.
5. Use Samples or Small Tastings Carefully
Sampling is the single highest-converting move most vendors can make. A University of Kentucky study cited by Ohio State Extension found that 55% of shoppers bought a product they sampled that same day, even when they had no plan to buy it.
Sample the item that is easy to explain and hard to refuse, and keep portions small enough to hand over in two seconds. Offer a single featured sample at a time rather than a spread, so the decision at the counter stays fast.
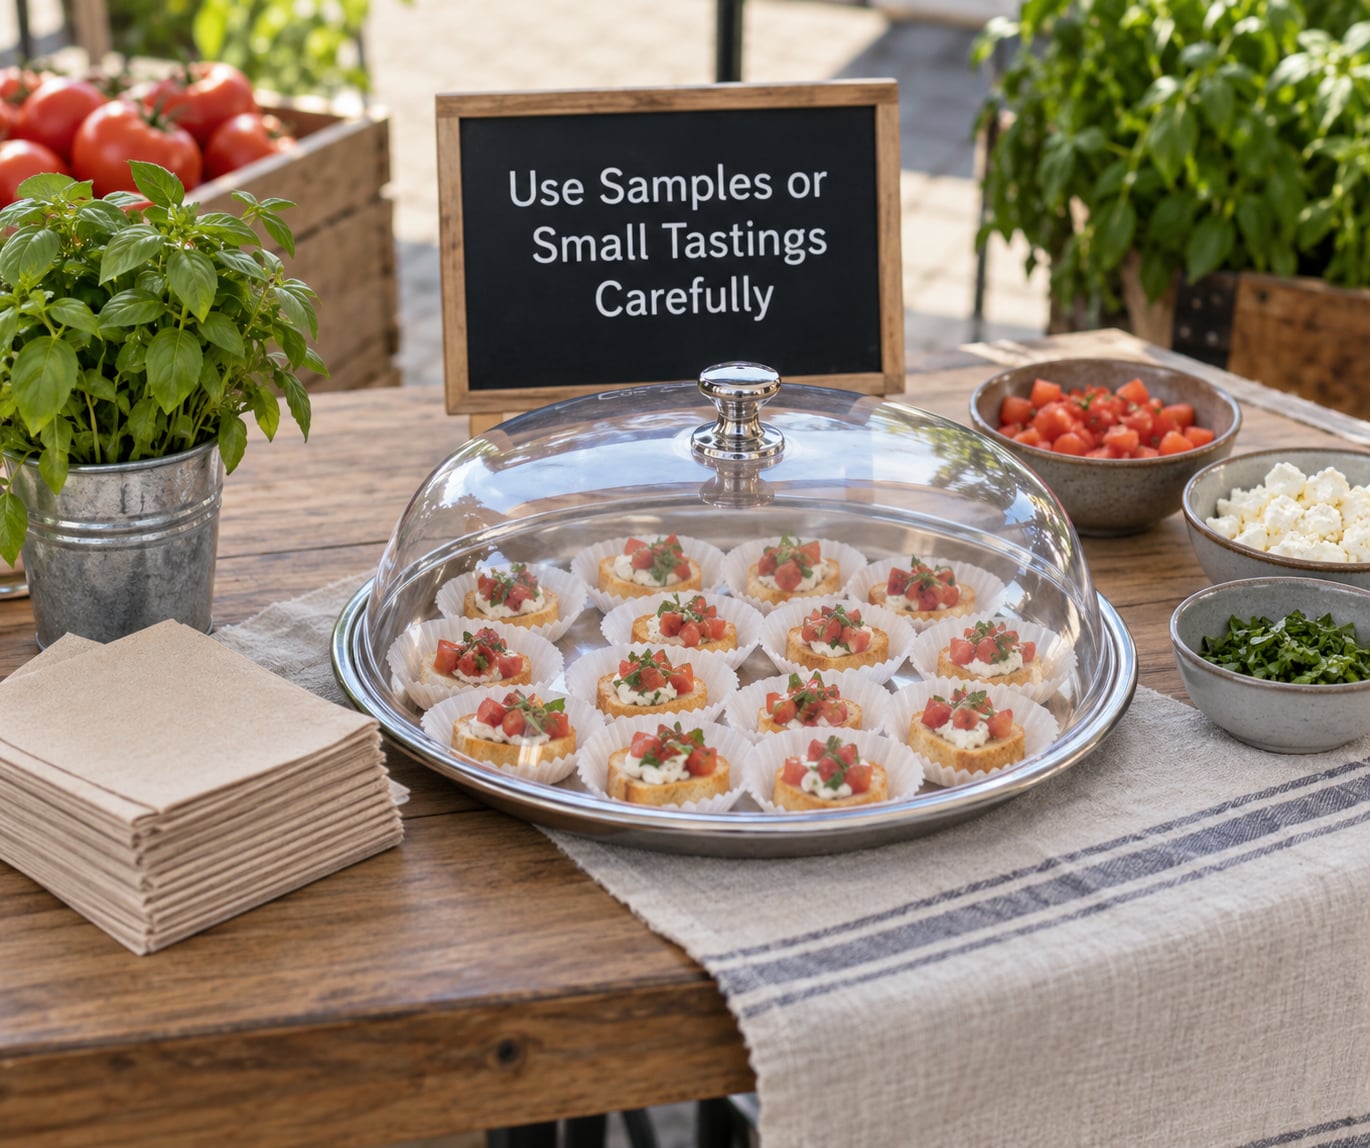
Then follow the rules. Most markets only permit samples from an approved plan, and your local health department sets the rest: handwashing within reach, gloves or tongs, a covered tray or sneeze guard for anything cut open, and an allergen label on the station. Hold cold items at or below 40°F and hot ones at or above 135°F, and keep a thermometer in the cooler so you can prove it. Cooked samples follow the same minimum internal temperatures as cooking at home: 165°F for poultry, 160°F for ground meat, and 145°F for whole cuts and fish. Ask your market manager which specific rules apply to you rather than assuming last season’s rules still hold.
6. Make Payment and Service Fast
Price tags fix the two problems vendors complain about most: haggling and the awkward pause where nobody knows what to do. Label every item, and put your card reader where the customer can see it before they ask.
Simplify the choice. Three options convert better than a wall of options, and a bundle, such as a two-item set with a fixed price, cuts the thinking out of the purchase. Put the payment station at the aisle-facing corner, keep a small cash float so nobody has to wait on an exact-dollar scramble, and test both readers and the battery the night before.
Pre-pack popular items so a sale takes under a minute. Peak traffic arrives in waves, and a booth that works at noon can fall apart at 10:30, so keep backup bags, labels, and a spare pen in a bin you can reach without walking away from the table.
7. Add a Reason to Remember and Return
Give shoppers something to carry home besides the product: a card with your social handle and market schedule, a market-day special that only happens on the day, or a small sign-up sheet for a text list of what’s coming next week. A mailing list is the cheapest marketing you can own, because a shopper who follows you turns into someone who looks for your stall by name.
Make the special real and easy to say in one breath. “Two jars today only” is better than a laminated explanation of a loyalty program. If you sell out early, tell people: an honest “I’m out, I have more on Friday” keeps a customer for the next market instead of losing them for the season.
Cross-vendor referrals are worth more than most giveaways. If a shopper asks for something you don’t carry, name the stall two doors down that does. You will usually get a customer back, and so will they.
8. Test the Booth Before Opening Day
The night before, build the whole booth in your garage, driveway, or living room. Set it up, then walk to it from twenty feet and look. Read the sign, find the price, see what the hero product is. Anything you have to lean in for is a problem you can still fix tonight.
Then time the transaction. Hand someone a sample order and count how many seconds from picking up to paid. Most stalls are slower than their owners think, and that gap is where sales go.
On market day, watch the traffic instead of talking to your neighbors. Count how many people slow down, how many stop, and how many buy in the first hour. Change one thing between weeks, never three, or you will never know which change did the work. Sales per hour is the number to track, since it tells you whether a slow day was a slow crowd or a booth that was not pulling its share of it.
Common Mistakes
These are the booth design errors that cost the most sales. Each one has a direct fix.
- Everything sits flat on the table. Product tops are all below eye level, so the display disappears behind heads. Fix: add two or three risers, and put your tallest item at the back.
- The booth name can’t be read from the aisle. You have three seconds of a moving person’s attention. Fix: enlarge the sign, raise it above head height, and test it at twenty feet before you pack.
- No visible prices. Unlabeled items create haggling and stalls, and many shoppers just move on. Fix: label every item at reading height, in one consistent format.
- Props read as product. Decorative crates and baskets get picked up and questioned. Fix: separate the display from the merchandise visually, and label anything that looks for sale.
- Staff sit down or stay on their phone. Shoppers read a seated vendor as a closed stall and keep walking. Fix: stand for the first hour, and put the phone in a pocket.
- Hard-selling. In vendor forums, the most-upvoted advice is to let a booth be quiet and well lit, and simply be a polite cashier. Pushing raises the resistance. Fix: greet, answer, then stop talking and let the display work.
- Too many choices. Decision fatigue kills impulse buys. Fix: three to five hero items up front, one board for the day, and a bundle with a fixed price.
- Underestimating the weather. Wind lifts canopies, rain ruins cardboard, heat wilts produce. Fix: ballast every canopy leg with a sand or water weight, use waterproof cases, and shade the display as the day heats up.
- Sampling without checking the rules. Unapproved sampling brings fines and insurance headaches. Fix: confirm the permit, handwashing, temperature control, and allergen labeling with your market manager and health department before the first sample.
- Changing everything every week. You learn nothing and re-buy props. Fix: one change per market day, and a written note on what happened.
Frequently Asked Questions
How do I attract customers to my market booth?
Start with visibility: raise your best product above eye level on risers, keep the booth name readable from about 20 feet, and price everything clearly. Then remove friction, with a card reader at the aisle-facing corner, small samples if your market allows them, and a greeting that hands off to the product. A University of Kentucky study cited by OSU Extension found 55% of shoppers bought a product they sampled the same day, often unplanned.
What are common booth design mistakes?
The costly ones are a flat table with nothing above eye level, a booth name you cannot read from the aisle, missing price tags, display props that look for sale, and staff sitting or absorbed in a phone. Weather is another: an unballasted canopy and cardboard displays fail in wind and rain. Fix one thing per market day so you can tell what actually helped.
How much does a market booth cost to set up?
A basic setup on a shared six-foot table runs a few hundred dollars: tablecloth, risers made from crates or boxes, printed labels, a chalkboard, a cash box, and a card reader. A ten-by-ten canopy with two tables, risers, and signage lands closer to a thousand or more, and market stall fees are separate and usually billed per market day. Reuse the hardware across every weekend and the cost spreads out fast.
What do you need for a booth at a farmers market?
Start with a table, a ground-length tablecloth, risers such as inverted milk crates or tiered racks, and a large readable sign. Add a chalkboard, price labels, a cash box, and a card reader with a charged battery. If you sample food, add handwashing supplies, gloves, tongs, a covered tray, a thermometer, and your health department permit. Plus your vendor agreement, insurance, and market rules.
How do I know if my booth is working?
Track sales per hour rather than total sales, since a busy market can hide a weak stall. Also count how many people slow down and how many stop in your first hour. Change one display element between markets and write down what changed. If people stop but don’t buy, the problem is usually pricing clarity, product visibility, or the length of the conversation.
Do I need a canopy for a farmers market booth?
It depends on your product and your market. Baked goods, fresh produce, and anything that must stay cold usually need shade, so a canopy or umbrellas protect both the goods and the shopper standing in the sun. Whatever you use, ballast every leg with a sand or water weight, because wind is what takes canopies down, not the frame itself. Check your market’s rules first, since some sites require them and others restrict them.
Conclusion
If you do only three things this week, raise your best product above eye level, price every item where it sits, and stand up and greet for the first hour. Those three fix the majority of quiet booths on their own.
When you are ready to build properly, start with the plan: pick three hero items, sketch the footprint, build the whole thing in your driveway the night before, and read your sign from twenty feet. Change one thing per market day, track sales per hour, and let the numbers tell you what the shoppers are already telling you with their feet.