You can level a cake layer with nothing more than a long serrated knife, a ruler, and about ten minutes of patience. Chill the cooled cake so the crumb firms up, mark the lowest point of the dome, then turn the cake in your hand while you saw the top away in shallow passes. No leveler, no turntable, no special equipment.
Table of Contents
- What You Need to Level Cake Layers Without a Tool
- Step-by-Step: How to Level Cake Layers Without a Tool
- Cool and Chill the Cake First
- Place the Cake on a Flat, Stable Surface
- Find the Lowest Point and Mark a Guide Line
- Trim Slowly With a Ruler or Straight Edge
- Check Levelness From Several Angles
- Handle and Store the Finished Layers
- Common Mistakes and How to Fix Them
- Troubleshooting Uneven or Delicate Cake Layers
- Tips for Clean, Even Layers Every Time
- Frequently Asked Questions
- Can I level a cake without a cake leveler?
- What can I use instead of a cake leveler?
- How do I level a domed cake layer?
- Why is my cake layer tearing when I trim it?
- Should I level a cake before or after frosting it?
- How do I keep trimmed cake layers from drying out?
- Conclusion
What You Need to Level Cake Layers Without a Tool
A long serrated knife is the whole toolkit for the standard method. Anything else on this list is a support or substitute: a ruler or small steel level to check your work, a bench scraper to straighten a rough cut, toothpicks to mark a height, and unflavored dental floss when you want a perfectly flat slice without a knife in the cake at all.
- Long serrated knife or bread knife, 9 to 10 inch blade. The blade has to span the entire cake in one pass. A short paring knife forces you to work from the middle outward, and that is where tilted cuts come from.
- Ruler or small spirit level. For the check most beginners skip. Rest it across the top and read it at eye level.
- Bench scraper, or the flat back of a knife. Good for shearing off a stubborn high ridge after the main cut.
- Toothpicks. A height guide: stick them in at the edge, mark the shortest one, and you have your cutting line.
- Unflavored dental floss. A cutting wire for the cleanest possible top. Skip mint or waxed floss.
- Cooling rack, cake board or flat plate, parchment or plastic wrap. A stable base and a nonstick landing spot.
- Fridge or freezer space. Chilling is what keeps the crumbs on the cutting board instead of all over your counter.
Worth knowing why you are doing this at all. A dome that is not trimmed does more than look uneven: stack three of them and the cake leans visibly, and slices taken from the top of every layer are the driest ones on the plate. Trimming puts the moist interior crumb directly against the filling.
Step-by-Step: How to Level Cake Layers Without a Tool
Cool and Chill the Cake First
Let the cake cool completely on a rack, which takes one to two hours for most 8-inch layers. Warm cake smears, gums the blade, and sheds crumbs no matter how carefully you cut.
Then chill it. Thirty minutes in the fridge firms the crumb enough that the cut stays crisp. If you are in a hurry, twenty minutes in the freezer does the same job and is my usual move on a warm afternoon.
A slightly underbaked cake is the exception. Those go straight into the fridge for an hour or two so the raw crumb can set. Trying to trim a fragile top while it is still tacky just tears it.
Place the Cake on a Flat, Stable Surface
Set the cake on a board or plate on a level counter, with a sheet of parchment or plastic wrap underneath so the trimmed slice has somewhere to land and the cake cannot stick to the counter as you lift the top away.
Work at the front edge of the counter and rotate the cake instead of reaching around it. Without a turntable, a cake board is the easiest way to turn a layer, and a damp towel underneath stops it sliding.
Find the Lowest Point and Mark a Guide Line
Set your cake on the counter and look at it from eye level, not from above. The lowest point of the dome is where your cut has to sit, because cutting above it leaves a high ridge you will have to chase with a second pass.
Lightly mark that height with a toothpick pushed in at the edge, or a pencil tick on the side of the cake. Now measure down with your ruler to decide the finished height of the layer, mark again, and check the same number all the way around.
Leave enough height for filling and frosting. Most two-layer cakes want roughly 1 to 1.5 inch of trimmed layer, and a three-layer cake is happier with a little more.
Trim Slowly With a Ruler or Straight Edge
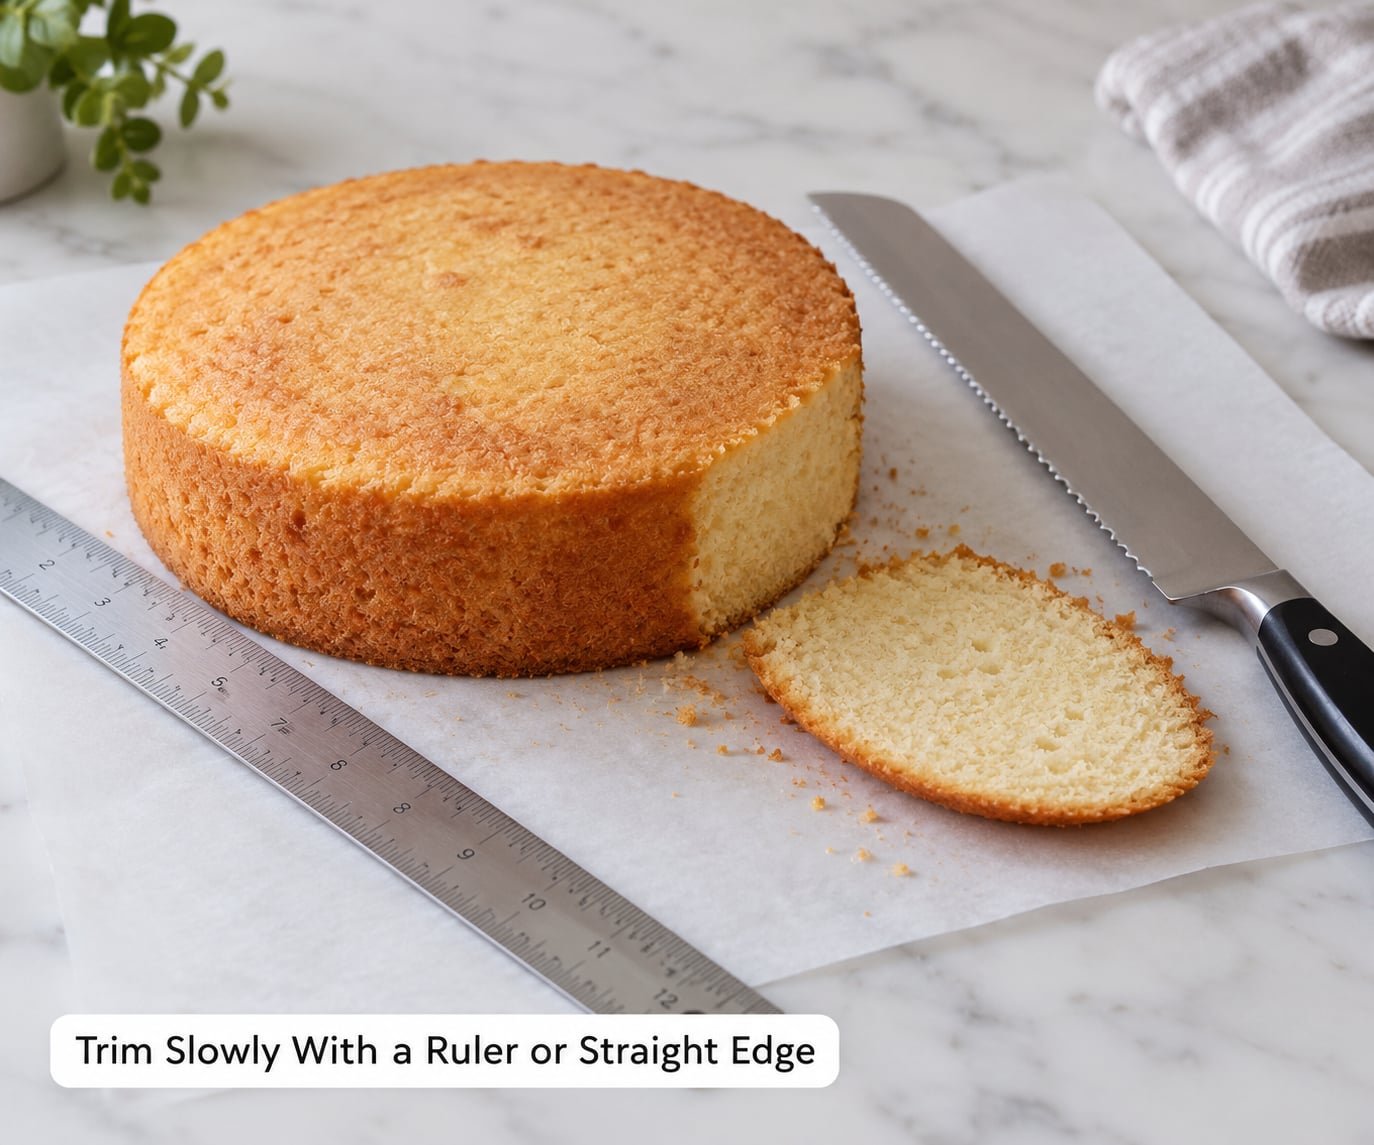
Hold the ruler upright against the side of the cake with one hand, blade against its edge with the other. Score a shallow cut about a quarter inch deep along the guide line, using a gentle sawing motion rather than pressing down.
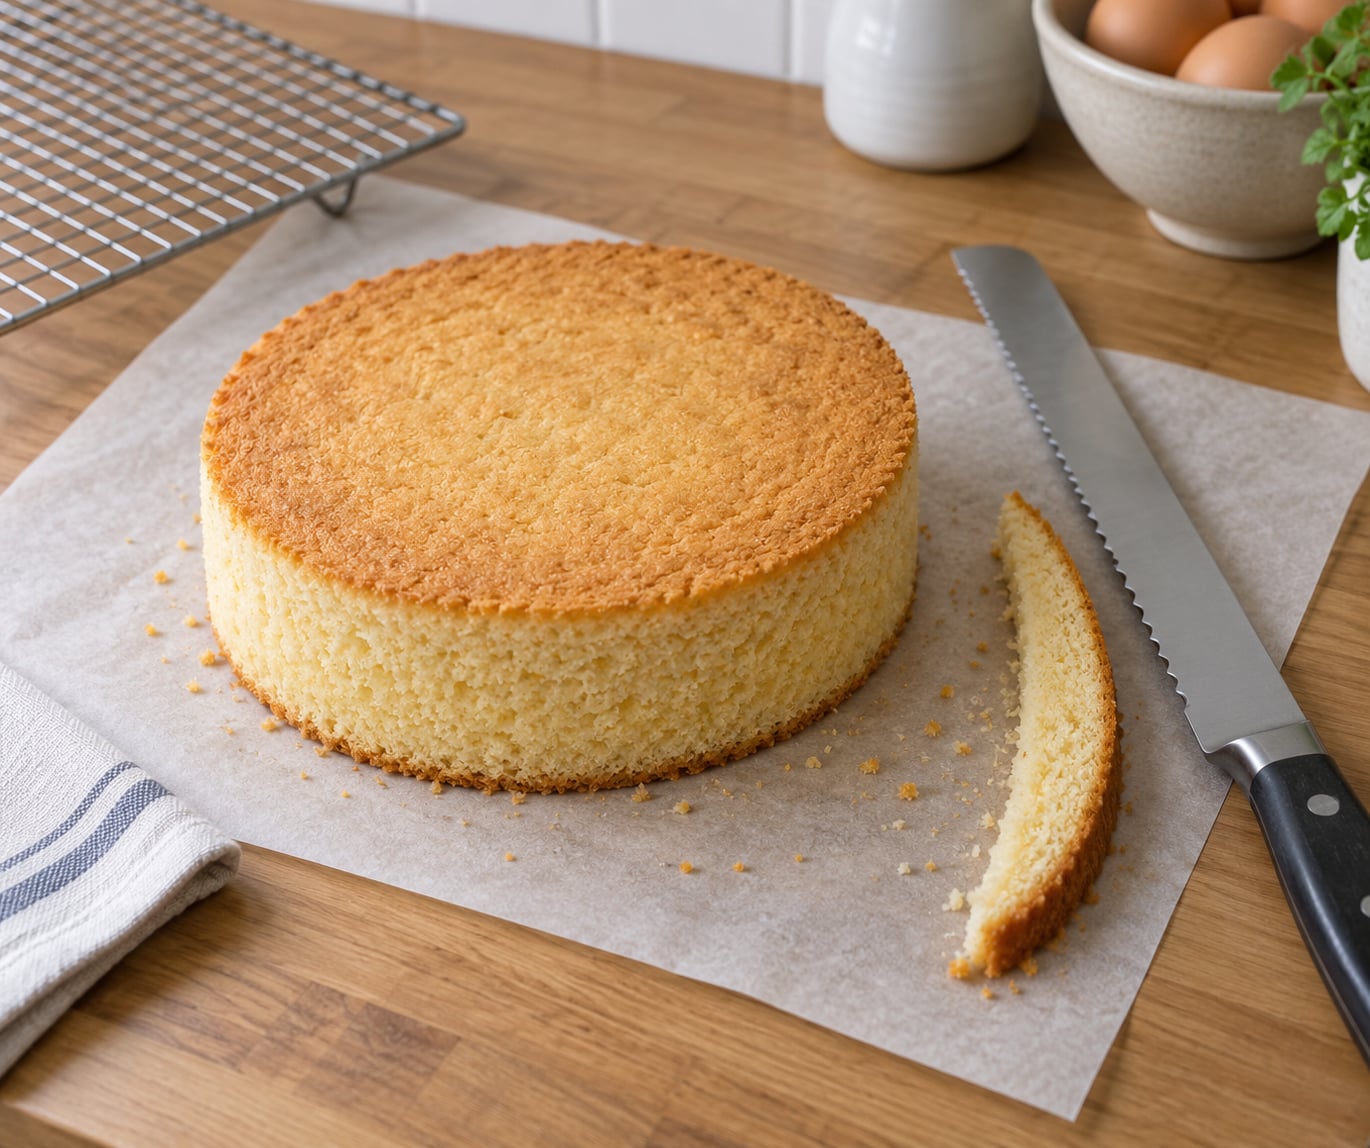
Turn the cake a few degrees, extend the incision a little further, and turn again. After two or three rotations a loose flap of dome separates and you can lift it away with one clean pass through the middle. Let the knife travel; pushing down squashes the layer and drags crumbs into the sides.
Wipe the blade every few cuts with a dry cloth. A knife loaded with crumbs stops cutting cleanly and starts tearing, which is the single most common reason a trimmed top comes out ragged.
Check Levelness From Several Angles
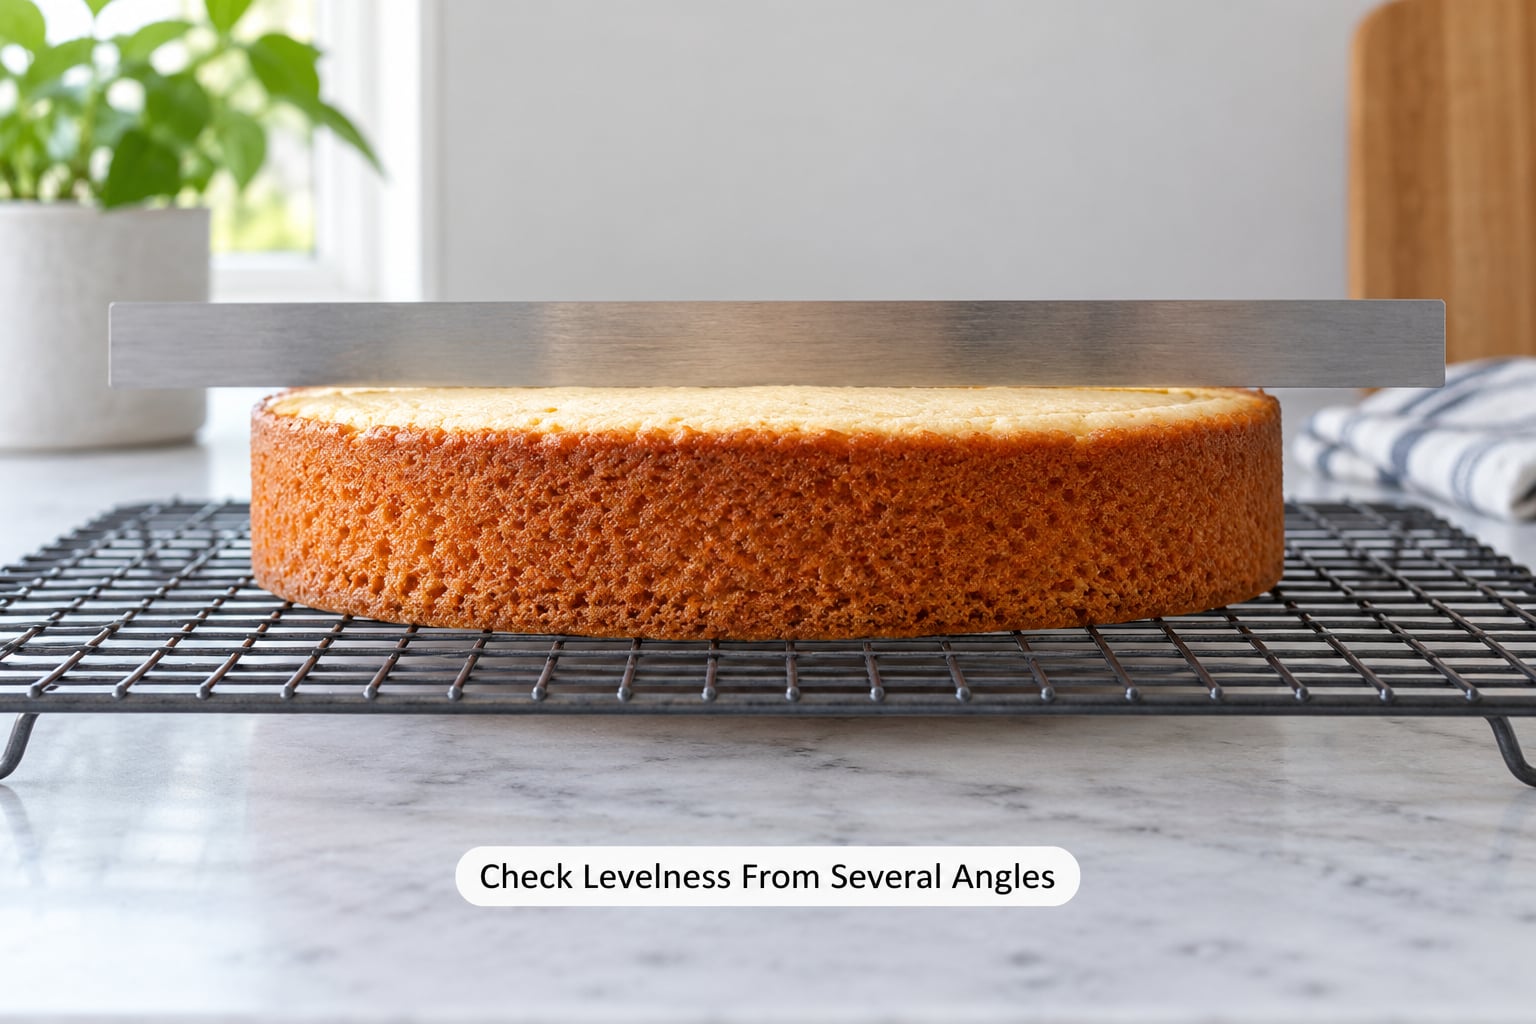
Rest the ruler across the top of the cake and look at it from the side. A gap under one end means you have more to take off that side. A spirit level on top of the ruler works the same way and gives you a second opinion.
Then crouch to eye level and sight across the surface, moving a few inches left and right. Most beginners find a small high spot on the far edge that looked flat from above. Take one more shallow pass there and check again.
Once the ruler touches the surface along its whole length, the layer is level. If you want an exact read with no eye involved, drop a spirit level straight onto the top face.
Handle and Store the Finished Layers
Slide a wide flat spatula or another board under the layer and move it in one piece. Lifting from the edge with your fingers will compress the crumb and give you a dent you can see through the frosting.
Keep trimmed layers on parchment so you can stack them without them bonding, and cover them. A cake left uncovered for an hour loses noticeably more moisture, and the exposed cut face dries faster than the crust did.
Wrap and refrigerate if you are not frosting the same day. Most unfrosted layers keep well at room temperature for a day or two in a cool kitchen; refrigerate anything with perishable filling or whipped frosting, and let the layers come back toward room temperature before you frost so the buttercream spreads easily.
Common Mistakes and How to Fix Them
- Cutting too much off in one pass. Stop rotating after a shallow score and look at what came away. It should be a thin cap, not a slab.
- Tearing the crumb. Usually a warm cake or a dull blade. Chill it properly and use a serrated edge, which is far less likely to drag than a straight chef’s knife.
- An uneven surface at the end. You probably cut from above rather than from the side. Get eye level with the cake on every pass.
- Trimming a warm cake. No fix after the fact. The crumb is already torn; frost over it and accept the texture, or cut horizontally in thin layers instead.
- Losing stability while rotating. Use a board under the cake and rotate the board, not the cake. Your non-cutting hand should always be on the board.
- Dragging crumbs into the frosting. Brush the trimmed face with a pastry brush or blow gently with a straw to clear loose crumbs before filling.
Troubleshooting Uneven or Delicate Cake Layers
A stubborn dome that resists one pass usually has two high zones on opposite sides. Score shallower, rotate more often, and take two thin passes instead of one thick one.
A fragile, crumbly top means the cake needs more chill time or the knife needs more angle. If the top tears no matter what, skip trimming and cut the cake horizontally into thinner layers with the dome distributed between them, then stack the thicker sections alternately so the cake stands even.
A split or cracked layer is usually a bake problem rather than a cutting one. A deep crack across the top often comes from an oven running hot, so trim the crack away if it sits high, or place the cracked face outward against the filling where it disappears.
Very soft cakes that compress under the blade should not be cut at all until they are properly set. Two hours in the fridge does more than an hour at room temperature for a cake that came out of the oven soft in the middle.
Sheet cakes and square 8×8 layers follow the same routine, but a wire leveler is nearly useless across a wide surface. Mark the low corner, then use the ruler as a straightedge along two perpendicular lines and shave the high edge down to meet them.
Tips for Clean, Even Layers Every Time
Prepare the pan properly. Grease the sides generously and line the bottom, because a cake that releases cleanly unmolds without tearing a rim you would otherwise have to trim.
Bake even layers from even batter. Weigh the batter, level each pan with a spoon, and tap the pan twice on the counter to release large bubbles. Doming starts before the cake ever reaches the knife.
Mark more than one point. Three toothpicks spaced evenly around the edge give you a line instead of a guess, and a marker tick on the side of the cake is faster than measuring each rotation.
Use the sharpest knife you own and hone it if you can. This is the whole job of the tool, so it deserves the attention.
Do not throw away the trimmed tops. Slice them thin, toast them and butter them, or turn them into a tasting plate for whatever filling you are testing.
Chill the layer again if you trim, wait, then fill. The surface firms back up and the filling sits on a stable base instead of sinking into a soft crumb.
Frequently Asked Questions
Can I level a cake without a cake leveler?
Yes, and most home bakers never buy one. A long serrated knife with a 9 to 10 inch blade is enough on its own: score a shallow line at the lowest point of the dome, rotate the cake in small increments while sawing, then lift the loosened cap away in one pass. A ruler laid across the top tells you when you are done.
What can I use instead of a cake leveler?
Any of these work: a long serrated or bread knife, unflavored dental floss pulled taut across the top, toothpicks inserted around the edge as height markers, a ruler or spirit level to verify the cut, and a bench scraper to straighten a rough surface. The knife is the real tool; the rest make the result more accurate.
How do I level a domed cake layer?
Cool the cake fully, then chill it 20 to 30 minutes so the crumb firms. Look from eye level to find the lowest point of the dome and mark it with a toothpick. Score about a quarter inch deep at that height, rotate the cake a few degrees at a time while sawing gently, and let the knife travel rather than pressing down.
Why is my cake layer tearing when I trim it?
Three usual causes: the cake was still warm, the knife was dull, or the blade dragged instead of sawing. Chill the layer for 30 minutes and use a serrated edge with a light back-and-forth motion. Wipe the blade every few cuts so crumbs do not build up and catch. If the crumb is very fragile, chill for two hours instead.
Should I level a cake before or after frosting it?
Always level before you frost. Once frosting is on, the dome is hidden but still there, and the cake will still lean when you cut into it. Trim the layer, brush off loose crumbs, apply a thin crumb coat so the surface is sealed, chill briefly, and only then add the final frosting layer.
How do I keep trimmed cake layers from drying out?
Move quickly and cover what you are not using. Trimmed layers should sit on parchment, out of direct airflow and away from the oven, wrapped in plastic wrap or a cake dome. If you are pausing more than an hour, refrigerate them. Fill and frost the same day whenever you can, since the exposed cut face loses moisture faster than the crust did.
Conclusion
Start with the three moves that matter most: cool the cake completely, chill it 20 to 30 minutes, and mark the lowest point of the dome before the blade ever touches it. Then rotate the cake while you saw shallow passes, check with a ruler at eye level, and take one more pass wherever a gap shows. Level every layer before any frosting goes on, and the stack will sit straight without a single piece of equipment.